User Manual Invacare SOLO2™ Transportable Oxygen Concentrator Dealer: This manual MUST be given to the end user. User: BEFORE using this product, read this manual and save for future reference. For more information regarding Invacare products, parts, and services, please visit www.invacare.
WARNING DO NOT USE THIS PRODUCT OR ANY AVAILABLE OPTIONAL EQUIPMENT WITHOUT FIRST COMPLETELY READING AND UNDERSTANDING THESE INSTRUCTIONS AND ANY ADDITIONAL INSTRUCTIONAL MATERIAL SUCH AS USER MANUALS, SERVICE MANUALS OR INSTRUCTION SHEETS SUPPLIED WITH THIS PRODUCT OR OPTIONAL EQUIPMENT. IF YOU ARE UNABLE TO UNDERSTAND THE WARNINGS, CAUTIONS OR INSTRUCTIONS, CONTACT A HEALTHCARE PROFESSIONAL, DEALER OR TECHNICAL PERSONNEL BEFORE ATTEMPTING TO USE THIS EQUIPMENT OTHERWISE, INJURY OR DAMAGE MAY OCCUR.
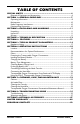
TABLE OF CONTENTS SPECIAL NOTES ....................................................................... 4 Disposal of Equipment and Accessories ............................................................................... 6 SECTION 1—GENERAL GUIDELINES ............................................. 7 Operating Information .............................................................................................................. 8 Maintenance..............................................................
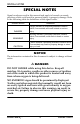
SPECIAL NOTES SPECIAL NOTES Signal words are used in this manual and apply to hazards or unsafe practices which could result in personal injury or property damage. Refer to the following table for definitions of the signal words. SIGNAL WORD DANGER MEANING Danger indicates an imminently hazardous situation which, if not avoided, will result in death or serious injury. WARNING Warning indicates a potentially hazardous situation which, if not avoided, could result in death or serious injury.
SPECIAL NOTES CAUTION Within the US: “Caution: Federal law restricts this device to sale or rental by or on order of a physician, or any other practitioner licensed by the law of the State in which he/she practices to use or order the use of this device.” The use of oxygen therapy in certain circumstances can be hazardous and seeking medical advice before using this device is advisable.
SPECIAL NOTES Disposal of Equipment and Accessories This product has been supplied from an environmentally aware manufacturer that complies with the Waste Electrical and Electronic Equipment (WEEE) Directive 2002/96/CE. This product may contain substances that could be harmful to the environment if disposed of in places (landfills) that are not appropriate according to legislation.
SECTION 1—GENERAL GUIDELINES SECTION 1—GENERAL GUIDELINES In order to ensure the safe installation, assembly and operation of the transportable oxygen concentrator these instructions MUST be followed. WARNING This section contains important information for the safe operation and use of this product. DANGER Risk of electric shock. DO NOT disassemble. Refer servicing to qualified service personnel. No user serviceable parts.
SECTION 1—GENERAL GUIDELINES DANGER Avoid creation of any spark near medical oxygen equipment. This includes sparks from static electricity created by any type of friction. DO NOT move or relocate concentrator by pulling on the cord. A product should NEVER be left unattended when plugged in. Make sure the transportable oxygen concentrator is Off when not in use. Outdoor use of the transportable oxygen concentrator MUST be conducted with battery power only.
SECTION 1—GENERAL GUIDELINES The transportable oxygen concentrator is designed only to be used with a humidifier while using continuous flow mode. Use of this device with a humidifier in pulse flow mode may impair performance and/or damage the equipment. When your automobile is turned Off, disconnect the car accessory power supply and remove the transportable oxygen concentrator from the automobile.
SECTION 1—GENERAL GUIDELINES Maintenance The transportable oxygen concentrator was specifically designed to minimize routine preventive maintenance. Only professionals of the healthcare field or persons fully conversant with this process such as factory trained personnel should perform preventive maintenance or performance adjustments on the oxygen concentrator. Radio Frequency Interference This equipment has been tested and found to comply with EMC limits specified by IEC/EN 60601‐1‐2.
SECTION 2—PACKAGING AND HANDLING SECTION 2—PACKAGING AND HANDLING Unpacking 1. Check for any obvious damage to the carton or its contents. If damage is evident, notify the carrier, or your local dealer. 2. Remove all loose packing from the carton. 3. Carefully remove all the components from the carton. The transportable oxygen concentrator packaging contains the following items (as shown below). If any parts are missing, please contact your equipment provider.
SECTION 3—TECHNICAL DESCRIPTION SECTION 3—TECHNICAL DESCRIPTION The Invacare transportable oxygen concentrator is to be used by patients with respiratory disorders who require supplemental oxygen. The device is not intended to sustain or support life. The oxygen concentration level of the output gas ranges from 87% to 95.6%. The oxygen is delivered to the patient through the use of a nasal cannula. The transportable oxygen concentrator provides two modes of operation; pulse flow and continuous flow.
SECTION 4—FEATURES SECTION 4— FEATURES Please review the figures below to familiarize yourself with the locations of the transportable oxygen concentrator features and controls. On/Off Button GREEN Indicator YELLOW Indicator RED Indicator LCD Display Carry Handle Increase Button Mode/Return/ Highlight Button External Power Input Connector Decrease Button Air Intake and Filter Oxygen Outlet Port and HEPA Filter NOTE: The battery pack is not shown.
SECTION 5—TYPICAL PRODUCT PARAMETERS SECTION 5—TYPICAL PRODUCT PARAMETERS Direct Current Type BF equipment Attention - Consider Accompanying Documents DO NOT smoke No open flame Class II, Double Insulation Power On/Off DO NOT dispose of in household waste Recycle DO NOT use oil or grease Keep dry in transport or storage IPX1 Protected against dripping water in upright position (AC and DC power input) IPX2 Protected against dripping water in upright and tilted positions (battery power only) NO AP/A
SECTION 5—TYPICAL PRODUCT PARAMETERS POWER INPUT: EXTERNAL POWER SUPPLY INPUT: AC POWER SUPPLY: 24 VDC @ 7.5 Amp or 11-16 VDC @ 10.0 Amp max (12.6 VDC Nom.) 120 VAC, 50/60 Hz @ 2.5 amps 230 VAC, 50/60 Hz @ 1.25 amps DC POWER SUPPLY: 11-16 VDC, (12.6 VDC Nom. @ 10.0 Amp max) SOUND LEVEL: < 40 dBA weighted @ 2 LPM continuous and all pulse settings (1-5) ALTITUDE: Up to 10,000 ft (3046 m) above sea level Titration recommended for use above 10,000 ft (3046 m) OXYGEN CONCENTRATION:* 87% to 95.
SECTION 5—TYPICAL PRODUCT PARAMETERS MAXIMUM RECOMMENDED FLOWRATE WITH 7KPA (1.01 PSI) BACKPRESSURE: 3.0 LPM PRESSURE RELIEF ACTIVATION: 20 psi ± 5 psi (137.8 kPa ± 34.5 kPa) MAX OUTLET PRESSURE @ 3.0 LPM CONTINUOUS: 12.0 psig DIMENSIONS: (WITHOUT CART) 16.5 in high x 11 in wide x 8 in deep (41.9 cm high x 27.9 cm wide x 20.3 cm deep) WEIGHT: (UNIT WITHOUT CART) < 20 lbs (9.09 kg) BATTERY DURATION: (TIMES ARE APPROXIMATE) Pulse Mode Continuous Mode Setting 1 = 4.5 hrs Setting 0.5 LPM = 4.
SECTION 5—TYPICAL PRODUCT PARAMETERS EXTENDED TEMPERATURE RANGE: (USING BATTERY) OPERATING TEMPERATURE: 95°F to 104° (35°C to 40°C) Pulse Mode Continuous Mode Settings 1, 2 and 3 = unlimited use 0.5 thru 1.5 LPM = unlimited use Setting 4 = 45 minutes 2.0 thru 2.5 LPM = 45 minutes Setting 5 = 30 minutes 3.0 LPM = 30 minutes Regulatory Listing ETL certified complying with: EN 55011: 1998 CISPR 11: 2003 IEC 60601-1: 2005 IEC 60601-1-2: 2.1 Ed.
SECTION 6—OPERATING INSTRUCTIONS SECTION 6—OPERATING INSTRUCTIONS Location WARNING NEVER block the air opening of the product or place it on a soft surface, such as a bed or couch, where the air opening may be blocked. Keep the openings free from lint, hair and the like. Keep unit at least 3 in (7.6 cm) away from walls, draperies, furniture, and the like. Locate and position the transportable oxygen concentrator in a well ventilated space so that the air intake and the air exhausts are not obstructed.
SECTION 6—OPERATING INSTRUCTIONS Powering the Transportable Oxygen Concentrator WARNING Use only Invacare specified power supplies with the transportable oxygen concentrator. Use of other non approved power supplies with the transportable oxygen concentrator can cause damage and/or injury and will void the warranty. When using the DC Power Cable to either operate or charge the transportable oxygen concentrator, the car/boat/motor home engine should be operating.
SECTION 6—OPERATING INSTRUCTIONS 2. To operate from external power (AC or DC) please follow the steps below: A. Turn off the transportable oxygen concentrator. B. Connect the external power supply (DC power cable or AC power adapter) to the transportable oxygen concentrator. C. Perform one of the following: • Plug the other end of the AC power adapter into a wall outlet. • Plug the other end of the DC power cable into the auto accessory outlet and start the engine. D.
SECTION 6—OPERATING INSTRUCTIONS Installing the Battery Module NOTE: For this procedure, refer to FIGURE 6.1 on page 20. 1. Raise unit handle to upright position. 2. With battery pack label facing toward the transportable oxygen concentrator, slowly lower battery module straight down into battery recess located on back side of the transportable oxygen concentrator. 3.
SECTION 6—OPERATING INSTRUCTIONS Checking Battery Charge Level The installed battery charge level can be checked as follows without operating the unit: • When using battery or the DC power cable, momentarily press the On/Off button. The Standby screen will display for a short period of time. • When using the AC power adapter the Standby screen is displayed. When the unit is operating, the Standby screen is periodically displayed.
SECTION 6—OPERATING INSTRUCTIONS Connecting/Positioning the Nasal Cannula CAUTION To ensure proper breath detection and oxygen delivery, Invacare recommends using a 7 ft (2.1 m) cannula. Tubing length not exceeding 25 ft (7.6 m) can be used with continuous flow. NOTE: For this procedure, refer to FIGURE 6.2. NOTE: The tubing/cannula must be connected to the transportable oxygen concentrator oxygen outlet as shown below. NOTE: Replace the nasal cannula on a regular basis.
SECTION 6—OPERATING INSTRUCTIONS Connecting the Humidifier (if so prescribed and only with Continuous Flow Mode) WARNING DO NOT use a humidifier while in Pulse Mode. DO NOT overfill humidifier. DO NOT reverse the oxygen input and output connections. Water from the humidifier bottle will travel through the cannula back to the patient. NOTE: For this procedure, refer to FIGURE 6.3 and FIGURE 6.4 on page 25. NOTE: Connect the humidifier only if prescribed. Use the humidifier only in Continuous Flow Mode.
SECTION 6—OPERATING INSTRUCTIONS DETAIL “A” Humidifier Bottle Adapter Humidifier Bottle DETAIL “B” To Oxygen Outlet Connector (Not Shown) Humidifier Bottle Adapter Humidifier Bottle Patient Cannula FIGURE 6.4 Humidifier Attachment Transportable Oxygen Concentrator Front Panel and LCD Display NOTE: For this procedure, refer to FIGURE 6.9 on page 30. The front panel consists of LED indicators (red, yellow and green), control/adjustment buttons and a LCD display.
SECTION 6—OPERATING INSTRUCTIONS Breath Detect Indication (Pulse Mode Only) The GREEN indicator light will blink off each time an inhalation is detected and the transportable oxygen concentrator outputs a measured pulse of oxygen. Audible Alarm The transportable oxygen concentrator is equipped with an audible alarm. The audible alarm will activated in conjunction with Indicators and LCD Display to annunciate Alarms and Warnings.
SECTION 6—OPERATING INSTRUCTIONS LCD Displays NOTE: For this procedure, refer to FIGURE 6.9 on page 30. There are four different “Display” screens and two “Adjustment” screens available through the LCD display that, along with the Warning and Alarm screens, provide full control and information to the user. Standby Screen When the external AC power supply is attached and providing power, the unit will show the Standby screen.
SECTION 6—OPERATING INSTRUCTIONS Mode & Flow Adjustment Screen This screen allows the user to change the current mode of operation and output flow. To access this screen, when the transportable oxygen concentrator is operating and either the Normal Operating screen or the Standby screens are shown, press and hold the Mode/Return/Highlight button, Up/Increase, or Down/Decrease button for approximately 2 seconds (screen should change to Mode & Flow Adjust).
SECTION 6—OPERATING INSTRUCTIONS Warning & Alarm Screens On occasion, even when operating normally, the internal monitoring of the transportable oxygen concentrator will need to provide a warning, or alarm, message to the user. These messages are usually shown in conjunction with the audible alarm and Indicator LEDs. Samples of both the Warning and the Alarm screens are shown below. Typical Warning Screen Typical Alarm Screen FIGURE 6.
SECTION 6—OPERATING INSTRUCTIONS DETAIL “A” FRONT PANEL YELLOW RED Indicator GREEN Indicator Indicator On/Off Button LCD Display Mode/ Return/ Highlight Button ICON ## % Increase Button Decrease Button DETAIL “B” - LCD DISPLAY ICONS NAME DESCRIPTION Attention The ATTENTION icon is displayed during a warning or alarm screen. It signifies that it requires your attention and reference to this manual is required. Audible Alarm The AUDIBLE ALARM is displayed during a warning or alarm screen.
SECTION 6—OPERATING INSTRUCTIONS Using the SOLO2 Transportable Oxygen Concentrator 1. Turn the transportable oxygen concentrator On by pressing the On/Off button for approximately 2‐3 seconds. 2. Breathe normally through your nose. Breathing through your mouth may result in less effective oxygen therapy. NOTE: In pulse dose mode, the transportable oxygen concentrator will put out a measured pulse of oxygen each time it detects a breath. 3.
SECTION 7—CLEANING, CARE, AND MAINTENANCE SECTION 7—CLEANING, CARE, AND MAINTENANCE WARNING Turn Off the transportable oxygen concentrator and unplug the power cord before cleaning. DO NOT allow any cleaning agent to drip inside the air inlet and outlet openings, or the battery pack. DO NOT spray or apply any cleaning agent directly to the cabinet.
SECTION 7—CLEANING, CARE, AND MAINTENANCE 5. Thoroughly dry the filter and inspect for fraying, crumbling, tears and holes. Replace filter if damage is found. 6. Reinstall the air intake filter and snap the filter cover back in place. NOTE: Use only Invacare part number 1156863 as the air intake filter for your transportable oxygen concentrator. Filter Cover Tab Filter Cover Filter Cover Filter Filter Cover Tab FIGURE 7.
Invacare SOLO2™ 34 Serial No. *NOTE: Refer to Preventive Maintenance section of Service Manual. NOTE: 2,160 hours are equivalent to usage 24 hours per day, for 90 days. 4,380 hours are equivalent to usage 24 hours per day, 7 days per week, for 6 months. 26,280 hours are equivalent to usage 24 hours per day, 7 days per week, for 3 years.
SECTION 8—TROUBLESHOOTING GUIDE SECTION 8—TROUBLESHOOTING GUIDE NOTE: In all cases, if the situation continues, change to another source of oxygen and contact your equipment provider. Troubleshooting TRANSPORTABLE OXYGEN CONCENTRATOR DOES NOT TURN ON, OR DOES NOT STAY ON SYMPTOM Concentrator does not operate when On/Off button pressed PROBABLE CAUSE On/Off button was not held down long enough.
SECTION 8—TROUBLESHOOTING GUIDE NO CHARGING SYMBOL SHOWN ON STANDBY SCREEN SYMPTOM With the unit turned Off and AC or DC power plugged into the unit, no charging icon is displayed. PROBABLE CAUSE SOLUTION Power source is no good, or there is a loose connection. Try another power outlet and check connections to unit. Battery is outside the allowed temperature range for charging. Allow unit to cool down to less than 95° F (35° C), or warm up to 50° F (10° C). Battery module is not fully seated.
SECTION 8—TROUBLESHOOTING GUIDE Warnings and Alarms NOTE: In all cases, pressing and holding the On/Off button for 2‐3 seconds will turn off and reset the unit. LCD DISPLAY: INDICATORS: Triple audible beep every 10 sec YELLOW indicator Flashing. DESCRIPTION: SOLUTIONS: 1. Verify the cannula is connected, not kinked, properly positioned and you are Transportable oxygen concentrator has not detected a breath for a predetermined breathing through your nose. time period.
SECTION 8—TROUBLESHOOTING GUIDE LCD DISPLAY: INDICATORS: Double audible beep every 15 sec YELLOW indicator On. DESCRIPTION: SOLUTIONS: Remaining battery capacity has fallen to 25%. Battery requires charging. 1. Connect transportable oxygen concentrator to either the AC or DC power, or use an alternate charged battery module. Battery gauge is empty ACKNOWLEDGEMENT REQUIRED: Press Return / Highlight button. Display will either show additional warnings / alarms or revert to normal operating screens.
SECTION 8—TROUBLESHOOTING GUIDE LCD DISPLAY: INDICATORS: Triple audible beep every 10 sec YELLOW indicator Flashing DESCRIPTION: SOLUTIONS: (Only possible with Continuous Flow 1. Verify the cannula is not kinked. Mode) 2. Replace outlet filter, if necessary. Output flow is more than 0.3 LPM below 3. Turn unit Off. Wait one minute, then the flow setting. retry. ACKNOWLEDGEMENT REQUIRED: Press Return / Highlight button.
SECTION 8—TROUBLESHOOTING GUIDE LCD DISPLAY: INDICATORS: Single audible beep every 15 sec YELLOW indicator On. DESCRIPTION: SOLUTIONS: (Only possible when External Power is applied) 1. Move unit to warmer, or cooler, surroundings. Allow unit to cool down to less than 95° F (35° C), or warm up to 50° F (10° C). Use AC or DC power. Battery is too hot, or cold, to allow for the 2. Remove battery and only use AC or DC battery to charge. power. 3. Turn unit Off, then On again to retry.
SECTION 8—TROUBLESHOOTING GUIDE LCD DISPLAY: INDICATORS: Continuous audible beep every half second RED indicator On. GREEN indicator is Off. DESCRIPTION: SOLUTIONS: 1. With the unit turned Off, press each control button looking for a stuck button. 2. Turn On the unit while ensuring that you are not continuing to hold the Power On/Off button once the indicator lights and LCD begin to illuminate. A stuck button is being detected upon power up. 3. ONLY press the On/Off button during startup.
SECTION 8—TROUBLESHOOTING GUIDE LCD DISPLAY: INDICATORS: Ten audible beeps every 10 sec RED indicator Flashing Fast. DESCRIPTION: SOLUTIONS: 1. Connect transportable oxygen concentrator to either AC or DC power, Remaining battery capacity has been or use an alternate charged battery completely used. Battery requires charging. module. Unit is turning off! 2. If no other power source is available, Change to another source of oxygen. ACKNOWLEDGEMENT REQUIRED: None required.
SECTION 8—TROUBLESHOOTING GUIDE LCD DISPLAY: INDICATORS: Continuous audible beep every half second. RED indicator is On. GREEN indicator is Off. DESCRIPTION: SOLUTIONS: 1. Turn unit Off, then On again to retry. Abnormal operating condition has been detected 2. Change to another source of oxygen if alarm continues. ACKNOWLEDGEMENT REQUIRED: Press and hold the On/Off button to power down the unit and restart. Call your provider and report the problem if alarm continues.
SECTION 8—TROUBLESHOOTING GUIDE LCD DISPLAY: INDICATORS: Continuous audible beep every half second. RED indicator is On. GREEN indicator is Off. DESCRIPTION: SOLUTIONS: 1.Verify unit is in recommended environmental temperature. Refer to Typical Product Parameters on page 14. 2. Clean intake filter and ensure both intake and exhaust are not blocked The oxygen output purity has fallen to a value below 73% (± 1%). 3. Turn unit Off, then On again to retry. 4.
SECTION 8—TROUBLESHOOTING GUIDE LCD DISPLAY: INDICATORS: Continuous audible beep every half second. RED indicator is On. GREEN indicator is Off. DESCRIPTION: SOLUTIONS: 1. Turn unit Off, then On again to retry. Abnormal compressor operation has been 2. Change to another source of oxygen if detected. alarm continues. ACKNOWLEDGEMENT REQUIRED: Press and hold the On/Off button to power down the unit and restart. Call your provider and report the problem if alarm continues.
SECTION 8—TROUBLESHOOTING GUIDE LCD DISPLAY: INDICATORS: Continuous audible beep every half second. RED indicator is On. GREEN indicator is Off. DESCRIPTION: SOLUTIONS: 1. Make sure that car (boat or motor home, etc.) is running. External DC Power is too low to allow continued operation. 2. Make sure DC Power Cable is firmly connected at both ends. Excessive current draw present. 3. Switch to external AC or battery power. 4. Change to another source of oxygen if no other power source is available.
SECTION 9—OPTIONAL ACCESSORIES SECTION 9—OPTIONAL ACCESSORIES The following optional accessories and replacement parts (as shown below) are also available: • Transportable Oxygen Concentrator without Battery Module, model number TPO100 • Transportable Oxygen Concentrator with Battery Module, model number TPO100B • Battery Module, model number TPO110 • Wheeled cart with handle, model number TPO120 • Air intake filter, part number 1156863 • AC power adapter, power cord style: • N.
LIMITED WARRANTY LIMITED WARRANTY NOTE: THE WARRANTY BELOW HAS BEEN DRAFTED TO COMPLY WITH FEDERAL LAW APPLICABLE TO PRODUCTS MANUFACTURED AFTER JULY 4, 1975. This warranty is extended only to the original purchaser who purchases this product when new and unused from Invacare Corporation or a dealer. This warranty is not extended to any other person or entity and it is not transferable or assignable to any subsequent purchaser or owner.
LIMITED WARRANTY THE FOREGOING EXPRESS WARRANTY IS EXCLUSIVE AND IN LIEU OF ANY OTHER WARRANTIES WHATSOEVER, WHETHER EXPRESS OR IMPLIED, INCLUDING THE IMPLIED WARRANTIES OF MERCHANTABILITY AND FITNESS FOR A PARTICULAR PURPOSE, AND THE SOLE REMEDY FOR VIOLATIONS OF ANY WARRANTY WHATSOEVER, SHALL BE LIMITED TO REPAIR OR REPLACEMENT OF THE DEFECTIVE PRODUCT PURSUANT TO THE TERMS CONTAINED HEREIN.