
User manual


Table Of Contents
- Introduction
- Using Qwest DSL
- Performing a Basic Setup
- Setting Up Static IP Address
- Configuring Advanced Settings
- Accessing Advanced Settings
- WAN IP Address
- Wireless Settings
- Wireless MAC Authentication
- Wireless Advanced Settings
- DHCP Server
- Services Blocking
- Website Blocking
- Remote Management/Telnet
- Port Forwarding
- DMZ Hosting
- Firewall
- Dynamic Routing
- NAT (Network Address Translation)
- Static Routing
- IP QoS Setting
- Telnet Timeout Setting
- LAN IP Address
- Viewing the Modem’s Status
- Using Utilities
- Troubleshooting
- Reference
- Static IP Address on the Computer
- Computer Security
- Specifications
- Glossary
- Firewall Security Level Services
- Alternative System Setup
- Additional Technical Support Options
- Notices
- Limited Warranty
4
Actiontec DSL Modem User Manual
5
Chapter 1 Introduction
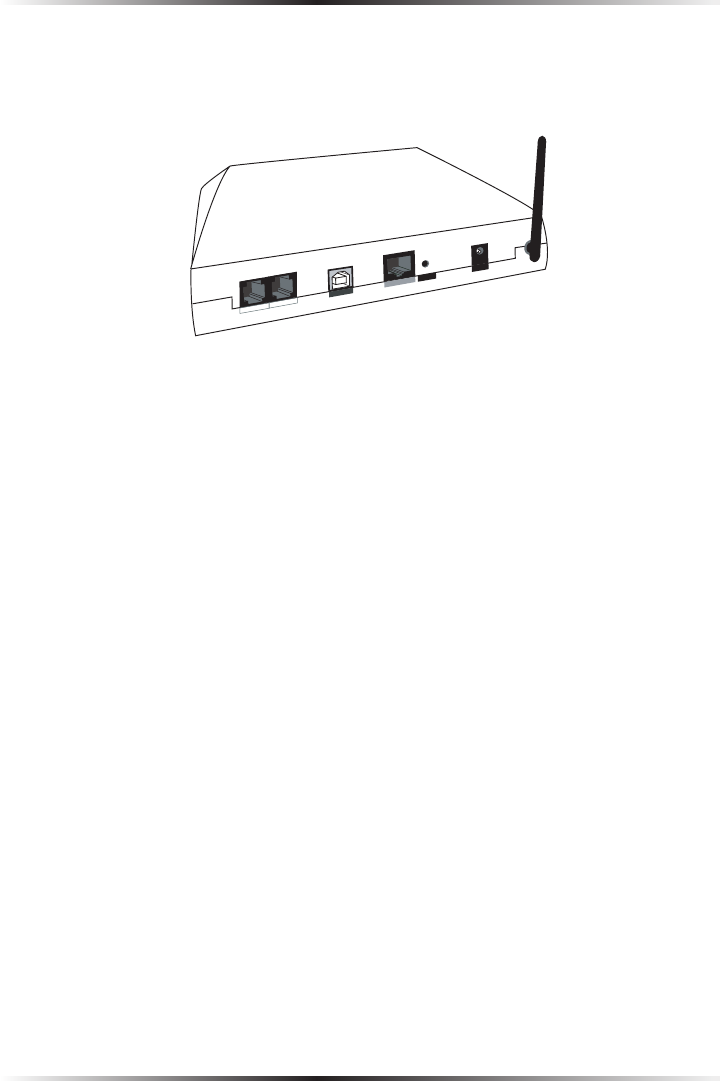
Rear Panel
The rear panel of the Modem contains five ports (Line, Phone, USB, Ethernet, and
Power), as well as a Reset switch.
Power
USB
Ethernet
Line
Reset
Phone
Line Port
Used to connect the Modem to a DSL (Digital Subscriber Line) connection.
Phone Port
Used to connect a telephone to the Modem.
USB Port
Used to connect a computer to the Modem via USB cable.
Ethernet Port
Used to connect computers to the Modem via Ethernet cable. The Ethernet port
is a 10/100 Mbps port; a straight-through Ethernet cable must be used when
connecting to the port.
Reset Switch
Depressing the Reset Switch for one or two seconds will power cycle (similar
to unplugging and then plugging in the Modem’s power cord) the Modem. To
restore the Modem’s factory default settings, depress and hold the Reset Switch
for approximately 10 seconds. The reset process will start about 10 seconds after
releasing the Reset Switch, or until the Power light glows amber.