
User manual


Table Of Contents
- Introduction
- Using Qwest DSL
- Performing a Basic Setup
- Setting Up Static IP Address
- Configuring Advanced Settings
- Accessing Advanced Settings
- WAN IP Address
- Wireless Settings
- Wireless MAC Authentication
- Wireless Advanced Settings
- DHCP Server
- Services Blocking
- Website Blocking
- Remote Management/Telnet
- Port Forwarding
- DMZ Hosting
- Firewall
- Dynamic Routing
- NAT (Network Address Translation)
- Static Routing
- IP QoS Setting
- Telnet Timeout Setting
- LAN IP Address
- Viewing the Modem’s Status
- Using Utilities
- Troubleshooting
- Reference
- Static IP Address on the Computer
- Computer Security
- Specifications
- Glossary
- Firewall Security Level Services
- Alternative System Setup
- Additional Technical Support Options
- Notices
- Limited Warranty
22
Actiontec DSL Modem User Manual
23
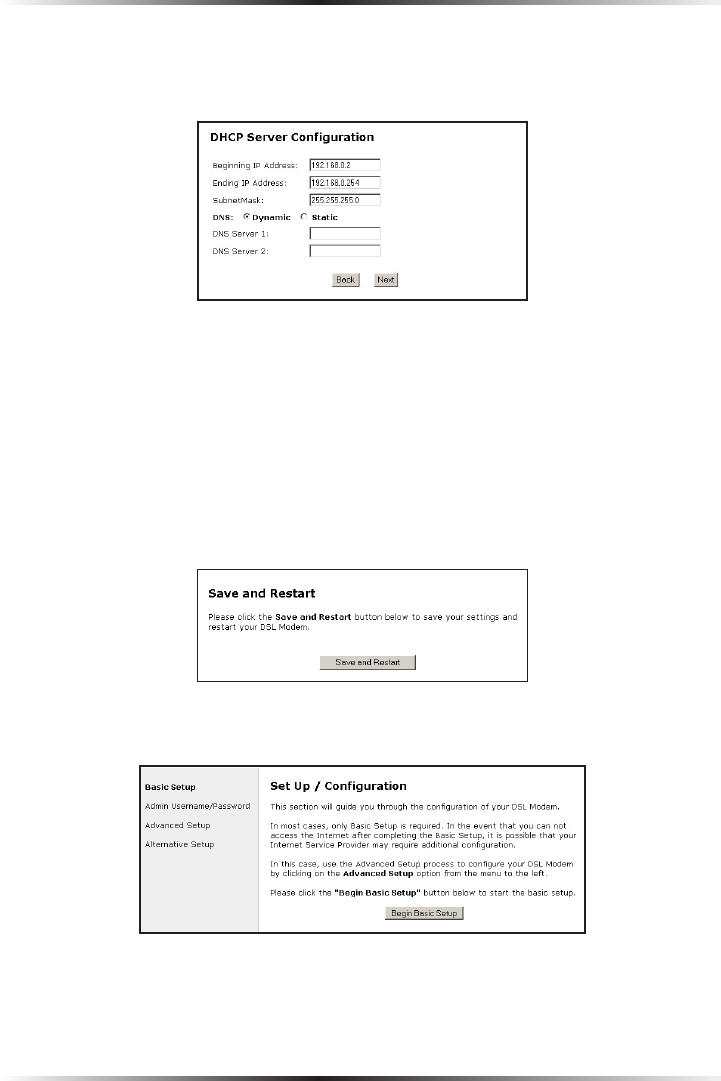
Chapter 4 Setting Up Static IP
9. In the “DHCP Server Configuration” screen, select “Static” from the
“DNS” options near the center of the screen, then enter the DNS Server IP
addresses assigned by the ISP in the appropriate text boxes.
☞
Note: If the ISP did not provide static DNS addresses, leave the
DNS option at “Dynamic.” Also, if the DHCP server option
is turned off, this screen will not appear. The Modem will
obtain dynamically assigned DNS addresses if supported by
the ISP with static IP addresses.
10. Click “Save and Restart” from the menu on the left side.
11. The “Save and Restart” page appears. Click “Save and Restart” to save the set-
tings changed in the Actiontec DSL Modem Setup Page screen.
12. Once the Modem restarts, return to the Setup/Configuration screen and select
Change Admin Password from the menu on the left side.