3D Laser Mouse OWNER'S GUIDE Ver.1.0 Please DO NOT direct the laser beam at anyone’s eye.
Welcome Your mouse uses a new generation technology laser module that replaces the traditional LED mouse and provides amazing tracking ability. The laser module accurately scans the surface with 30 times more sensitivity of an LED optical mouse. It also uses digital radio technology and a has rechargeable receiver for your mouse’s batteries. Safety Notice 1. This product complies with IEC 60825-1, class 1 laser product. 2. Your product complies with FCC and CE rules. 3.
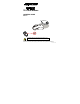
Functional Introduction: Lo w p ower LED OFF/ ON Switc h Cha nnel re se t b utto n Mo use whee l Ba ttery c o ver Pre vious / Ne xt p a g e Installing the Batteries Step 1 Pull up the battery cover of the mouse. Step 2 Insert the batteries as shown inside the battery compartment. Step 3 Replace the cover.
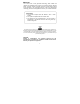
Install the Receiver and the Charger The receiver (charger) is connected to your computer via a cable. It needs to plug in your computer by a USB port or a mouse port. Connec t to the USB or Mo use p ort of your c om p uter For PS/2 port installation Please turn off your computer before plugging in the receiver cable to the computer’s mouse port. Plugging and unplugging cables to your computer’s mouse port while the computer is running can damage the mouse port or your computer.
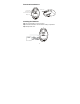
Note: This RF Mouse is a plug-and-play device. Normally, it’s not necessary to setup the RF Channel. But if some interference happens, then you must setup the connection RF Channel. Setup the connection RF Channel between the Mouse and the Receiver 1 2 Push the c ha nnel reset b utton on the m ouse. Push the c ha nnel reset b utton on the rec eiver If the c ursor d oe s NOT move a fte r 30 se - c onds, ple a se do the step s a b ove . GREEN LED FLASH (0.5 sec.
Recharging: RED LED FLASH Low p ower RED LED OFF Norm a l / No b a tte ries RED LED ON Re c ha rg ing RED LED OFF Finished c ha rg ing 5
Using your Mouse How to use the wheel Your mouse has a wheel that functions both as a wheel for Windows Scrolling and also as a customized button. It can be used as a standard mouse button, click (press down) the wheel. To Use the Middle Button, Directly Press down the Wheel. For scrolling across the screen, simply move the wheel. Utility The Mouse Utility provides you an easy way to customize the mouse operations. It will load into your system automatically after finishing the driver Installation.
Universal Scroll Provide the scrolling movement by mouse scroll button. Choose the “Universal Scroll “to adjust the horizontal and Vertical Movement speed by “Slow-Fast bar “on the window. Zoom It allows you to a certain pan area by input the numbers in “Zoomed Size “from 2 X 2 to 64 X 48. And, enlarge the content of the pan area by inputting the factor number from2 to 8 times to” Zoom Factor “. Application Switching Choose this function for easy-to-do application change by clicking scroll button.
Troubleshooting A. Mouse does not work upon installation. Try one or more of the following: y For optimal performance, adjust the placement of the receiver to find the best performance. y Make sure you have installed the batteries correctly. y Press the “Channel Reset” button on the receiver, and then press the “Channel Reset” button on the mouse. B. Mouse not detected. When using the mouse, it may not be detected by the computer or receiver.
D. Mouse does not work upon installation. Try one or more of the following: y Make sure you have installed the Driver correctly. y Make sure the receiver cable is plugged in the right mouse port or USB port. y Unplug the receiver and then plug in the receiver again. Make sure that it had been detected by the Operating Systems properly. y Make sure your mouse port has the proper configuration. Refer to your computer documentation for the correct port configuration.