
Operation Manual


Table Of Contents
- Table of Contents
- 1. Introducing Acronis® Snap Deploy®
- 1.1 Overview
- 1.2 What you can do with Acronis Snap Deploy 3
- 1.2.1 Take an image of the master system (Acronis Snap Deploy 2.0 functionality)
- 1.2.2 Manual deployment (Acronis Snap Deploy 2.0 functionality)
- 1.2.3 Scheduled deployment (new in v 3)
- 1.2.4 Event-driven deployment (new in v 3)
- 1.2.5 Command line and scripting under Win PE (new in v 3)
- 1.2.6 Standalone deployment (new in v 3)
- 1.2.7 Custom Deployment (User-initiated deployment) (new in v 3)
- 1.2.8 Deployment of a disk partition or MBR (new in v 3)
- 1.2.9 Selective deployment (MAC filtering) (new in v 3)
- 1.2.10 Password protection (new in v 3)
- 1.2.11 Manage a remote computer (Acronis Snap Deploy 2.0 functionality)
- 1.3 What else is new in v 3?
- 1.4 Supported operating systems
- 1.5 License policy
- 1.6 Upgrade to v 3
- 1.7 Technical support
- 2. Understanding Acronis Snap Deploy
- 3. Installation
- 3.1 System requirements
- 3.2 Used ports and IP addresses
- 3.3 General rules of installation
- 3.4 Installation of Acronis Snap Deploy Management Console
- 3.5 Installation of Acronis License Server
- 3.6 Installation of Acronis OS Deploy Server
- 3.7 Installation and setup of Acronis PXE Server
- 3.8 Installation of Acronis WOL Proxy
- 3.9 Installation of Acronis Snap Deploy Management Agent
- 3.10 Installation of Acronis Universal Deploy
- 3.11 Extracting the Acronis Snap Deploy components
- 3.12 Using Acronis License Server
- 4. Using Acronis Snap Deploy Management Console
- 5. Creating Acronis bootable media
- 6. Configuring PXE Server
- 7. Taking an image
- 8. Checking the master image
- 9. Deployment templates
- 9.1 Why save templates?
- 9.2 Creating templates
- 9.2.1 Master image selection
- 9.2.2 Disk/partition selection
- 9.2.3 Target disk and partition selection
- 9.2.4 User accounts
- 9.2.5 Computer names and domain/workgroup
- 9.2.6 Network settings
- 9.2.7 Security identifiers
- 9.2.8 Transferring files
- 9.2.9 Executing applications
- 9.2.10 Using Acronis Universal Deploy
- 9.2.11 Deployment options
- 9.2.12 Comments and summary
- 10. Standalone deployment
- 11. Manual deployment
- 12. Event-driven deployment
- 13. Scheduled deployment
- 14. Custom deployment mode
- 15. Command line and scripting under Win PE and Bart PE
- 16. Managing a remote computer
54 © Acronis, Inc
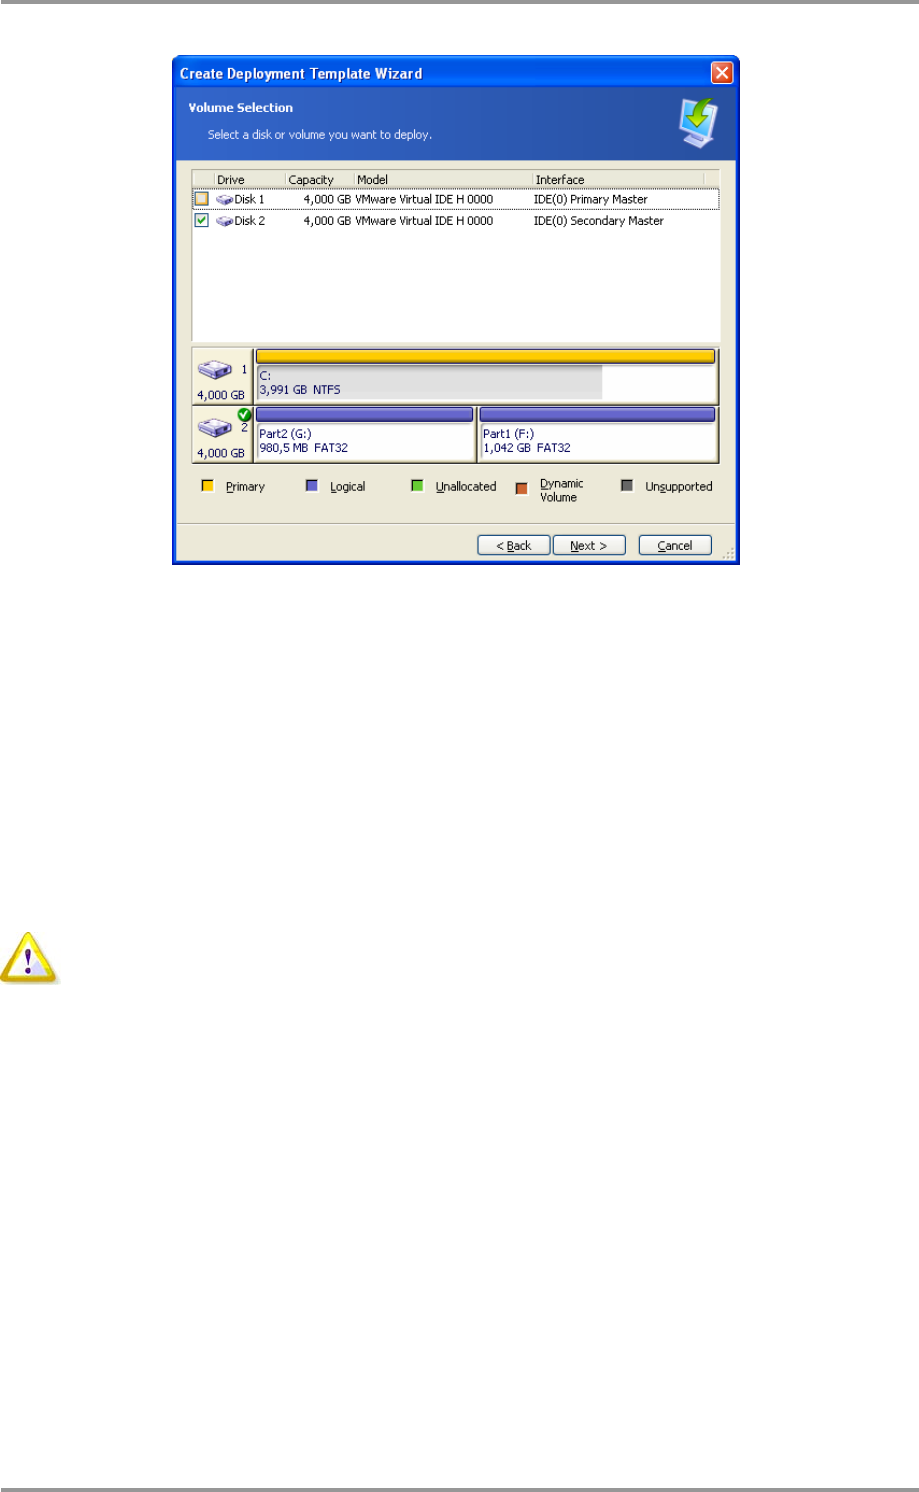
Selecting a disk from the master image
The further steps will depend on how many partitions you select.
If you deploy one partition, it is assumed that the target disk has partitions and you will have to select
the target partition, to deploy over it. Other partitions will remain untouched. The active partition of
the target disk will remain active - even if you deploy an active partition side by side with it, the newly
deployed partition will not become active. Therefore, deploy an active partition to an active partition if
you want to boot from the deployed partition.
Deploying more than one partition will clear partitioning of the target disk. Only the newly deployed
partitions will exist on the disk after deployment.
The Master Boot Record (MBR) is always deployed from the image regardless of your choice.
If your operating system and its loader reside on different partitions, always include both
partitions in the image. The partitions must also be deployed together; otherwise there is a
high risk that the operating system will not start.