
Operation Manual


Table Of Contents
- Table of Contents
- 1. Introducing Acronis® Snap Deploy®
- 1.1 Overview
- 1.2 What you can do with Acronis Snap Deploy 3
- 1.2.1 Take an image of the master system (Acronis Snap Deploy 2.0 functionality)
- 1.2.2 Manual deployment (Acronis Snap Deploy 2.0 functionality)
- 1.2.3 Scheduled deployment (new in v 3)
- 1.2.4 Event-driven deployment (new in v 3)
- 1.2.5 Command line and scripting under Win PE (new in v 3)
- 1.2.6 Standalone deployment (new in v 3)
- 1.2.7 Custom Deployment (User-initiated deployment) (new in v 3)
- 1.2.8 Deployment of a disk partition or MBR (new in v 3)
- 1.2.9 Selective deployment (MAC filtering) (new in v 3)
- 1.2.10 Password protection (new in v 3)
- 1.2.11 Manage a remote computer (Acronis Snap Deploy 2.0 functionality)
- 1.3 What else is new in v 3?
- 1.4 Supported operating systems
- 1.5 License policy
- 1.6 Upgrade to v 3
- 1.7 Technical support
- 2. Understanding Acronis Snap Deploy
- 3. Installation
- 3.1 System requirements
- 3.2 Used ports and IP addresses
- 3.3 General rules of installation
- 3.4 Installation of Acronis Snap Deploy Management Console
- 3.5 Installation of Acronis License Server
- 3.6 Installation of Acronis OS Deploy Server
- 3.7 Installation and setup of Acronis PXE Server
- 3.8 Installation of Acronis WOL Proxy
- 3.9 Installation of Acronis Snap Deploy Management Agent
- 3.10 Installation of Acronis Universal Deploy
- 3.11 Extracting the Acronis Snap Deploy components
- 3.12 Using Acronis License Server
- 4. Using Acronis Snap Deploy Management Console
- 5. Creating Acronis bootable media
- 6. Configuring PXE Server
- 7. Taking an image
- 8. Checking the master image
- 9. Deployment templates
- 9.1 Why save templates?
- 9.2 Creating templates
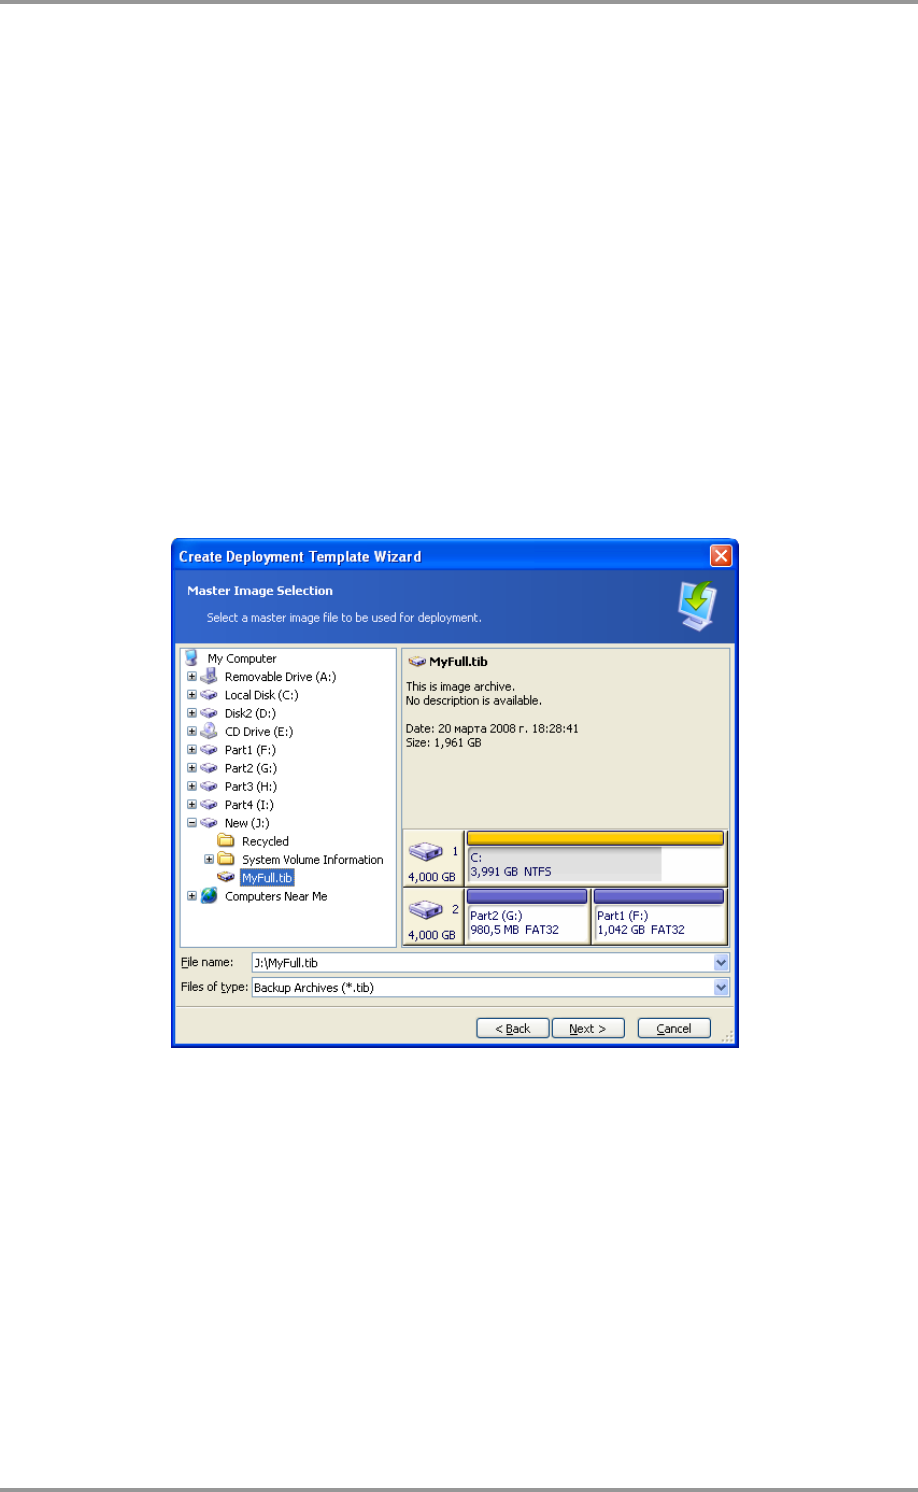
- 9.2.1 Master image selection
- 9.2.2 Disk/partition selection
- 9.2.3 Target disk and partition selection
- 9.2.4 User accounts
- 9.2.5 Computer names and domain/workgroup
- 9.2.6 Network settings
- 9.2.7 Security identifiers
- 9.2.8 Transferring files
- 9.2.9 Executing applications
- 9.2.10 Using Acronis Universal Deploy
- 9.2.11 Deployment options
- 9.2.12 Comments and summary
- 10. Standalone deployment
- 11. Manual deployment
- 12. Event-driven deployment
- 13. Scheduled deployment
- 14. Custom deployment mode
- 15. Command line and scripting under Win PE and Bart PE
- 16. Managing a remote computer
© Acronis, Inc 53
- on DVD+R/RW, DVD-R/RW, CD-R/RW loaded in the deploy server media drive.
The best practice is keeping images on the deploy server hard drive. This minimizes network traffic
during deployment.
The image created on removable media has to fit into one media disk. To deploy an image spread
over several CDs, DVDs or other media, copy all parts of the image to the same folder on the deploy
server or on a network share.
Acronis Standalone Utility can deploy images located:
- in network shared folders
- on USB and FireWire (IEEE-1394) storage devices (hard drives, flash drives) attached to the
managed computer
- on DVD+R/RW, DVD-R/RW, CD-R/RW loaded in the managed computer media drive.
The image created on removable media has to fit into one media disk. To deploy an image spread
over several CDs, DVDs or other media, copy all parts of the image to the same folder on an external
drive or a network share.
Selecting a master image
9.2.2 Disk/partition selection
Specify:
- The disk to deploy, if the image contains multiple disks.
- The disk partitions to deploy, if the image of the selected disk contains multiple partitions.