
Operation Manual


Table Of Contents
- Table of Contents
- 1. Introducing Acronis® Snap Deploy®
- 1.1 Overview
- 1.2 What you can do with Acronis Snap Deploy 3
- 1.2.1 Take an image of the master system (Acronis Snap Deploy 2.0 functionality)
- 1.2.2 Manual deployment (Acronis Snap Deploy 2.0 functionality)
- 1.2.3 Scheduled deployment (new in v 3)
- 1.2.4 Event-driven deployment (new in v 3)
- 1.2.5 Command line and scripting under Win PE (new in v 3)
- 1.2.6 Standalone deployment (new in v 3)
- 1.2.7 Custom Deployment (User-initiated deployment) (new in v 3)
- 1.2.8 Deployment of a disk partition or MBR (new in v 3)
- 1.2.9 Selective deployment (MAC filtering) (new in v 3)
- 1.2.10 Password protection (new in v 3)
- 1.2.11 Manage a remote computer (Acronis Snap Deploy 2.0 functionality)
- 1.3 What else is new in v 3?
- 1.4 Supported operating systems
- 1.5 License policy
- 1.6 Upgrade to v 3
- 1.7 Technical support
- 2. Understanding Acronis Snap Deploy
- 3. Installation
- 3.1 System requirements
- 3.2 Used ports and IP addresses
- 3.3 General rules of installation
- 3.4 Installation of Acronis Snap Deploy Management Console
- 3.5 Installation of Acronis License Server
- 3.6 Installation of Acronis OS Deploy Server
- 3.7 Installation and setup of Acronis PXE Server
- 3.8 Installation of Acronis WOL Proxy
- 3.9 Installation of Acronis Snap Deploy Management Agent
- 3.10 Installation of Acronis Universal Deploy
- 3.11 Extracting the Acronis Snap Deploy components
- 3.12 Using Acronis License Server
- 4. Using Acronis Snap Deploy Management Console
- 5. Creating Acronis bootable media
- 6. Configuring PXE Server
- 7. Taking an image
- 8. Checking the master image
- 9. Deployment templates
- 9.1 Why save templates?
- 9.2 Creating templates
- 9.2.1 Master image selection
- 9.2.2 Disk/partition selection
- 9.2.3 Target disk and partition selection
- 9.2.4 User accounts
- 9.2.5 Computer names and domain/workgroup
- 9.2.6 Network settings
- 9.2.7 Security identifiers
- 9.2.8 Transferring files
- 9.2.9 Executing applications
- 9.2.10 Using Acronis Universal Deploy
- 9.2.11 Deployment options
- 9.2.12 Comments and summary
- 10. Standalone deployment
- 11. Manual deployment
- 12. Event-driven deployment
- 13. Scheduled deployment
- 14. Custom deployment mode
- 15. Command line and scripting under Win PE and Bart PE
- 16. Managing a remote computer
40 © Acronis, Inc
can slow down the deployment. If you choose to save the agent’s log, the log will be available on
the deploy server in:
\Documents and Settings\All Users\Application Data\Acronis\DeployServer\AgentsLogs.
3. Select the type of bootable media to create. You can:
- create CD, DVD, diskettes or other bootable media such as USB flash drive if the hardware BIOS
allows for boot from such media
- build an ISO image of a bootable disc to burn it later onto a blank disc
- upload the selected components to the PXE server. The previously uploaded components will be
deleted from the PXE server before uploading the newly selected ones.
When using 3.5” diskettes, you will be able to write only one component at a time on a diskette
(or a set of the diskettes) — for example, Acronis Snap Deploy Agent. To write another
component, start the Bootable Media Builder once again.
4. To create physical media, insert the blank disk, so the program can determine its capacity, or
attach the flash drive.
To create a bootable disk ISO image, specify the ISO file name and the folder in which to place it.
To upload the components to a PXE server, specify the server and provide the user name and
password to access it.
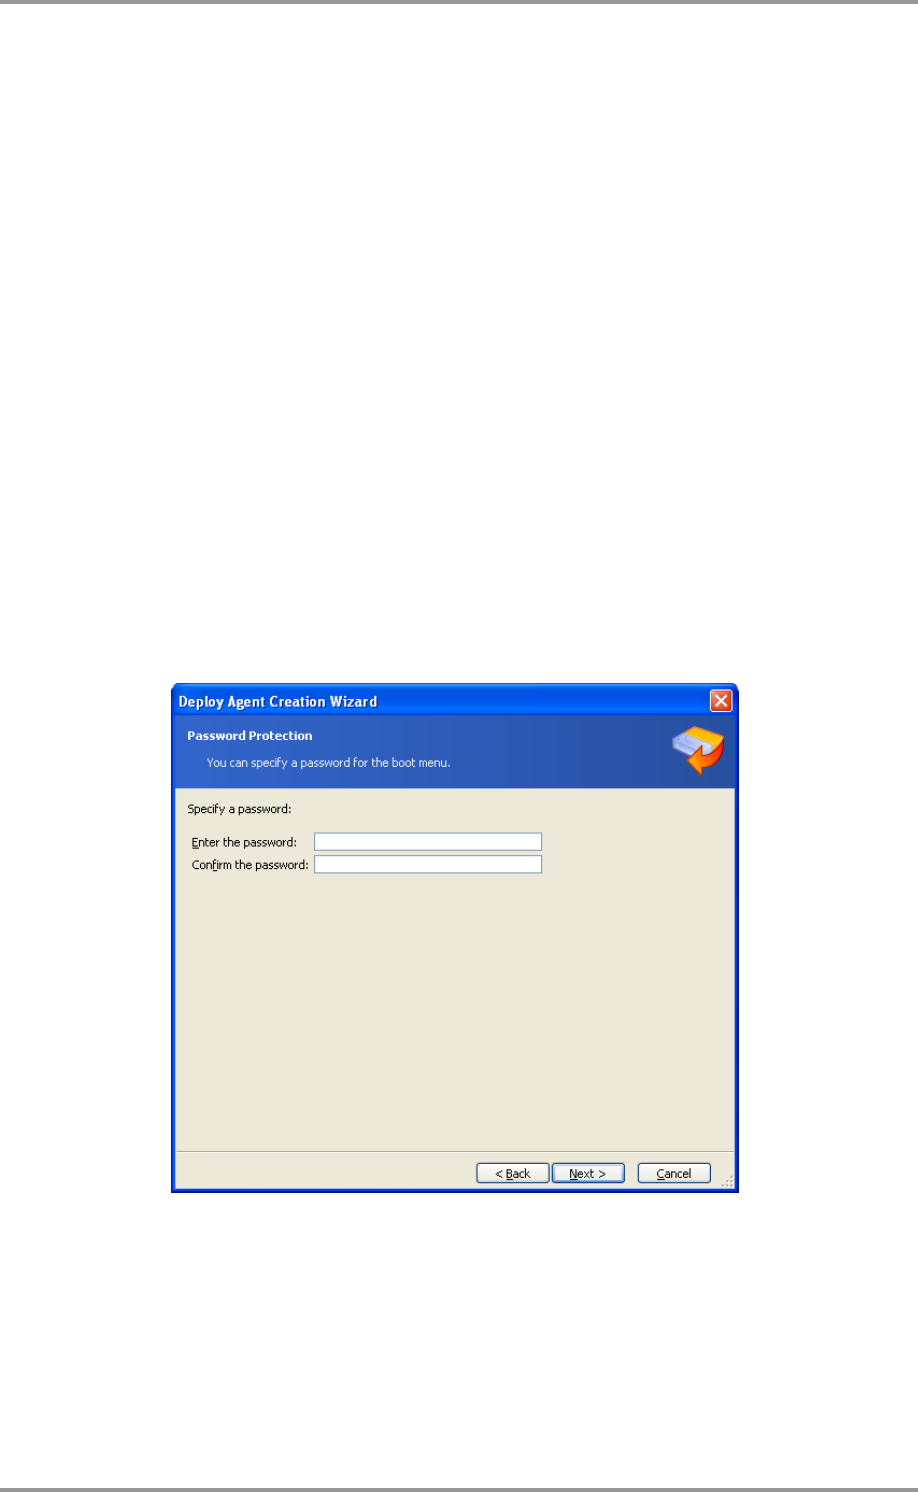
5. The components being uploaded to the PXE server can be protected with a password to prevent
the components from unauthorized execution. The password prompt will come up before
displaying the Acronis boot menu.
Protecting the boot menu with a password
6. Next, the program will calculate how many blank disks are required (in case you have not chosen
ISO or PXE) and give you time to prepare them. When you have finished, click Proceed.
After you create a boot disk, mark it and keep it in a safe place.