
Operation Manual


Table Of Contents
- Table of Contents
- 1. Introducing Acronis® Snap Deploy®
- 1.1 Overview
- 1.2 What you can do with Acronis Snap Deploy 3
- 1.2.1 Take an image of the master system (Acronis Snap Deploy 2.0 functionality)
- 1.2.2 Manual deployment (Acronis Snap Deploy 2.0 functionality)
- 1.2.3 Scheduled deployment (new in v 3)
- 1.2.4 Event-driven deployment (new in v 3)
- 1.2.5 Command line and scripting under Win PE (new in v 3)
- 1.2.6 Standalone deployment (new in v 3)
- 1.2.7 Custom Deployment (User-initiated deployment) (new in v 3)
- 1.2.8 Deployment of a disk partition or MBR (new in v 3)
- 1.2.9 Selective deployment (MAC filtering) (new in v 3)
- 1.2.10 Password protection (new in v 3)
- 1.2.11 Manage a remote computer (Acronis Snap Deploy 2.0 functionality)
- 1.3 What else is new in v 3?
- 1.4 Supported operating systems
- 1.5 License policy
- 1.6 Upgrade to v 3
- 1.7 Technical support
- 2. Understanding Acronis Snap Deploy
- 3. Installation
- 3.1 System requirements
- 3.2 Used ports and IP addresses
- 3.3 General rules of installation
- 3.4 Installation of Acronis Snap Deploy Management Console
- 3.5 Installation of Acronis License Server
- 3.6 Installation of Acronis OS Deploy Server
- 3.7 Installation and setup of Acronis PXE Server
- 3.8 Installation of Acronis WOL Proxy
- 3.9 Installation of Acronis Snap Deploy Management Agent
- 3.10 Installation of Acronis Universal Deploy
- 3.11 Extracting the Acronis Snap Deploy components
- 3.12 Using Acronis License Server
- 4. Using Acronis Snap Deploy Management Console
- 5. Creating Acronis bootable media
- 6. Configuring PXE Server
- 7. Taking an image
- 8. Checking the master image
- 9. Deployment templates
- 9.1 Why save templates?
- 9.2 Creating templates
- 9.2.1 Master image selection
- 9.2.2 Disk/partition selection
- 9.2.3 Target disk and partition selection
- 9.2.4 User accounts
- 9.2.5 Computer names and domain/workgroup
- 9.2.6 Network settings
- 9.2.7 Security identifiers
- 9.2.8 Transferring files
- 9.2.9 Executing applications
- 9.2.10 Using Acronis Universal Deploy
- 9.2.11 Deployment options
- 9.2.12 Comments and summary
- 10. Standalone deployment
- 11. Manual deployment
- 12. Event-driven deployment
- 13. Scheduled deployment
- 14. Custom deployment mode
- 15. Command line and scripting under Win PE and Bart PE
- 16. Managing a remote computer
© Acronis, Inc 27
The Acronis License Server Management Tool is a simple command-line utility for controlling
Acronis License Server. Acronis License Server Management Console provides an easy-to-use
GUI. Alternatively, you can control Acronis License Server using Acronis Snap Deploy Management
Console. So you can choose to install only the Acronis License Server.
If you have already installed Acronis License Server that came with another Acronis product,
you still need to install Acronis License Server that came with Acronis Snap Deploy. You can
install both license servers on the same computer. The Acronis License Server then will be
seen as a common server for all Acronis products.
There is no need to install Acronis License Server Management Console or Acronis License
Server Management Tool once again, because you already have the necessary management
instruments.
To install Acronis License Server:
1. Run the Acronis Snap Deploy setup program
2. Click Install Acronis License Server
3. Follow the Install Wizard instructions on the screen.
4. Reboot on prompt.
After installation, Acronis License Server launches automatically as Windows service.
Before installing Acronis OS Deploy Server, import serial numbers to Acronis License Server either in
command-line mode or using Acronis Snap Deploy Management Console.
3.5.2 Adding licenses using Acronis Snap Deploy Management Console
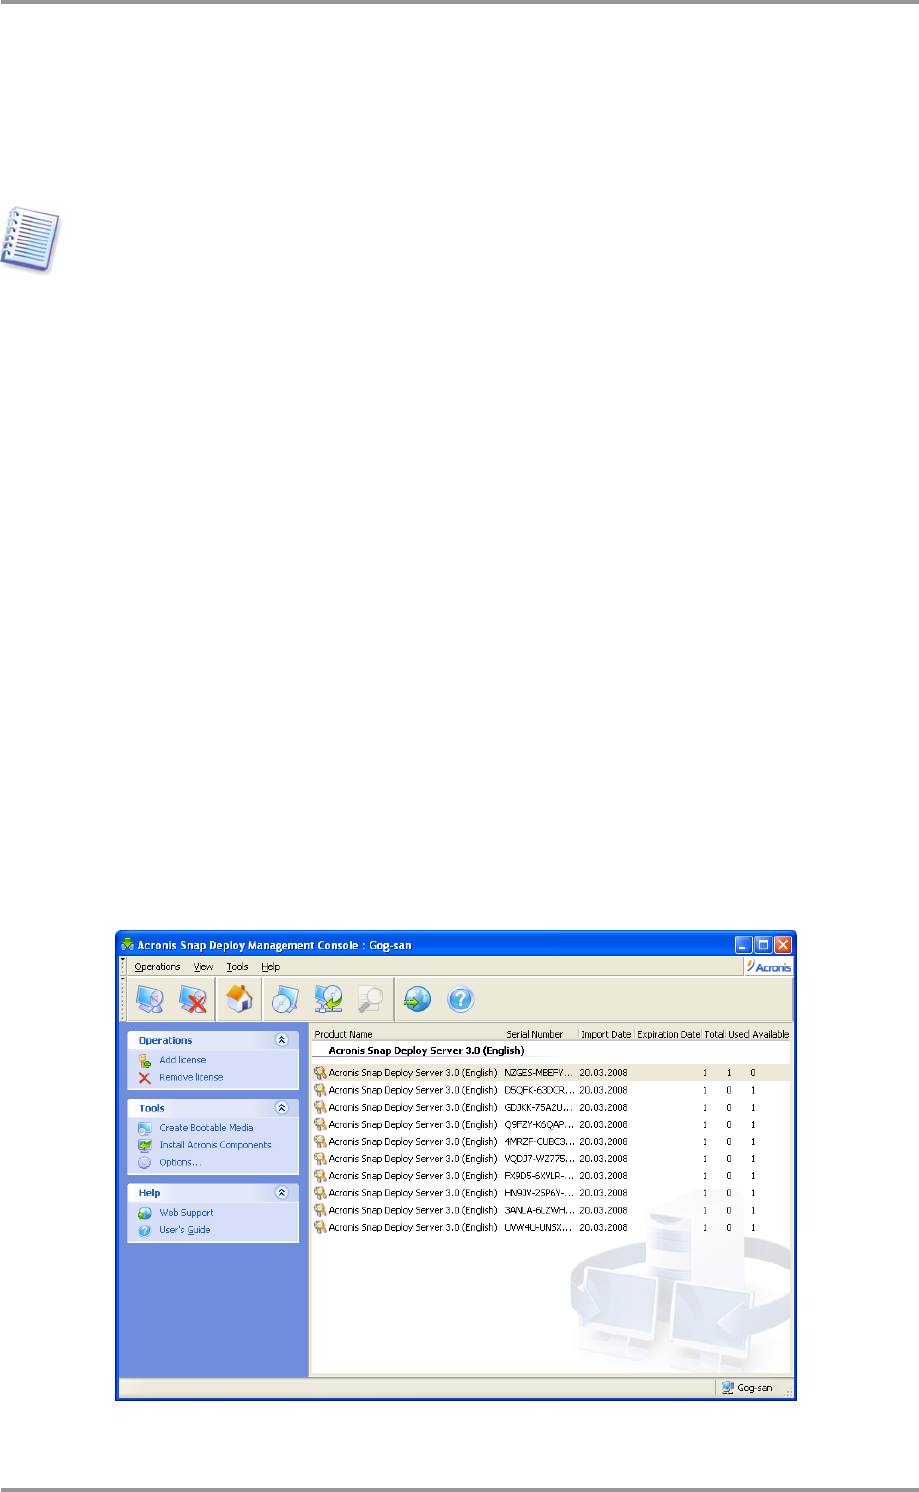
1. Run the Acronis Snap Deploy Management Console.
2. Click Manage licenses. Connect to the computer where Acronis License Server is installed.
3. Click Add License on the sidebar.
4. In the Add License window, type in the serial number or a path to the .txt or .eml file containing
the serial numbers. Or you can browse to the file.
5. In the final window, click Proceed. Acronis License Server performs the operation and reports the
number of newly-added licenses.
The license server has 10 server licenses