
User guide


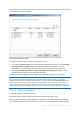

Table Of Contents
- 1 Introducing Acronis Snap Deploy 5
- 1.1 Overview
- 1.2 What's new in Acronis Snap Deploy 5
- 1.3 What you can do with Acronis Snap Deploy 5
- 1.3.1 Taking an image of the master system
- 1.3.2 Deployment to specific machines (immediate, manual, and scheduled deployment)
- 1.3.3 Deployment to any ready machines (event-driven deployment)
- 1.3.4 Stand-alone deployment
- 1.3.5 Deployment with individual deployment settings
- 1.3.6 User-initiated deployment (custom deployment)
- 1.3.7 Deployment of a disk volume and MBR
- 1.3.8 Command-line mode and scripting under WinPE
- 1.4 Features of Acronis Snap Deploy 5
- 1.4.1 List of machines
- 1.4.2 List of deployment tasks
- 1.4.3 Per-deployment licensing
- 1.4.4 Support for the VHD format
- 1.4.5 Graphical user interface in WinPE
- 1.4.6 E-mail notifications about deployment
- 1.4.7 Compatibility with images created by other Acronis products
- 1.4.8 Support for multiple network adapters
- 1.4.9 Multicast TTL and network bandwidth throttling
- 1.4.10 Falling back to unicast
- 1.4.11 Encrypted communication
- 1.4.12 Password protection
- 1.5 Supported operating systems for imaging and deployment
- 1.6 Licensing policy
- 1.7 Upgrading to Acronis Snap Deploy 5
- 1.8 Technical Support
- 2 Understanding Acronis Snap Deploy 5
- 3 Getting started with Acronis Snap Deploy 5
- 4 Installation of Acronis Snap Deploy 5
- 4.1 Supported operating systems
- 4.2 System requirements
- 4.3 Used ports and IP addresses
- 4.4 Typical installation
- 4.5 Custom installation
- 4.5.1 Installation procedure
- 4.5.2 Common installation configurations
- 4.5.3 Installation of components
- 4.5.3.1 Installation of Acronis Snap Deploy 5 Management Console
- 4.5.3.2 Installation of Acronis Snap Deploy 5 License Server
- 4.5.3.3 Installation of Acronis Snap Deploy 5 OS Deploy Server
- 4.5.3.4 Installation of Acronis PXE Server
- 4.5.3.5 Installation of Acronis Wake-on-LAN Proxy
- 4.5.3.6 Installation of Acronis Snap Deploy 5 Management Agent
- 4.6 Other ways of installation
- 4.7 Upgrading Acronis Snap Deploy 5
- 4.8 Uninstalling Acronis Snap Deploy 5
- 5 Using Acronis Snap Deploy 5 Management Console
- 6 Using Acronis Snap Deploy 5 License Server
- 7 Deployment tools
- 8 Creating a master image
- 9 Validating a master image
- 10 Deploying a master image
- 10.1 Files supported as master images
- 10.2 Licenses for deployment
- 10.3 Deployment templates
- 10.4 Deployment through a deployment task
- 10.5 Stand-alone deployment
- 10.6 User-initiated deployment (custom deployment)
- 10.7 Deploying BIOS-based systems to UEFI-based and vice versa
- 11 Managing the list of machines (the Machines view)
- 12 Individual deployment settings
- 13 Managing deployment tasks (the Deployment tasks view)
- 14 Command-line mode and scripting under WinPE
- 15 Collecting system information

90 Copyright © Acronis International GmbH, 2002-2014
Note: The active volume of the target disk will remain active. Even if you deploy an active volume side by
side with an already present active volume, the newly deployed volume will not become active. Therefore,
you need to deploy an active volume to an active volume if you want to boot from the deployed volume.
Tip: To deploy a single volume to unallocated space or bare metal, first create a target volume of a desired
size by using a third-party partitioning tool, such as Microsoft Disk Management or Acronis Disk Director.
In either case, the size of the deployed volume will depend on the setting in Disk space utilization (p.
90).
The When deploying a single volume setting is not effective when you deploy multiple volumes. In
this case, all existing volumes on the target disk are always deleted, and the entire disk space is
available for the volumes.
Converting the target disk to GPT
This setting determines whether a target disk larger than 2 TB should be converted to GPT.
This setting is available only when the operating system stored in the image allows changing the boot
mode from BIOS to UEFI. These are the following:
64-bit versions of all Windows operating systems starting with Windows Vista x64 SP1
64-bit versions of all Windows Server operating systems starting with Windows Server 2008 x64
SP1
The preset is: Convert disk to GPT if target disk is larger than 2 TB
MBR disks have a size limitation of 2 TB. If an image of an MBR disk is deployed to a target disk that is
larger than 2 TB, only 2 TB of the disk capacity will be used. To get around this issue, Acronis Snap
Deploy 5 can automatically change the target disk partitioning style to GPT. However, in order to
boot from a GPT disk, the target machine must support the UEFI boot loader. If the target machine
does not support UEFI, clear this check box.
Disk space utilization
This setting determines whether to change the size of the volumes you are deploying according to
the available space on the target disk. The available space depends on the size of the target disk and
on whether you selected to replace all volumes or only a particular volume (see the Target disk
layout (p. 89) setting).
The preset is: Resize volumes to fit target disk
The settings are the following:
Resize volumes to fit target disk: The software will proportionally extend or reduce each of the
deployed volumes according to the available space on the target disk.
The following examples assume that you have a 300-GB target disk that already contains two
volumes: the first volume is 50 GB in size, and the second volume is 250 GB in size.
Example 1. You are deploying a single 100-GB volume. In Target disk layout, you selected to
replace all volumes on the target disk. In this case, the size of the deployed volume will be
300 GB.
Example 2. You are deploying a single 100-GB volume. In Target disk layout, you selected to
replace the second (250-GB) volume on the target disk. In this case, the size of the deployed
volume will be 250 GB. The first volume on the target disk will remain intact.