
User guide


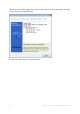
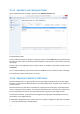
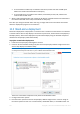


Table Of Contents
- 1 Introducing Acronis Snap Deploy 5
- 1.1 Overview
- 1.2 What's new in Acronis Snap Deploy 5
- 1.3 What you can do with Acronis Snap Deploy 5
- 1.3.1 Taking an image of the master system
- 1.3.2 Deployment to specific machines (immediate, manual, and scheduled deployment)
- 1.3.3 Deployment to any ready machines (event-driven deployment)
- 1.3.4 Stand-alone deployment
- 1.3.5 Deployment with individual deployment settings
- 1.3.6 User-initiated deployment (custom deployment)
- 1.3.7 Deployment of a disk volume and MBR
- 1.3.8 Command-line mode and scripting under WinPE
- 1.4 Features of Acronis Snap Deploy 5
- 1.4.1 List of machines
- 1.4.2 List of deployment tasks
- 1.4.3 Per-deployment licensing
- 1.4.4 Support for the VHD format
- 1.4.5 Graphical user interface in WinPE
- 1.4.6 E-mail notifications about deployment
- 1.4.7 Compatibility with images created by other Acronis products
- 1.4.8 Support for multiple network adapters
- 1.4.9 Multicast TTL and network bandwidth throttling
- 1.4.10 Falling back to unicast
- 1.4.11 Encrypted communication
- 1.4.12 Password protection
- 1.5 Supported operating systems for imaging and deployment
- 1.6 Licensing policy
- 1.7 Upgrading to Acronis Snap Deploy 5
- 1.8 Technical Support
- 2 Understanding Acronis Snap Deploy 5
- 3 Getting started with Acronis Snap Deploy 5
- 4 Installation of Acronis Snap Deploy 5
- 4.1 Supported operating systems
- 4.2 System requirements
- 4.3 Used ports and IP addresses
- 4.4 Typical installation
- 4.5 Custom installation
- 4.5.1 Installation procedure
- 4.5.2 Common installation configurations
- 4.5.3 Installation of components
- 4.5.3.1 Installation of Acronis Snap Deploy 5 Management Console
- 4.5.3.2 Installation of Acronis Snap Deploy 5 License Server
- 4.5.3.3 Installation of Acronis Snap Deploy 5 OS Deploy Server
- 4.5.3.4 Installation of Acronis PXE Server
- 4.5.3.5 Installation of Acronis Wake-on-LAN Proxy
- 4.5.3.6 Installation of Acronis Snap Deploy 5 Management Agent
- 4.6 Other ways of installation
- 4.7 Upgrading Acronis Snap Deploy 5
- 4.8 Uninstalling Acronis Snap Deploy 5
- 5 Using Acronis Snap Deploy 5 Management Console
- 6 Using Acronis Snap Deploy 5 License Server
- 7 Deployment tools
- 8 Creating a master image
- 9 Validating a master image
- 10 Deploying a master image
- 10.1 Files supported as master images
- 10.2 Licenses for deployment
- 10.3 Deployment templates
- 10.4 Deployment through a deployment task
- 10.5 Stand-alone deployment
- 10.6 User-initiated deployment (custom deployment)
- 10.7 Deploying BIOS-based systems to UEFI-based and vice versa
- 11 Managing the list of machines (the Machines view)
- 12 Individual deployment settings
- 13 Managing deployment tasks (the Deployment tasks view)
- 14 Command-line mode and scripting under WinPE
- 15 Collecting system information

119 Copyright © Acronis International GmbH, 2002-2014
Tip: To find a template in the custom boot menu, press a letter key which corresponds to the first letter of the
template name. The cursor will jump on the first template whose name starts with the pressed letter.
Important: If the user-initiated deployment uses a PXE server, machines that are deployed through deployment
tasks (p. 102) will not be able to boot from that PXE server. However, deployments to such machines will be
possible if they boot from a bootable media.
The user-initiated deployment mode is primarily intended for continual work without the
administrator’s assistance. Only users (the ones on the target side) will be able to initiate deployment.
However, the administrator can view logs, create new deployment templates, change the
user-initiated deployment configuration (add, edit or remove boot menu items) and perform other
management operations except initiating the custom deployment.
10.6.2 Considerations when using a PXE server
When enabling or configuring the user-initiated deployment mode with Acronis PXE Server, the
software first removes all bootable components (Acronis Snap Deploy 5 Agent, Acronis Snap Deploy
5 Master Image Creator, and the PE image) from the PXE server, because users might be confused by
the unknown items appearing in the boot menu. Then, the software uploads to the PXE server the
templates selected by the administrator. So you will have to upload the bootable utilities again, if
they are needed after switching off the user-initiated deployment mode.
If you need to perform both user-initiated deployment and deployment through a deployment task,
you can use the PXE server for the former and bootable media for the latter.
Alternatively, you can use another Acronis Snap Deploy 5 OS Deploy Server to perform deployment
through deployment tasks, while one Acronis Snap Deploy 5 OS Deploy Server is in the user-initiated
deployment mode. To do so, ensure that the target machines connect to the appropriate
deployment server, by specifying the deployment server when creating the bootable media or by
configuring Acronis Snap Deploy 5 Agent at boot. Two deployment servers cannot use the same
Acronis PXE Server.
10.6.3 Setting up the user-initiated deployment mode
Preparation
1. Install Acronis Snap Deploy 5 Management Console and Acronis Snap Deploy 5 License Server.
Import licenses to the license server. Install Acronis Snap Deploy 5 OS Deploy Server and Acronis
PXE Server. All these components are already installed if you have performed a typical
installation (p. 45).
2. Configure and image the master system (or systems), either from a bootable media with Acronis
Snap Deploy 5 Master Image Creator (p. 74) or by using Acronis Snap Deploy 5 Management
Agent (p. 74).
To set up user-initiated deployment
1. Start Acronis Snap Deploy 5 Management Console.
2. In the welcome screen, click Configure user-initiated deployment. If prompted, specify the
machine where Acronis Snap Deploy 5 OS Deploy server is installed.
Note: If you are planning to use an Acronis PXE Server with user-initiated deployment and there are active
operations that use that PXE server, either cancel those operations or wait until they are completed, before
proceeding. See also “Considerations when using a PXE server” (p. 119).