User’s Guide Acronis Snap Deploy 2.
Copyright © Acronis, Inc., 2000-2007. All rights reserved. Windows and MS-DOS are registered trademarks of Microsoft Corporation. All other trademarks and copyrights referred to are the property of their respective owners. Distribution of substantively modified versions of this document is prohibited without the explicit permission of the copyright holder.
END-USER LICENSE AGREEMENT BY ACCEPTING, YOU (ORIGINAL PURCHASER) INDICATE YOUR ACCEPTANCE OF THESE TERMS. IF YOU DO NOT WISH TO ACCEPT THE PRODUCT UNDER THESE TERMS, YOU MAY CHOOSE NOT TO ACCEPT BY SELECTING "I decline..." AND NOT INSTALLING THE SOFTWARE. Acronis® Snap Deploy (the software) is protected by Copyright © Acronis, Inc., 2000-2007. All rights are reserved. The original purchaser is granted a license to use the software only, subject to the following restrictions and limitations.
Table of Contents Table of Contents CHAPTER 1. 1.1. 1.2. 1.3. 1.4. 1.5. GENERAL INFORMATION ................................................................................................ 6 KEY FEATURES ....................................................................................................................................... 6 NEW IN ACRONIS SNAP DEPLOY 2.0 .......................................................................................................
Table of Contents 6.1 BOOTING UP THE TARGET PCS .............................................................................................................. 42 6.2 STARTING THE DEPLOY IMAGE WIZARD............................................................................................... 44 6.3 SELECTING TARGET COMPUTERS .......................................................................................................... 45 6.4 SELECTING TEMPLATE MODE .............................................
General information Chapter 1. General information Acronis® Snap Deploy is a comprehensive solution designed for simultaneous remote deployment of a fully configured operating system with application software to target PCs over a network from a previously created image file. Acronis Snap Deploy also provides configuration management tools to configure system settings, manage files, and execute applications on systems throughout the network.
General information Adding, editing or deleting local user accounts Setting network settings Generation of new security identifiers (SIDs) for the target computers Transferring files to all target computers after deployment Executing applications on all target computers after deployment Running configuration files on all target computers after deployment Managing deployment templates Master image creation Master images checking Support for various ways of boot up (boo
General information Acronis Snap Deploy Management Console is the primary tool for remote management of Acronis OS Deploy Server, Acronis PXE Server and master/target PCs. Acronis OS Deploy Server controls the simultaneous master system deployment on target PCs. Acronis Snap Deploy Agent – boots up on each of target PCs and performs the system deployment under control of Acronis OS Deploy Server.
General information Acronis Snap Deploy supports images created by Acronis True Image. 6. If you are going to boot target computers from removable media, create bootable media with Acronis Snap Deploy Agent. See details in 5.1 Creating bootable media. If you are going to boot target computers with Acronis PXE Server, install Acronis PXE Server and upload Acronis Snap Deploy Agent to that server. See details in 5.5 Configuring Acronis PXE Server.
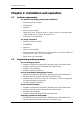
Installation and operation Chapter 2. Installation and operation 2.1 System requirements For Acronis Snap Deploy components installation: Pentium processor or higher 128 MB RAM keyboard mouse (recommended) Floppy disk drive, CD-R/RW drive or another device for bootable media creating (USB-device, Zip drive, flash drive etc.
Installation and operation Windows Vista all Editions Windows 2000/XP Acronis Snap Deploy enables, with certain limitations (some operations or options will not be available), deployment of any PC-based operating system. For example, Windows 98/NT/ME can be deployed only as is, without changing SID, user accounts or network settings. 2.
Installation and operation Broadcast address: 255.255.255.255 If you are using a firewall, you might have to set the appropriate access options 2.5 License policy Acronis Snap Deploy licensing is based on number of deployed and/or managed computers (servers or workstations). The number of deployments onto the same computer, as well as the number of Acronis Snap Deploy Management Console, Acronis OS Deploy Server*, Acronis PXE Server or Acronis License Server installations is not counted.
Installation and operation Figure 1. Acronis Snap Deploy Install Menu 2. In the Install Menu, select the component that you are going to install on a PC. Available options are: Acronis Snap Deploy Management Console, Acronis OS Deploy Server, Acronis PXE Server, Acronis Snap Deploy Management Agent or Acronis License Server. 3. Read and accept the terms of the license agreement, then click Next. 4. When installing Acronis OS Deploy Server, specify the License Server for license validation.
Installation and operation Figure 2. Custom setup 7. In the Select Administrators Options window, choose Install for all users or Install for the currently logged-in user, then click Next. 8. Click Proceed to begin installation. Acronis Universal Deploy installation Acronis Universal Deploy is an option to Acronis Snap Deploy. It must be purchased separately and installed from a separate setup file. Acronis Universal Deploy can only be installed on a computer where Acronis OS Deploy Server is installed.
Installation and operation or network drive. It will help you modify or recover the existing component installation on a local computer. 1. Run the Acronis Snap Deploy setup procedure. 2. In the Install Menu, right-click on the application name and select Extract. 3. Select location for the setup file and click Save. 2.8 Using Acronis Snap Deploy trial version If you have not purchased a software license for Acronis Snap Deploy yet, you may still try the full-featured trial version of the product.
Installation and operation 4. In the Modify window, choose the component features to be added or deleted. 5. Click Next to apply changes. 2.11 Repairing components During maintenance period, you may need to repair (or restore) Acronis Snap Deploy components. To repair a component: 1. Run AcronisSnapDeploy.exe. 2. In the Install Menu, click on the component you want to repair. 3. Click Repair in the Modify, Repair or Remove Installation window. 2.
Using the Acronis Snap Deploy Management Console Chapter 3. Using the Acronis Snap Deploy Management Console 3.1 Key features Acronis Snap Deploy Management Console is the primary administrative tool for Acronis OS Deploy Server, Acronis PXE Server and remote computers. In addition, it allows you to create and check master images on remote PCs.
Using the Acronis Snap Deploy Management Console Figure 4. Acronis Snap Deploy Management Console main window 3.2 Connecting to a remote computer With Acronis Snap Deploy Management Console, you can establish connections with remote computers to perform management operations. To perform a given operation, you must connect the console to a valid computer. For example: To manage a software deployment, connect to a computer with Acronis OS Deploy Server installed.
Using the Acronis Snap Deploy Management Console 1. Select New connection in the Remote management sidebar section of the Acronis Snap Deploy Management Console main window or the associated menu or toolbar items. You can also establish a connection using a context menu invoked by right-clicking the desired machine name in the View → Computers list. 2. Specify a PC network name or select a PC by pressing the Browse… button. 3. Enter the user name and password. Figure 5.
Using the Acronis Snap Deploy Management Console 6. The Acronis component will be installed to the remote PC you specified. If you checked the box for Allow to reboot remote computer automatically during Acronis components installation, the remote machine will reboot. Otherwise, you will see the corresponding message. Figure 6. Remote installation of Acronis components Installation of Acronis components onto remote machines running all Windows Vista editions is not possible.
Using the Acronis Snap Deploy Management Console Figure 7. Log viewer The left panel can contain up to 50 logs. If there are more, you can browse the list using the More and Less buttons with the left and right arrows. The buttons appear at the top when the number of log entries exceeds 50. To delete a log, select it and click Delete. If any step was terminated by an error, the corresponding log will be marked with a red circle with a white “X” inside.
Using Acronis License Server Chapter 4. Using Acronis License Server 4.1 Overview The Acronis License Server is a mechanism that tracks individual licenses of Acronis products. When installing Acronis OS Deploy Server, you have to specify the Acronis License Server. You may specify the server’s DNS name, IP address, or let the Acronis License Server to be found automatically on the network.
Using Acronis License Server The Acronis License Server Management Tool is a command-line utility for controlling the Acronis License Server, while the Acronis License Server Management Console provides an easy-to-use GUI and additional useful features such as remote Acronis components installation and license revoke. These two programs are intended mostly for Acronis products other than Acronis Snap Deploy.
Using Acronis License Server Figure 8. Viewing all licenses 3. Invoke Add License Wizard by selecting Add License in the Tasks group on the sidebar. 4. In the Add License window, type in the serial number or a path to the text file containing serial numbers. You can also browse folders to find the text file. 5. In the final window, click Proceed. Acronis License Server performs the operation and reports the number of new-added licenses.
Using Acronis License Server Figure 9. Viewing used licenses The Revoke License task and the Renew Date parameter are not used in Acronis Snap Deploy. For information how to use them with other Acronis products, see the dedicated Acronis License Server guide bundled with these products. You can sort any list using View -> Arrange Icons by. 4.
Using Acronis License Server --import-file [server name] [filename] Imports license serial keys from .txt or .eml file. --help Shows usage. To import serial numbers to the Acronis License Server: 1. After the Acronis License Server installation run LicenseServerCmdLine.exe in the Windows Command Prompt (cmd.exe). the 2.
Pre-deployment operations Chapter 5. Pre-deployment operations 5.1 Creating bootable media You can boot Acronis Master Image Creator on the master computer or Acronis Snap Deploy Agent on the target computers in the following ways: 1. from removable media (CD-R/RW, DVD-R/RW, diskettes or any other media the computers can boot from, such as a Zip drive 2. using Microsoft Remote Installation Services (RIS) 3. from Acronis PXE Server. Acronis Snap Deploy allows you to create: 1.
Pre-deployment operations Figure 10. Selecting components The Start automatically after parameter indicates the time interval between the computer boot and the selected program’s automatic start. For example, if you check the box for Acronis Master Image Creator, the creator will launch in 10 (or whatever you select) seconds after the master PC boots. This eliminates the need for a click on the boot menu and enables, in the case of RIS, fully remote imaging.
Pre-deployment operations them. You will not see this option if chose to create an ISO image or save the file to a RIS server. When you are finished, click Proceed. After you create a boot disk, identify it and keep it in a safe place. 5.2 The master OS preparation Before creating a master image for mass OS deployment, it is usually recommended to prepare the master operating system with the Microsoft Sysprep tool.
Pre-deployment operations 5.3 5.3.1 Creating master image Local vs. remote operation Acronis Snap Deploy allows you to create master image either locally on the master computer (using a bootable version of Acronis Master Image Creator) or remotely (using Acronis Snap Deploy Management Console). To enable remote imaging, you must install the Acronis Snap Deploy Management Agent on the master computer.
Pre-deployment operations 3. A dialog box comes up suggesting that you configure Acronis Master Image Creator. Figure 13. Acronis Master Image Creator configure prompt If there is no DHCP (Dynamic Host Control Protocol) server in your network, the master computer will not be able to connect to the network automatically after booting Acronis Master Image Creator.
Pre-deployment operations Figure 15. Master Image Creation Wizard: welcome window In this window, click Next and go to step 5.3.4 Selecting disks. 5.3.3 Running Acronis Master Image Creator on a remote computer If you are going to create master image of a remote computer, install Acronis Snap Deploy Management Agent on the master computer (see 3.3 Installing Acronis components on a remote PC) and connect the console to that computer. 1.
Pre-deployment operations Figure 16. Image creation mode If you choose Create master image using bootable media, the program will suggest that you create the bootable media. If you already created bootable media with Acronis Master Image Creator, go to step 5.3.2 Running Acronis Master Image Creator on a local computer. Otherwise, create bootable media and do the same. For more information about creating bootable media see 5.1 Creating bootable media. 5.3.
Pre-deployment operations Figure 17. Selecting disks Having selected disks, click Next. Note that this button is disabled if no disks are selected. 5.3.5 Selecting image location You can place an image file on any networked PC or on removable media. Acronis recommends that you keep master images on the computer with Acronis OS Deploy Server installed. It minimizes network traffic during deployment.
Pre-deployment operations Figure 18. Selecting Image location You can store several disks in a single file, but you cannot append images to a file. 5.3.6 Setting options Set the options for creating master image. 1. Compression level The default setting is Normal. Select the data compression level for the image to be created. If you select None, the data will be copied without any compression, which can significantly increase the image file size.
Pre-deployment operations Figure 19. Selecting data compression level Generally, it is recommended that you use the default Normal compression level. You might want to select Maximum compression for removable media to reduce the number of blank disks required. 2. Image creation priority The default setting is Low. The priority of any process running in a system determines the amount of CPU usage and system resources allocated to that process.
Pre-deployment operations Figure 20. Selecting data compression level The default setting is Automatic. With this setting, the program will act as follows. When creating an image on a hard disk: If the selected disk has enough space and its file system allows the estimated file size, the program will create a single image file. If the storage disk has enough space, but its file system does not allow the estimated file size, the image will be automatically split into several files.
Pre-deployment operations The current version of Acronis Snap Deploy does not support images spanning several disks. Therefore, the Fixed Size option is intended for future versions. 4. Additional settings You can choose to check the master image data integrity. Verification will be performed immediately after the image is created. The default setting is disabled. To enable verification, check the Validate the image upon its creation completion box. 5.3.
Pre-deployment operations Figure 22. Image creation summary Clicking Proceed will launch the task execution. The task progress will be shown in a special window. You can stop the procedure by clicking Cancel. Figure 23. Image creation progress 5.4 Checking master image To be assured that your images are not damaged, you can check their integrity. To do so: 1.
Pre-deployment operations 2. Select Check master image in the Management Console main window or a respective task in Acronis Master Image Creator menu. 3. You will see the first wizard window. Click Next to continue. 4. In the Image Archive selection window, select the image file, using Windows Explorer. Figure 24. Image Archive Selection 5. Click Proceed to continue. The checking progress will be indicated in the new window. You can cancel checking by clicking Cancel.
Pre-deployment operations To update PXE Server: 1. Connect to a computer with Acronis PXE Server installed. 2. Click on Configure Acronis PXE Server in the Acronis Snap Deploy Management Console main window. 3. Click Configure PXE Server in the Tasks sidebar to start the Update PXE wizard and click Next. 4. Check/uncheck components you want to upload/remove and click Next. Figure 25.
Deployment Chapter 6. Deployment Acronis Snap Deploy Management Console permits you manage simultaneous deployments of a master image to target PCs remotely. Some steps of the deployment procedure may differ from those described below, depending on the operating system. 6.1 Booting up the target PCs 1. Boot the target PCs from bootable media, PXE or RIS. Figure 26. Acronis Snap Deploy Agent boot menu 2. Select Acronis Snap Deploy Agent in the boot menu.
Deployment time. Then enter the target computer IP address and other settings necessary for connection. Figure 28. Acronis Snap Deploy Agent configuration: network settings You can also specify the DNS name or IP address of the OS deployment server; if you do not specify that information, the server will be found automatically. If there are several deployment servers on the network, you must specify the deployment server that is connected to the console or that you are going to connect. Figure 29.
Deployment 4. When Acronis Snap Deploy Agent starts and the target computer is ready for deployment, the target computer displays: Figure 30. Acronis Snap Deploy Agent: ready for deployment The progress bar is suspended because the computer is waiting for deployment. 6.2 Starting the Deploy Image Wizard 1. Connect to the computer with Acronis OS Deploy Server installed. 2. Click on Manage deployment icon in the Acronis Snap Deploy Management Console main window.
Deployment In the central part of the window you see the IP addresses of target PCs. 3. Click Deploy on target PCs in the Tasks group of the sidebar to launch the Deploy Image wizard, then click Next in the wizard welcome window. 6.3 Selecting target computers Now tick off the IP addresses of target PCs. You can select all target computers by checking All clients. Then, click Next. Figure 32. Target computers selection window 6.
Deployment Figure 33. Template Selection If you already have templates and want to use one of them: 1. Choose Select the existing template and click Next. 2. Then select a template in the Choose Template window and click Next. Figure 34. Choose template window You can modify all settings of the existing template by checking Modify existing template. 3. Acronis Snap Deploy will ask you to change computer name (and IP addresses if they were set manually) for target computers.
Deployment information on computer name and IP settings, see 6.7 and 6.8 of this guide. 6.5 Selecting a master image to deploy Select the master image you want to deploy, then click Next. Figure 35. Image selection 6.6 Adding user information You can create user accounts on target computers and add them to one of the following groups: Administrators, Power Users and Users. To add user account: 1. Press on Add button. 2. Type a user name. 3. Select the group that the user will be a member of. 4.
Deployment Figure 36. User information To edit the selected account, click Edit and change the user name, group or password. To delete the selected account, click the Delete button. 6.7 Computer name At this step, you can specify name and membership of target computers. Windows uses that information to identify computers on the network. To generate unique names for target computers use wild card {start[,count]}, where start – first given numeral value and count (optional) - last numeral.
Deployment start1 (2) – the first figure in a double-valued number (2…) count1 (3) – increasing quantity of first figures (2…, 3…, 4…) start2 (5)– the second figure in a double-valued number(…5) count2 (4)– increasing quantity of second figures (…5, …6, …7, …8) Then select the membership of target PCs: Domain -- select this option and type the domain name, if the target PCs are to join the domain membership. You must have administrator rights to set the domain membership.
Deployment o Last IP address – last IP address in a range of target PCs o Subnet Mask – subnet mask address o Default Gateway – IP address of the default gateway Do not change the network settings – select this parameter if you are planning to use IP settings from a previously selected master image. If you have selected this parameter, skip section 6.9 and proceed to section 6.10 of this guide. Figure 38. Network settings Click Next to continue. 6.
Deployment Figure 39. DNS settings 6.10 Change security identifiers You can change security identifiers on target computers. The security identifier (SID) is a data structure of variable length that identifies user, group and computer accounts. Every account on a network is issued a unique SID when the account is created. Internal processes in Windows refer to an account's SID rather than its user or group name. Check Change Security IDs to make SIDs on target computers unique. Figure 40.
Deployment 6.11 Transferring files You can select files, which will be transferred to all target computers after deployment (for example, installation files). To add files for transfer: 1. Click Add button. Settings window will appear. 2. In the Source field, click the “…” button to select a file. 3. In the Destination field, click the “…“ button to specify file location on remote computers. 4. Check Execute file if you want to execute transferred file after deployment. 5.
Deployment Figure 42. Executing applications To remove a file from the executing list, select it, then click on Remove button. 6.13 Using Acronis Universal Deploy Acronis Universal Deploy is an add-on option to Acronis Snap Deploy, allowing deployment of a bootable system on hardware that differs from that of a master computer. 6.13.1 Purpose of Acronis Universal Deploy A system image can be deployed easily on hardware identical to that of the master computer.
Deployment 6.13.2 Acronis Universal Deploy general principles 1. Automatic HAL and mass storage drivers selection Acronis Universal Deploy searches the Windows default driver storage folders (in the master image) for HAL and mass storage device drivers and installs drivers that better fit the target hardware. You can specify a custom driver repository (a folder or folders on a network drive or CD) which will also be used for drivers search.
Deployment The following is for Acronis Snap Deploy installations including Acronis Universal Deploy. 6.13.5 Using Acronis Universal Deploy 1. Using Acronis Universal Deploy will help you create a bootable system clone on dissimilar hardware. Choose this when deploying a system to a computer with a different processor, motherboard or mass storage device than in the imaged system. The Acronis Universal Deploy option does not work if master image contains dynamic disks and volumes. Figure 43.
Deployment Figure 44. Adding a driver repository Acronis Universal Deploy uses three sources for drivers: - the driver repository - a folder or folders on a network drive or CD specified at the current step - the mass storage device driver specified by the user at the previous step - the Windows default driver storage folders (in the master image). The program will pick out the most suitable drivers of all available drivers and install them into the deployed system.
Deployment Figure 45. Deployment options: restart The default setting is Shutdown. 6.14.2 Disk utilization If the target disk capacity is not equal to that of the master computer’s disk, the program can enlarge (or reduce) each partition according to the proportion of the master and target disk capacities. Alternatively, if the target disk is larger, the program can keep the original partitions’ size and leave the remaining disk space unallocated. The default setting is Occupy disk space entirely. 6.
Deployment Figure 46. Deployment options: network utilization Acronis Snap Deploy uses Internet Group Management Protocol (IGMP) for the multicasting. Therefore, all the network hardware (routers and/or switches) must be IGMP-capable and correctly configured. The specific information on configuring any particular router or switch is usually available in the documentation, provided with the hardware.
Deployment Figure 47. Deployment template comments The more details that you include, the lower the risk that you’ll use the wrong deployment template. 6.16 Deployment Summary Next you will see the deployment summary. You can save the template you have just created by checking Save the template. Figure 48. Deployment script Click Proceed to start the deployment. Copyright © Acronis, Inc.
Deployment 6.17 Managing templates With the Acronis Snap Deploy Management Console, you can manage deployment templates (create and save new templates, edit or delete existing ones) without launching the deployment process. All deployment templates you have saved are stored on the Acronis OS Deploy Server, so you have to establish a connection with the OS Deploy Server to manage them. All existing templates are listed in the Templates tab of the Management Console window. Figure 49.
Remote management operations Chapter 7. Remote management operations 7.1 File management on a remote PC The Acronis Snap Deploy Management Console allows you to manage files and folders on a remote PC. You can create and edit text files (for example batch files or scripts), copy files/folders to the clipboard, paste them, or rename and delete files/folders. The Acronis Snap Deploy Management Agent must be installed on a remote PC to perform file management operations.
Remote management operations 1. Select a directory where you want to create a folder and click on the Create new folder button. 2. Enter a file name in the New folder window and click OK. Copy file/folder to clipboard Select a file/folder you want to copy to the clipboard and click on the Copy button. You can copy files/folders from the remote PC and paste them to your local machine and vice versa.
Remote management operations Figure 51. Application selection Click Next to continue. Selecting task start parameters After selecting an application, you must set task execution parameters. Figure 52. Start parameters Do not start automatically – a task will not be executed. You can select this variant to leave it disabled. Daily – a task will be executed daily at the specified time (selected on the next step). Copyright © Acronis, Inc.
Remote management operations Weekly – a task will be executed weekly or in some weeks at the specified time and day (selected on the next step). Monthly – a task will be executed monthly at the specified time and day (selected on the next step). One time only – a task will be executed once at the specified time and day (selected on the next step). When my computer starts – a task will be executed at OS startup. When I log on – a task will be executed when you log into the OS.
Remote management operations Even if the computer is turned off at the time when the task was scheduled to run, you can execute the task later. To do this, check the parameter If the computer was turned off at the time when the task was scheduled to run, the system will perform the task the next time it is restarted. In this case, the task will be executed at the next startup. Setting up weekly execution If you select weekly execution, you will have to specify some additional parameters.
Remote management operations Figure 55. Monthly parameters Even if the computer is turned off at the time when the task was scheduled to run, you can execute the task later. To do this, check the parameter If the computer was turned off at the time when the task was scheduled to run, the system will perform the task the next time it is restarted. Setting up one time execution If you select one-time execution, you will have to specify some additional parameters. First, the Start time (hours and minutes).
Remote management operations Figure 56. One time parameters Even if the computer is turned off at the time when the task was scheduled to run, you can execute the task later. To do this, check the parameter If the computer was turned off at the time when the task was scheduled to run, the system will perform the task the next time it is restarted. Entering user name Specify the name of the user who owns the executed task. Figure 57. User information In the upper field enter user name.
Remote management operations Figure 58. Scheduled tasks 68 Copyright © Acronis, Inc.