
Specifications


55
Copyright © Acronis, Inc., 2000-2010
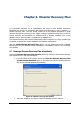
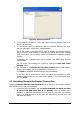
Figure 42. Selecting databases
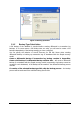
3. Choose whether you want to receive the Disaster Recovery Plan by e-mail or to
view it in HTML format
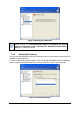
4. If in the previous step you selected to receive the Disaster Recovery Plan by e-
mail, you will need to specify the e-mail parameters
Specify the e-mail account that will be used for sending the Disaster Recovery
Plan. Provide the e-mail address to which the plan will be sent and the outgoing
SMTP server name. You can specify several e-mail addresses separating them by
commas
A Username and a password may also be needed if the SMTP server requires
authentication.
You can check if the settings are correct by clicking the Send test E-Mail
message button
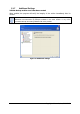
5. The final stage of the Disaster Recovery Plan Creation wizard is the summary
window, which display the list of operations to be performed.
Click Finish to obtain the Disaster Recovery Plan immediately.
In the latter case an e-mail will be sent to the address you specified or a HTML
version of the Disaster Recovery Plan will be opened in your web browser after
you click Finish.
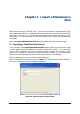
6.2 Scheduling Receipt of the Disaster Recovery Plan
Launch the Disaster Recovery Plan Creation wizard by clicking on the Disaster Recovery
Plan operation icon in the main workspace.
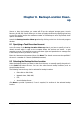
1. In the first step of the wizard, use the Define databases for which you want
to receive the plan each time it is updated option to choose which
databases to generate the Disaster Recovery Plan for each time any changes
occur. The updated version of the plan will automatically be sent to e-mail
addresses you specify.