
User manual

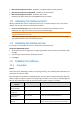
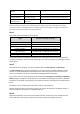
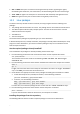


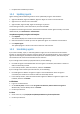
Table Of Contents
- 1 User's Guide
- 1.1 About the backup service
- 1.2 Software requirements
- 1.3 Activating the backup account
- 1.4 Accessing the backup service
- 1.5 Installing the software
- 1.6 Backup console views
- 1.7 Backup
- 1.8 Recovery
- 1.9 Operations with backups and backup plans
- 1.10 Troubleshooting
- 2 Glossary

5
Microsoft Exchange Server 2013 – all editions, Cumulative Update 1 (CU1) and later.
Microsoft Exchange Server 2007/2010 – all editions, all service packs.
Microsoft Exchange Server 2003 – all editions, SP2 or later.
Hotfix http://support.microsoft.com/kb/908072 must be installed.
1.3 Activating the backup account
When an administrator creates a backup account for you, an email message is sent to your email
address. The message contains the following information:
An account activation link. Сlick the link and set the password for the backup account.
Remember your login that is shown on the account activation page.
Important You must provide these credentials when installing the agents on the machines that are
associated with this backup account.
A link to the backup console login page. Use this link to access the console in future. The login
and password are the same as in the previous step.
1.4 Accessing the backup service
You can log in to the backup service if you activated your backup account.
To log in to the backup service
1. Go to the backup service login page. The login page address was included in the activation email
message.
2. Type the login and password of the backup account.
3. Click Log in.
1.5 Installing the software
1.5.1 Preparation
Step 1
Choose the agent, depending on what you are going to back up. The following table summarizes the
information, to help you decide.
Note that Agent for Windows is installed along with any other agent installed in Windows (Agent for
VMware, Agent for Hyper-V, Agent for Exchange, Agent for SQL). If you install, for example, Agent for
SQL, you also will be able to back up the entire machine where the agent is installed.
What are you going to
back up?
Which agent do I need?
Where to install it?
Physical machines
running Windows
Agent for Windows
On the machine that will be backed up.
Physical machines
running Linux
Agent for Linux
On the machine that will be backed up.
Physical machines
running OS X
Agent for Mac
On the machine that will be backed up.
VMware ESX(i) virtual
machines
Agent for VMware
On a Windows machine that has network access to
vCenter Server and to the virtual machine storage.*