Backup Service Version 4 USERS'S GUIDE Revision: 7/27/2015
Table of contents 1 User's Guide ....................................................................................................................3 1.1 About the backup service ..........................................................................................................3 1.2 Software requirements ..............................................................................................................3 1.2.1 1.2.2 1.2.3 1.2.4 Supported web browsers ................................
1 User's Guide 1.1 About the backup service This service enables backup and recovery of physical and virtual machines, files, and databases to local or cloud storage. This service is available through a web interface. 1.2 1.2.1 Software requirements Supported web browsers The backup service web interface supports the following web browsers: Google Chrome 29 or later Mozilla Firefox 23 or later Opera 16 or later Windows Internet Explorer 10 or later Safari 5.1.
Various x86 and x86_64 Linux distributions, including: Red Hat Enterprise Linux 4.x, 5.x, 6.x, and 7.x Ubuntu 9.10, 10.04, 10.10, 11.04, 11.10, 12.04, 12.10, 13.04, 13.10, 14.04, 14.10, and 15.04 Fedora 11, 12, 13, 14, 15, 16, 17, 18, 19, 20, 21, and 22 SUSE Linux Enterprise Server 10 and 11 SUSE Linux Enterprise Server 12 – supported on file systems, except for Btrfs Debian 4, 5, 6, 7.0, 7.2, 7.4, 7.5, 7.6, 7.7, 8.0, and 8.1 CentOS 5.x, 6.x, and 7.0 Oracle Linux 5.x, 6.x, 7.0, and 7.
Microsoft Exchange Server 2013 – all editions, Cumulative Update 1 (CU1) and later. Microsoft Exchange Server 2007/2010 – all editions, all service packs. Microsoft Exchange Server 2003 – all editions, SP2 or later. Hotfix http://support.microsoft.com/kb/908072 must be installed. 1.3 Activating the backup account When an administrator creates a backup account for you, an email message is sent to your email address. The message contains the following information: An account activation link.
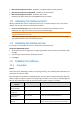
Hyper-V virtual machines Agent for Hyper-V On the Hyper-V host. SQL databases Agent for SQL On the machine running Microsoft SQL Server. Exchange databases Agent for Exchange On the machine running Microsoft Exchange Server. Virtual machines hosted The same as for physical on Windows Azure machines** On the machine that will be backed up. *If your ESX(i) uses a SAN attached storage, install the agent on a machine connected to the same SAN.
443 and 8443 These ports are used for accessing the backup console, registering the agents, downloading the certificates, user authorization, and downloading files from the cloud storage. 7770...7800 The agents use these ports to communicate with the backup management server. 44445 The agents use this port for data transfer during backup and recovery. 1.5.
Linux distribution Red Hat Enterprise Linux Package names How to install kernel-devel gcc make The setup program will download and install the packages automatically by using your Red Hat subscription. perl Run the following command: yum install perl CentOS Fedora kernel-devel gcc make The setup program will download and install the packages automatically.
Linux version 2.6.35.6-45.fc14.i686 gcc version 4.5.1 2. Obtain the kernel-devel and gcc packages that correspond to this kernel version: kernel-devel-2.6.35.6-45.fc14.i686.rpm gcc-4.5.1-4.fc14.i686.rpm 3. Obtain the make package for Fedora 14: make-3.82-3.fc14.i686 4. Install the packages by running the following commands as the root user: rpm -ivh kernel-devel-2.6.35.6-45.fc14.i686.rpm rpm -ivh gcc-4.5.1.fc14.i686.rpm rpm -ivh make-3.82-3.fc14.
7. Complete the installation procedure. 1.5.4 Updating agents Agents starting with the following versions can be updated by using the web interface: Agent for Windows, Agent for VMware, Agent for Hyper-V: version 11.9.191 and later Agent for Linux: version 11.9.179 and later Agent for Mac, Agent for SQL, Agent for Exchange: any version To find the agent version, select the machine, and then click Info. To update from earlier agent versions, download and install the newest agent manually.
In OS X 1. 2. 3. 4. 5. Double-click the installation file (.dmg). Wait while the operating system mounts the installation disk image. Inside the image, run the Uninstall.tool file. If prompted, provide administrator credentials. Confirm your decision. 1.6 Backup console views The backup console has two views: a simple view and a table view. To switch between the views, click the corresponding icon in the top right corner. The simple view supports up to five machines.
To apply a backup plan to machines 1. Select the machines that you want to back up. 2. Click Backup. If a common backup plan is already applied to the selected machines, click Add backup plan. The software displays previously created backup plans, if any, or a new backup plan template. 3. [Optional] To select another backup plan or to create a new backup plan, click the arrow next to the backup plan name. 4. [Optional] To modify the plan parameters, click the corresponding section of the backup plan panel.
SQL databases Direct selection (p. 16) Exchange databases Direct selection (p. 16) 1.7.2 Selecting data to back up 1.7.2.1 Selecting disks/volumes Always full (p. 19) Weekly full, daily incremental (p. 19) Custom (F-I) (p. 19) Always full (p. 19) Weekly full, daily incremental (p. 19) Custom (F-I) (p. 19) A disk-level backup contains a copy of a disk or a volume in a packaged form. You can recover individual disks, volumes, or files from a disk-level backup.
[Disk 1] selects the first disk of the machine, including all volumes on that disk. To select another disk, type the corresponding number. Rules for Linux /dev/hda1 selects the first volume on the first IDE hard disk. /dev/sda1 selects the first volume on the first SCSI hard disk. /dev/md1 selects the first software RAID hard disk.
3. In Select items for backup, select Using policy rules. 4. Select any of the predefined rules, type your own rules, or combine both. The policy rules will be applied to all of the machines included in the backup plan. If no data meeting at least one of the rules is found on a machine when the backup starts, the backup will fail on that machine. 5. Click Done. Selection rules for Windows Full path to a file or folder, for example D:\Work\Text.doc or C:\Windows.
MSSearch Service Background Intelligent Transfer Service (BITS) The registry Windows Management Instrumentation (WMI) Component Services Class registration database 1.7.2.4 Selecting SQL databases A backup of an SQL database contains the database files (.mdf, .ndf), log files (.ldf), and other associated files. The files are backed with the help of the SQL Writer service. The service must be running at the time that the Volume Shadow Copy Service (VSS) requests a backup or recovery.
To select Exchange Server data 1. Click Microsoft Exchange. Machines with Agent for Exchange installed are shown. 2. Browse to the data that you want to back up. Double-click a machine to view the databases (storage groups) it contains. 3. Select the data that you want to back up. If prompted, provide the credentials to access the data. 4. Click Backup. 1.7.2.6 File filters File filters define which files and folders to skip during the backup process.
The asterisk (*) substitutes for zero or more characters in a file name. For example, the criterion Doc*.txt matches files such as Doc.txt and Document.txt The question mark (?) substitutes for exactly one character in a file name. For example, the criterion Doc?.txt matches files such as Doc1.txt and Docs.txt, but not the files Doc.txt or Doc11.
You can set a date range for when the schedule is effective. Select the Run backup plan within a date range check box, and then specify the date range. 1.7.4.2 File-level backups The scheduling parameters of a file-level backup depend on the backup destination. With any destination, you can set a date range for when the schedule is effective. Select the Run backup plan within a date range check box, and then specify the date range.
Specify the maximum number of backups to keep. Keep backups indefinitely Note A backup stored in a local or network folder cannot be deleted if it has dependent backups that are not subject to deletion. Such backup chains are deleted only when the lifetime of all their backups expires. This requires extra space for storing backups whose deletion is postponed. Also, the backup age and number of backups may exceed the values you specify. 1.7.6 1. 2. 3. 4.
2. Do any of the following: Burn a CD/DVD using the ISO file. Create a bootable USB flash drive by using the ISO file and one of the free tools available online. Use ISO to USB or RUFUS if you need to boot an UEFI machine, Win32DiskImager for a BIOS machine. In Linux, using the dd utility makes sense. Connect the ISO file as a CD/DVD drive to the virtual machine that you want to recover. To create bootable media in OS X 1.
The recovery progress is shown in the Status column for the machine. 1.8.3.2 Virtual machine The backup service web interface enables you to overwrite a virtual machine with its backed-up version. Overwriting a machine means that only the content of its original disks is overwritten. The content of disks that were added after the backup will remain the same. A virtual machine must be stopped during the recovery to this machine. The software stops the machine without a prompt.
a. Ensure that the number of the target machine disks and each disk capacity are equal to or exceed those of the original machine, and then click Apply RAID/LVM. b. Review the volume structure, and then click Apply RAID/LVM to create it. 10. If you are recovering an operating system to dissimilar hardware, choose to use the Universal Restore feature.
2. Click Recover > More ways to recover... > Download files. 3. Log in with your backup account credentials. 4. [When browsing disk-level backups] Under Versions, click the backup from which you want to recover the files. [When browsing file-level backups] You can select the backup date and time in the next step, under the gear icon located to the right of the selected file. By default, files are recovered from the latest backup. 5.
To recover from cloud storage, select Cloud storage. Enter the credentials of the backup account to which the backed up machine was assigned. 6. 7. 8. 9. 10. 11. To recover from a local or a network folder, browse to the folder under Local folders or Network folders. Click OK to confirm your selection. Select the backup from which you want to recover the data. If prompted, type the password for the backup. In Backup contents, select Folders/files. Select the data that you want to recover.
8. Click Recover. 9. By default, the databases are recovered to the original ones. If the original database does not exist, it will be recreated. You can select another machine or another SQL Server instance to recover the databases to. To recover a database as a different one to the same instance: a. Click the database name. b. In Recover to, select New database. c. Specify the new database name. d. Specify the new database path and log path.
databases which existed in the instance at the time of the backup. After recovering the master database, you may need to do the following: Databases that have appeared in the instance after the backup was done are not visible by the instance. To bring these databases back to production, attach them to the instance manually by using SQL Server Management Studio. Databases that have been deleted after the backup was done are displayed as offline in the instance.
d. Specify the new database path and log path. The folder you specify must not contain the original database and log files. 10. Click Start recovery. 11. If the databases are recovered to the original ones, confirm overwriting the databases with their backed-up versions. The recovery progress is shown in the Status column for the machine. 1.8.7.1 Mounting Exchange Server databases After recovering the database files, you can bring the databases online by mounting them.
4. 5. 6. 7. Click the gear icon next to the backup plan name, and then click Edit. To modify the plan parameters, click the corresponding section of the backup plan panel. Click Save changes. To change the backup plan for all machines to which it is applied, click Apply the changes to this backup plan. Otherwise, click Create a new backup plan only for the selected resources. To revoke a backup plan from machines 1. Select the machines that you want to revoke the backup plan from. 2. Click Backup. 3.
2 Glossary B Backup set A group of backups to which an individual retention rule can be applied. For the Custom backup scheme, the backup sets correspond to the backup methods (Full, Differential, and Incremental). In all other cases, the backup sets are Monthly, Daily, Weekly, and Hourly. A monthly backup is the first backup created after a month starts. A daily backup is the first backup created after a day starts.