Acronis® Backup & Recovery 10™ Advanced Server Virtual Edition User's Guide
Copyright © Acronis, Inc., 2000-2010. All rights reserved. “Acronis” and “Acronis Secure Zone” are registered trademarks of Acronis, Inc. "Acronis Compute with Confidence", “Acronis Startup Recovery Manager”, “Acronis Active Restore” and the Acronis logo are trademarks of Acronis, Inc. Linux is a registered trademark of Linus Torvalds. VMware and VMware Ready are trademarks and/or registered trademarks of VMware, Inc. in the United States and/or other jurisdictions.
Table of contents 1 Introducing Acronis® Backup & Recovery™ 10 ........................................................................7 1.1 Acronis Backup & Recovery 10 overview ..................................................................................7 1.2 Getting started...........................................................................................................................8 1.2.1 1.3 Acronis Backup & Recovery 10 components ................................................
2.14.6 2.14.7 2.14.8 3 Options ...............................................................................................................................88 3.1 Console options .......................................................................................................................88 3.1.1 3.1.2 3.1.3 3.1.4 3.1.5 3.2 3.3 Machine management..................................................................................................................................
.6.5 6 Time since last backup ................................................................................................................................ 178 Direct management ........................................................................................................... 180 6.1 Administering a managed machine .......................................................................................180 6.1.1 6.1.2 6.1.3 6.2 Creating a backup plan .......................................
.8 Acronis Secure Zone ..............................................................................................................248 6.8.1 6.8.2 6.9 Creating Acronis Secure Zone .................................................................................................................... 248 Managing Acronis Secure Zone .................................................................................................................. 250 Acronis Startup Recovery Manager ......................
1 Introducing Acronis® Backup & Recovery™ 10 1.1 Acronis Backup & Recovery 10 overview Based on Acronis’ patented disk imaging and bare metal restore technologies, Acronis Backup & Recovery 10 succeeds Acronis True Image Echo as the next generation disaster recovery solution.
Overview of all configured and running operations with color-coding for successful and failed operations Enterprise level of security Controlling user rights to perform operations and access backups Running services with minimal user rights Restricted remote access to a backup agent Secure communication between the product components Using third-party certificates for authentication of the components Data encryption options for both data transmission and storage Backup of remote machines to a centralize
have a choice between Windows and Linux console distributions. Install Acronis Bootable Media Builder. 4. Start the console. Create the bootable media. 5. Connect the console to the management server. The simplified way of centralized management Backup Using the Back up control, select the machine which you want to back up and then create a backup plan (p. 368) on the machine. You can create backup plans on multiple machines in turn.
4. Ensure that the backup plans you create use the managed vault as destination for the backup archives. Creating a backup policy rather than backup plans Set up a centralized backup policy and apply it to the All machines group. This way you will deploy backup plans on each machine with a single action. Select Actions > Create backup policy from the top menu and then refer to the context help.
Navigation pane Contains the Navigation tree and the Shortcuts bar and lets you navigate to the different views (see the Navigation pane (p. 11) section.) Actions and tools pane Contains bars with a set of actions that can be performed and tools (see the Actions and Tools pane (p. 12) section). Main area The main place of working, where you create, edit and manage backup plans, policies, tasks and perform other operations. Displays the different views and action pages (p.
Dashboard. Use this view to estimate at a glance whether the data is successfully protected on the machines registered on the management server. Backup policies. Use this view to manage backup policies existing on the management server. Physical machines. Use this view to manage machines registered on the management server. Virtual machines. Use this view to manage virtual machines from the registered physical machines and from the registered machines with the agent for ESX/ESXi. Vaults.
All actions can also be accessed in the respective menu items. A menu item appears on the menu bar when you select an item in any of the navigation views. Examples of "'Item name' actions" bars Actions Contains a list of common operations that can be performed on a managed machine or on a management server. Always the same for all views. Clicking the operation opens the respective action page (see the Action pages (p. 15) section.) All the actions can also be accessed in the Actions menu.
Operations with panes How to expand/minimize panes By default, the Navigation pane appears expanded and the Actions and Tools - minimized. You might need to minimize the pane in order to free some additional workspace. To do this, click the chevron ( - for the Navigation pane; - for the Actions and tools pane). The pane will be minimized and the chevron changes its direction. Click the chevron once again to expand the pane. How to change the panes' borders 1. Point to the pane's border. 2.
Common way of working with views Generally, every view contains a table of items, a table toolbar with buttons, and the Information panel. Use filtering and sorting capabilities to search the table for the item in question In the table, select the desired item In the Information panel (collapsed by default), view the item's details Perform actions on the selected item.
the available fields are displayed. You can switch between the views by selecting the Advanced view check box at the top of the action page. Most settings are configured by clicking the respective Change… links to the right. Others are selected from the drop-down list, or typed manually in the page's fields. Action page - Controls Acronis Backup & Recovery 10 remembers the changes you made on the action pages.
Console The console provides Graphical User Interface and remote connection to the agents and other Acronis Backup & Recovery 10 components. Usage of the console is not licensed. Bootable media builder With bootable media builder, you can create bootable media in order to use the agents and other rescue utilities in a rescue environment. Availability of the agent add-ons in a rescue environment depends on whether an add-on is installed on the machine where the media builder is working. 1.3.
Deduplication This add-on enables the agent to back up data to deduplicating vaults managed by Acronis Backup & Recovery 10 Storage Node. Agent for Hyper-V Acronis Backup & Recovery 10 Agent for Hyper-V protects virtual machines residing on a Hyper-V virtualization server. The agent allows for backing up virtual machines from the host without having to install agents on each virtual machine.
Management Server Acronis Backup & Recovery 10 Management Server is the central server that drives data protection within the enterprise network. The management server provides the administrator with: a single entry point to the Acronis Backup & Recovery 10 infrastructure an easy way to protect data on numerous machines (p. 375) using backup policies (p. 368) and grouping enterprise-wide monitoring and reporting functionality the ability to create centralized vaults (p.
Storage Node Acronis Backup & Recovery 10 Storage Node is a server aimed to optimize usage of various resources (such as the corporate storage capacity, the network bandwidth, or the managed machines' CPU load) required for the enterprise data protection. This goal is achieved through organizing and managing the locations that serve as dedicated storages of the enterprise backup archives (managed vaults).
If the archive is already encrypted by the agent, the storage node-side encryption is applied over the encryption performed by the agent. PXE Server Acronis PXE Server allows for booting machines into Acronis bootable components through the network. The network booting: Eliminates the need to have a technician onsite to install the bootable media (p.
1.3.7 Acronis Wake-On-LAN Proxy Acronis Wake-On-LAN Proxy enables Acronis Backup & Recovery 10 Management Server to wake up for backup machines located in another subnet. Acronis Wake-On-LAN Proxy installs on any server in the subnet where the machines to be backed up are located. 1.
Windows 2000 Server/2000 Advanced Server/Server 2003/Server 2008* Windows SBS 2003/SBS 2008* Windows XP Professional x64 Edition, Windows Server 2003/2008* x64 Editions Windows Vista - all editions except for Vista Home Basic and Vista Home Premium Windows 7 - all editions except for the Starter and Home editions* * Acronis Backup & Recovery 10 Storage Node handles tape libraries and autoloaders by using Removable Storage Management (RSM).
x64 versions of the above Linux distributions and other Linux distributions are also supported. The agent for Linux is in fact a 32-bit executable. For authentication, the agent uses system libraries, 32-bit versions of which are not always installed by default with 64-bit distributions. When using the agent on a 64-bit RedHat based distribution, such as RHEL, CentOS, Fedora or Scientific Linux, make sure that the following 32-bit packages are installed in the system: pam.i386 libselinux.i386 libsepol.
Agent for Linux 65 MB 150 MB 70 MB Bootable Media Builder 70 MB 240 MB 140 MB Management Console 25 MB 100 MB 40 MB The components installed on VMware ESX(i) server Agent for ESX/ESXi Virtual Appliance 512 MB 5 GB 5 GB (the Virtual Appliance memory setting) CPU reservation: minimum 300 MHz recommended In a vCenter cluster, a shared storage is required Network interface card or virtual network adapter is a common requirement for all the components.
2 Understanding Acronis Backup & Recovery 10 This section attempts to give its readers a clear understanding of the product so that they can use the product in various circumstances without step-by-step instructions. 2.1 Basic concepts Please familiarize yourself with the basic notions used in the Acronis Backup & Recovery 10 graphical user interface and documentation. Advanced users are welcome to use this section as a step-by-step quick start guide. The details can be found in the context help.
The following diagram illustrates the notions discussed above. For more definitions please refer to the Glossary. Copyright © Acronis, Inc.
Backup using bootable media You can boot the machine using the bootable media, configure the backup operation in the same way as a simple backup plan and execute the operation. This will help you extract files and logical volumes from a system that failed to boot, take an image of the offline system or back up sector-bysector an unsupported file system. Recovery under operating system When it comes to data recovery, you create a recovery task on the managed machine.
The following diagram illustrates data recovery under the operating system (online). No backup can proceed on the machine while the recovery operation is taking place. If required, you can connect the console to another machine and configure a recovery operation on that machine. This ability (remote parallel recovery) first appeared in Acronis Backup & Recovery 10; the previous Acronis products do not provide it.
If the machine fails to boot or you need to recover data to bare metal, you boot the machine using the bootable media and configure the recovery operation in the same way as the recovery task. The following diagram illustrates the recovery using the bootable media. 2.2 User privileges on a managed machine Windows When managing a machine running Windows, the scope of a user's management rights depends on the user's privileges on the machine.
View and manage backup plans and tasks owned by any user on the machine. Linux When managing a machine running Linux, the user has or obtains the root privileges, and so can: Back up and recover any data or the entire machine, having full control over all Acronis Backup & Recovery 10 agent operations and log files on the machine. Manage local backup plans and tasks owned by any user registered in the operating system.
You can skip the Plan's (Task) credentials step. Every time you start the task, the task will run under the credentials with which you are currently logged on. Any person that has administrative privileges on the machine can also start the task. The task will run under this person's credentials. The task will always run under the same credentials, regardless of the user who actually starts the task, if you specify the task credentials explicitly. To do so, on the plan (task) creation page: 1.
Example: An Internet cafe, school or university lab where the administrator often undoes changes made by the students or guests but rarely updates the reference backup (in fact, after installing software updates only). The backup time is not crucial in this case and the recovery time will be minimal when recovering the systems from the full backup. The administrator can have several copies of the full backup for additional reliability.
2.5 GFS backup scheme This section covers implementation of the Grandfather-Father-Son (GFS) backup scheme in Acronis Backup & Recovery 10. With this backup scheme you are not allowed to back up more often than once a day. The scheme enables you to mark out the daily, weekly and monthly cycles in your daily backup schedule and set the retention periods for the daily, monthly and weekly backups.
created on this day of the week will be considered as a monthly backup. Backups created on the other days will be considered as daily backups. Assume you select Friday for Weekly/Monthly backup. Here is the total schedule marked out according to the selection. “D” stands for the backup that is considered Daily. “W” stands for the backup that is considered Weekly. “M” stands for the backup that is considered Monthly. The schedule marked out according to the GFS scheme.
The resulting archive: ideal Assume you select to keep daily backups for 7 days, weekly backups for 2 weeks and monthly backups for 6 months. Here is how your archive would appear after the backup plan is launched if all the backups were full and so could be deleted as soon as the scheme requires. The left column shows days of the week. For each day of the week, the content of the archive after the regular backup and the subsequent cleanup is shown. “D” stands for the backup that is considered Daily.
When using the incremental and differential backup methods, you cannot delete a backup as soon as the scheme requires if later backups are based on this backup. Regular consolidation is unacceptable because it takes too much system resources. The program has to wait until the scheme requires the deletion of all the dependent backups and then deletes the entire chain. Here is how the first month of your backup plan will appear in real life. “F” stands for full backup. “Dif” stands for differential backup.
Tower of Hanoi overview The Tower of Hanoi scheme is based on a mathematical puzzle of the same name. In the puzzle a series of rings are stacked in size order, the largest on the bottom, on one of three pegs. The goal is to move the ring series to the third peg. You are only allowed to move one ring at a time, and are prohibited from placing a larger ring above a smaller ring. The solution is to shift the first ring every other move (moves 1, 3, 5, 7, 9, 11...
incremental backups on first level (A) - to gain time and storage savings for the most frequent backup operations; but data recovery from such backups takes longer because it generally requires access to three backups full backups on the last level (E for five-level pattern) - the rarest backups in the scheme, take more time and occupy more space in storage differential backups on all intermediate levels (B, C and D for five-level pattern) an old backup on a level is kept until a new back
The retention rules are effective if the archive contains more than one backup. This means that the last backup in the archive will be kept, even if a retention rule violation is detected. Please do not try to delete the only backup you have by applying the retention rules before backup. This will not work. Use the alternative setting Clean up archive > When there is insufficient space while backing up (p. 210) if you accept the risk of losing the last backup. 1.
Combination of rules 1 and 2 You can limit both the backups’ lifetime and the archive size. The diagram below illustrates the resulting rule. Example Delete backups older than = 3 Months Keep the archive size within = 200GB Never delete backups younger than = 10 Days Every time the retention rules are applied, the program will delete all backups created more than 3 months (or more exactly, 90 days) ago.
Please be aware that consolidation is just a method of deletion but not an alternative to deletion. The resulting backup will not contain data that was present in the deleted backup and was absent from the retained incremental or differential backup. Backups resulting from consolidation always have maximum compression. This means that all backups in an archive may acquire the maximum compression as a result of repeated cleanup with consolidation.
Recovering dynamic volumes A dynamic volume can be recovered over any type of existing volume to unallocated space of a disk group to unallocated space of a basic disk. Recovery over an existing volume When a dynamic volume is recovered over an existing volume, either basic or dynamic, the target volume’s data is overwritten with the backup content. The type of target volume (basic, simple/spanned, striped, mirrored, RAID 0+1, RAID 5) will not change.
Unallocated space (basic GPT disk) Basic GPT volume Basic GPT volume Basic GPT volume Moving and resizing volumes during recovery You can resize the resulting basic volume, both MBR and GPT, during recovery, or change the volume's location on the disk. A resulting dynamic volume cannot be moved or resized. Preparing disk groups and volumes Before recovering dynamic volumes to bare metal you should create a disk group on the target hardware.
For detailed instructions on how to recover logical volumes, see Recovering MD devices and logical volumes (p. 263). You do not need to create the volume structure if it already exists on the machine (such is the case when some data on the volume was lost, but no hard disks were replaced). How to select logical volumes to back up Logical volumes appear at the end of the list of volumes available for backup. Basic volumes included in logical volumes are also shown in the list with None in the Type column.
2.10 Backing up RAID arrays (Linux) Acronis Backup & Recovery 10 Agent for Linux can back up and recover Linux Software RAID devices (known as multiple-disk devices or MD devices) and hardware RAID arrays. Software RAID arrays Software RAID arrays, or MD devices, combine several volumes and make solid block devices (/dev/md0, /dev/md1, ..., /dev/md31), information of which is stored in /etc/raidtab or in dedicated areas of those volumes.
Recovery Parameters of software RAID arrays are not backed up, so they can only be recovered over a basic volume, to unallocated space, or to a previously configured array. Recovery can be performed in Linux or a Linux-based bootable media. When started from bootable media, the bootable agent tries to access parameters of a software disk array and configure it. However, if the necessary information is lost, the array cannot be configured automatically.
A virtual machine can be online (running), offline (stopped), suspended, or switch between the three states during backup. A virtual machine has to be offline (stopped) during the recovery to this machine. The machine will be automatically stopped before recovery. You can opt for manual stopping of machines (p. 126). Virtual machine backup vs. the machine's volumes backup Backing up a virtual machine means backing up all the machine's disks plus the machine configuration.
Microsoft Windows 7 Linux platform. Guest HDD The following virtual disk configurations are supported. Partitioning style: MBR Volume types: basic and dynamic volumes. Dynamic volumes (LDM in Windows and LVM in Linux) are supported to the same extent as on physical machines. The LDM/LVM structure needs to be created prior to the recovery if you want to retain the LDM/LVM. To do so, you will have to boot the target virtual machine using bootable media (p.
4. Right click the virtual machine and select Install/Upgrate VMware Tools. 5. Follow the onscreen instructions. 2.12 Tape support Acronis Backup & Recovery 10 supports tape libraries, autoloaders, SCSI and USB tape drives as storage devices. A tape device can be locally attached to a managed machine (in this case, the Acronis Backup & Recovery 10 Agent writes and reads the tapes) or accessed through the Acronis Backup & Recovery 10 Storage Node (p. 20).
Backup to a locally attached tape device When creating a backup plan, you are able to select the locally attached tape device as the backup destination. An archive name is not needed when backing up to a tape. An archive can span multiple tapes but can contain only one full backup and an unlimited number of incremental backups. Every time you create a full backup, you start with a new tape and create a new archive. As soon as the tape is full, a dialog window with a request to insert a new tape will appear.
Should the disk experience a physical failure, the zone and the archives located there will be lost. That's why Acronis Secure Zone should not be the only location where a backup is stored. In enterprise environments, Acronis Secure Zone can be thought of as an intermediate location used for backup when an ordinary location is temporarily unavailable or connected through a slow or busy channel.
Acronis Startup Recovery Manager is especially useful for mobile users. If a failure occurs, the user reboots the machine, hits F11 on prompt "Press F11 for Acronis Startup Recovery Manager…" and performs data recovery in the same way as with ordinary bootable media. The user can also back up using Acronis Startup Recovery Manager, while on the move. On machines with the GRUB boot loader installed, the user selects the Acronis Startup Recovery Manager from the boot menu instead of pressing F11.
1. Instant recovery of a failed system on different hardware. 2. Hardware-independent cloning and deployment of operating systems. 3. Physical-to-physical, physical-to-virtual and virtual-to-physical machine migration. The Universal Restore principles 1. Automatic HAL and mass storage driver selection. Universal Restore searches for drivers in the network folders you specify, on removable media and in the default driver storage folders of the system being recovered.
Universal Restore for the other product editions is purchased separately, has its own license, and is installed as a separate feature from the setup file. You need to re-create bootable media to make the newly installed add-on operational in the bootable environment. 2.13.4 Acronis Active Restore Active Restore is the Acronis proprietary technology that brings a system online immediately after the system recovery is started.
If you opt for Acronis Active Restore, the system will be operational in a short time. Users will be able to open the necessary files from the storage and use them while the rest of the files, which are not immediately necessary, are being recovered in the background. Examples: movie collection storage, music collection storage, multimedia storage. How to use 1. Back up the system disk or volume to a location accessible through the system’s BIOS.
What if you have to manage hundreds of machines? It takes time to create a backup plan on each machine, while the plans may be quite similar – you need to back up, say, the system drive and the users' documents. Tracking the plans' execution on each machine separately is also time-consuming. To be able to propagate the management operations to multiple machines, you install Acronis Backup & Recovery 10 Management Server (p. 376) and register (p. 377) the machines on the server.
2.14.2 Setting up centralized data protection in a heterogeneous network Assume that the network infrastructure includes servers (1, 2, 9) and workstations (3, 5-8) running Windows and Linux. You also have a VMware ESX server (4) that hosts two guest systems. You have to protect each server as a whole, the users' data on the workstations, and the virtual machines.
5. Install Acronis Backup & Recovery 10 Storage Node [ASN] on one of the Windows servers (9). The storage node enables you to organize the infrastructure for storing backup archives and to use the deduplication functionality. The node can be installed together with the management server if the host is capable enough. When installing the storage node, register it on the management server in the same way as you register the agents.
b. select the server c. select the Backup plans and tasks tab on the Information pane. When you need and have the opportunity to back up any of the servers, navigate to the backup plan as described above, select the plan and run it. Protecting the workstations Here is how to set up the most popular schedule: weekly full backup and daily incremental backup of users' default document folders. In addition, we will retain only backups from the last 7 days. 1.
Register the virtual appliance (Agent for ESX/ESXi) on the management server. All virtual machines, except for the virtual appliance, will appear in the All virtual machines group. You can group these machines and apply any policy that backs up disks or volumes to them. Install Agent for Windows or Agent for Linux on each virtual machine. Register the machines on the management server. The machines will be considered as physical machines.
Using custom groups Grouping helps the administrator to organize data protection by company departments, by Active Directory organizational units, by various populations of users, by the site locations and the like. To make the best use of the AD OU criterion, consider reproducing the Active Directory hierarchy in the management server. Grouping by the IP address range enables taking account of the network topology. The groups you create can be nested.
a backup policy to the group. Any server, that is added to the network and registered on the management server, will appear in this group and the policy will be applied to it automatically. To protect the salesmen's workstations with a different policy, the administrator creates the G2 dynamic group using the AD OU criterion. Any change in the OU membership of a machine will be reflected in the G2 membership.
Operations with groups to which backup policies are applied will result in changing the policies on the member machines. On any hierarchy change, that is, when moving, removing, creating groups; adding machines to static groups; or when machines enter a group based on dynamic criteria, a huge number of inheritance changes may occur.
3. A policy applied to a group cannot be revoked from a machine. 4. To revoke the policy from the machine, remove the machine from the group. The same policy on a group and on a machine 1. The same policy can be applied to a group and to a machine. Nothing changes on the machine at the second application of the same policy, but the server remembers that the policy has been applied twice. 2. A policy, revoked from the group, remains on the machine. 3.
Inheritance of policies Policy inheritance can be easily understood if we assume that a machine can be a member of only one group besides the All machines group. Let's start from this simplified approach. In the diagram below, the container stands for a group; the two-color circle stands for a machine with two applied policies; the three-color circle stands for a machine with three applied policies and so on. 66 Copyright © Acronis, Inc.
Besides the All machines group, we have the custom G1 group in the root and the custom G2 group, which is G1's child. The "green" policy, applied to the All machines group, is inherited by all machines. The "orange" policy, applied to G1, is inherited by the G1 members and all its child groups, both immediate and indirect. The "blue" policy, applied to G2, is inherited only by the G2 members since G2 does not have child groups. The "violet" policy is applied straight to machine #4.
#5 or #6 2.14.5 "green" Inherited All machines -> #5 or #6 "orange" Inherited G1 -> G2 -> #5 or #6 "blue" Inherited G2 -> #5 or #6 Backup policy's state and statuses Centralized management presumes that the administrator can monitor the health of the entire product infrastructure using a few easily understandable parameters. The state and status of a backup policy are included in such parameters.
Backup policy state diagram Policy status on a machine To see this parameter, select any group of machines in the tree, then select the machine, and then select the Backup policies tab on the Information pane. In each of the states, the backup policy can have one of the following statuses: Error; Warning; OK. While the policy is in the Deployed state, its status reflects how successfully the policy is executed.
/dev/sda1 volume (since the [System] volume is not found). The policy will get the Error status on Linux machines that do not have a SCSI device. The following table provides details.
Cumulative state and status of a policy In addition to the deployment state and status as related to a specific machine or group, the backup policy has a cumulative deployment state and a cumulative status. The cumulative state of a backup policy To see this parameter, select Backup policies in the tree. The Deployment state column displays the cumulative deployment state for each policy.
Performed in the vault after a backup is completed. The storage node analyses the vault's archives and deduplicates data in the vault. When creating a backup plan, you have the option to turn off deduplication at source for that plan. This may lead to faster backups but a greater load on the network and storage node. Deduplicating vault A managed centralized vault where deduplication is enabled is called a deduplicating vault.
1. It moves the items (disk blocks or files) from the archives to a special folder within the vault, storing duplicate items there only once. This folder is called the deduplication data store. Items that cannot be deduplicated remain in the archives. 2. In the archives, it replaces the moved items with the corresponding references to them. As a result, the vault contains a number of unique, deduplicated items, with each item having one or more references to it from the vault's archives.
Indexing of a backup requires that the vault have free space with a minimum size of 1.1 multiplied by the size of the archive the backup belongs to. If there is not enough free space in the vault, the indexing task will fail and start again after 5–10 minutes, on the assumption that some space has been freed up as a result of cleanup or of other indexing tasks. The more free space there is in the vault, the faster your archives will reduce to the minimum possible size.
If the volume is a compressed volume If the volume's allocation unit size—also known as cluster size or block size—is not divisible by 4 KB Tip: The allocation unit size on most NTFS and ext3 volumes is 4 KB and so allows for block-level deduplication. Other examples of allocation unit sizes allowing for block-level deduplication include 8 KB, 16 KB, and 64 KB.
Remote connection A remote connection is established between Acronis Backup & Recovery 10 Management Console on one machine and Acronis Backup & Recovery 10 Agent on another machine. You might need to specify logon credentials to establish a remote connection. To establish a remote connection 1. On the toolbar, click Connect, then point to New connection, and then click Manage a remote machine. 2.
Privileges for remote connection in Windows To establish a remote connection to a machine running Windows, the user must be a member of the Acronis Remote Users security group on that machine. After remote connection is established, the user has management rights on the remote machine as described in User rights on a managed machine (p. 30).
2. Add the names of the non-root users, whom you want to allow to connect to the machine remotely, to the Acronis_Trusted group. For example, to add the existing user user_a to the group, run the following command: usermod -G Acronis_Trusted user_a 3. Create the file /etc/pam.d/Acronisagent-trusted with the following content: #%PAM-1.0 auth required auth required account required pam_unix.so pam_succeed_if.so user ingroup Acronis_Trusted pam_unix.
Acronis Backup & Recovery 10 Management Server When Acronis Backup & Recovery 10 Management Server is being installed on a machine, two groups are created (or updated): Acronis Centralized Admins A user who is a member of this group is a management server administrator.
User privileges on a storage node The scope of a user's privileges on Acronis Backup & Recovery 10 Storage Node depends on the user's rights on the machine where the storage node is installed.
Rights for Acronis services The Acronis Backup & Recovery 10 Agent for Windows, Acronis Backup & Recovery 10 Management Server, and Acronis Backup & Recovery 10 Storage Node components run as services. When installing any of these components, you need to specify the account under which the component's service will run. For each service, you can either create a dedicated user account (recommended in most cases) or specify an existing account of a local or domain user—for example: .
This section also provides information on configuring communication settings, selecting a network port for communication, and managing security certificates. Secure communication Acronis Backup & Recovery 10 provides the capability to secure the data transferred between its components within a local area network and through a perimeter network (also known as demilitarized zone, DMZ).
Acronis Backup & Recovery 10 Bootable Agent Yes Yes Configuring communication settings You can configure communication settings, such as whether to encrypt transferred data, for Acronis Backup & Recovery 10 components installed on one or more machines, by using Acronis Administrative Template. For information on how to load the Administrative Template, see How to load Acronis Administrative Template (p. 331).
Client Encryption options Specifies whether to encrypt the transferred data when the component acts as a client application, and whether to trust self-signed SSL certificates. Select one of the following: Not configured The component will use the default settings, which is to use encryption if possible and to trust self-signed SSL certificates (see the following option). Enabled Encryption is enabled.
The component will use the default setting, which is to use encryption if possible (see the following option). Enabled Encryption is enabled. In Encryption, select one of the following: Enabled Data transfer will be encrypted if encryption is enabled on the client application, otherwise it will be unencrypted. Disabled Encryption is disabled; any connection to a client application which requires encryption will not be established.
Linux Specify the port in the /etc/Acronis/Policies/Agent.config file. Restart the Acronis_agent daemon. Configuring the port in a bootable environment While creating Acronis bootable media, you have the option to pre-configure the network port that will be used by the Acronis Backup & Recovery 10 Bootable Agent.
Tip: Alternatively, you can manage the list of certificates of a remote machine. To do this, click Another computer and then type the remote machine's name. 7. Click Close to close the Add Standalone Snap-in dialog box, and then click OK to close the Add/Remove Snap-in dialog box.
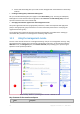
3 Options This section covers Acronis Backup & Recovery 10 options that can be configured using Graphical User Interface. The content of this section is applicable to both stand-alone and advanced editions of Acronis Backup & Recovery 10. 3.1 Console options The console options define the way information is represented in the Graphical User Interface of Acronis Backup & Recovery 10. To access the console options, select Options > Console options from the top menu. 3.1.
The preset is: Enabled for all results. To make a setting for each result (successful completion, failure or success with warnings) individually, select or clear the respective check box. 3.1.3 Time-based alerts Last backup This option is effective when the console is connected to a managed machine (p. 375) or to the management server (p. 376). The option defines whether to alert if no backup was performed on a given machine for a period of time.
The option defines the fonts to be used in the Graphical User Interface of Acronis Backup & Recovery 10. The Menu setting affects the drop-down and context menus. The Application setting affects the other GUI elements. The preset is: System Default font for both the menus and the application interface items. To make a selection, choose the font from the respective combo-box and set the font's properties. You can preview the font's appearance by clicking the button to the right. 3.
3.2.3 Event tracing You can configure the management server to log events in the Application Event Log of Windows, besides the management server's own log. You can configure the management server to send Simple Network Management Protocol (SNMP) objects to a specified SNMP manager. Windows event log This option defines whether the management server has to record its own log events in the Application Event Log of Windows (to see this log, run eventvwr.
3.2.4 Domain access credentials This option determines the user name and password that the management server will use to access the domain. The preset is: No credentials The management server needs domain access credentials when working with a dynamic group that is based on the Organizational unit criterion (p. 305). When you are creating such group and no credentials are given by this option, the program will ask you for credentials and save them in this option.
VMware vCenter integration This option defines whether to show virtual machines managed by a VMware vCenter Server in the management server and show the backup status of these machines in the vCenter. Integration is available in all Acronis Backup & Recovery 10 advanced editions; a license for Virtual Edition is not required. No software installation is required on the vCenter Server.
To access the machine options, connect the console to the managed machine and then select Options > Machine options from the top menu. 3.3.1 Machine management This option defines whether the machine has to be managed centrally by the Acronis Backup & Recovery 10 Management Server. To be able to use this option, you must be logged on as a member of the Administrators group on the machine.
This option defines whether the agent(s) operating on the managed machine have to log events in the Application Event Log of Windows (to see this log, run eventvwr.exe or select Control Panel > Administrative tools > Event Viewer). You can filter the events to be logged. You can override the settings set here, exclusively for the events that occur during backup or during recovery, in the Default backup and recovery options (p. 97).
Types of events to send – choose the types of events: All events, Errors and warnings, or Errors only. Server name/IP – type the name or IP address of the host running the SNMP management application, the messages will be sent to. Community – type the name of the SNMP community to which both the host running SNMP management application and the sending machine belong. The typical community is "public". To disable sending SNMP messages, clear the Send messages to SNMP server check box.
3.3.4 Customer Experience Program This option defines whether the machine will participate in the Acronis Customer Experience Program (ACEP). If you choose Yes, I want to participate in the ACEP, information about the hardware configuration, the most and least used features and about any problems will be automatically collected from the machine and sent to Acronis on a regular basis.
Source files exclusion (p. 100) + + + + + + Pre/Post backup commands (p. 101) + + + + PE only PE only Pre/Post data capture commands (p. 102) + + + + - - Multi-volume snapshot (p. 104) + + - - - - File-level backup snapshot (p. 104) - + - + - - Use VSS (p. 105) + + - - - - Compression level (p. 105) + + + + + + + + + + - - HDD writing speed (p. 106) Dest: HDD Dest: HDD Dest: HDD Dest: HDD Dest: HDD Dest: HDD Network connection speed (p.
Additional settings (p.
used for verification purposes. With this two-level security, the backup data is protected from any unauthorized access, but recovering a lost password is not possible. Source files exclusion This option is effective for Windows and Linux operating systems and bootable media. This option is effective for disk-level backup of NTFS and FAT file systems only. This option is effective for file-level backup of all supported file systems.
Pre/Post commands This option is effective for Windows and Linux operating systems and PE-based bootable media. The option enables you to define the commands to be automatically executed before and after the backup procedure. The following scheme illustrates when pre/post commands are executed.
Perform the backup only after the command is successfully executed. Fail the task if the command execution fails. the command execution and irrespective of the command execution result. command is executed despite execution failure or success. Post-backup command To specify a command/executable file to be executed after the backup is completed 1. In the Command field, type a command or browse to a batch file. 2.
Execute after the data capture 2. Do any of the following: Click Edit to specify a new command or a batch file Select the existing command or the batch file from the drop-down list 3. Click OK. Pre-data capture command To specify a command/batch file to be executed before data capture 1. In the Command field, type a command or browse to a batch file. The program does not support interactive commands, i.e. commands that require user input (for example, "pause".) 2.
Selected Do not back up until the command execution is complete Cleared Selected Cleared Result Preset Continue the backup after the Continue the backup command is only after the executed despite command is command successfully execution failure executed. Delete the or success. TIB file and temporary files and fail the task if the command execution fails. N/A Continue the backup concurrently with the command execution and irrespective of the command execution result.
When this option is set to Enable, snapshots of all volumes being backed up will be created simultaneously. Use this option to create a time-consistent backup of data spanned across multiple volumes, for instance for an Oracle database. When this option is set to Disable, the volumes' snapshots will be taken one after the other. As a result, if the data spans across several volumes, the resulting backup may be not consistent.
compressed files, such as .jpg, .pdf or .mp3. However, formats such as .doc or .xls will be compressed well. To specify the compression level Select one of the following: None – the data will be copied as is, without any compression. The resulting backup size will be maximal. Normal – recommended in most cases. High – the resulting backup size will typically be less than for the Normal level. Maximum – the data will be compressed as much as possible. The backup duration will be maximal.
Backing up to a fixed hard disk (for example, to Acronis Secure Zone) may slow performance of the operating system and applications because of the large amounts of data that needs to be written to the disk. You can limit the hard disk usage by the backup process to the desired level. The preset is: Maximum.
2. In the E-mail addresses field, type the e-mail address to which notifications will be sent. You can enter several addresses separated by semicolons. 3. Under Send notifications, select the appropriate check boxes as follows: When backup completes successfully – to send a notification when the backup task has completed successfully When backup fails – to send a notification when the backup task has failed The When user interaction is required check box is always selected. 4.
2. In the Machine name field, enter the name of the machine to which notifications will be sent. Multiple names are not supported.
Acronis Backup & Recovery 10 provides the following Simple Network Management Protocol (SNMP) objects to SNMP management applications: 1.3.6.1.4.1.24769.100.200.1.0 - string identifying the type of event (Information, Warning, Error) 1.3.6.1.4.1.24769.100.200.2.0 - string containing the text description of the event (it looks identical to messages published by Acronis Backup & Recovery 10 in its log). The preset is: Use the setting set in the Machine options.
Automatic With this setting, Acronis Backup & Recovery 10 will act as follows. When backing up to a hard disk: A single backup file will be created if the destination disk's file system allows the estimated file size. The backup will automatically be split into several files if the destination disk's file system does not allow the estimated file size. Such might be the case when the backup is placed on FAT16 and FAT32 file systems that have a 4GB file size limit.
To completely eliminate this kind of problem, disable preserving file security settings in archives. The recovered files and folders will always inherit the permissions from the folder to which they are recovered or from the disk, if recovered to the root. Alternatively, you can disable recovery (p. 122) of the security settings, even if they are available in the archive. The result will be the same - the files will inherit the permissions from the parent folder.
When a recoverable error occurs, the program re-attempts to perform the unsuccessful operation. You can set the time interval and the number of attempts. The attempts will be stopped as soon as the operation succeeds OR the specified number of attempts is performed, depending on which comes first. For example, if the backup destination on the network becomes unavailable or not reachable, the program will attempt to reach the destination every 30 seconds, but no more than 5 times.
You might have to provide the access credentials for the secondary destination. Enter the credentials on prompt. Task start conditions This option is effective in Windows and Linux operating systems. This option is not available when operating under bootable media. This option determines the program behavior in case a backup task is about to start (the scheduled time comes or the event specified in the schedule occurs), but the condition (or any of multiple conditions) is not met.
Skip the task execution Delaying a backup might be unacceptable, for example, when you need to back up data strictly at the specified time. Then it makes sense to skip the backup rather than wait for the conditions, especially if the events occur relatively often. Task failure handling This option is effective for Windows and Linux operating systems. This option is not available when operating under the bootable media. This option determines the program behavior when any of the backup plan's tasks fails.
Separate tape set is a tape set which contains only backups of the specific protected data. Other backups cannot be written to a separate tape set. (For the backup policy/plan to be created) Use a separate tape set The preset is: Disabled. If you leave this option unchanged, then the backups, belonging to the policy or plan being created, might be written onto tapes containing backups written by different backup policies and comprising of data from different machines.
Additional settings Specify the additional settings for the backup operation by selecting or clearing the following check boxes. Overwrite data on a tape without prompting for user confirmation This option is effective only when backing up to a tape device. The preset is: Disabled. When starting backup to a non-empty tape in a locally attached tape device, the program will warn that you are about to lose data on the tape. To disable this warning, select this check box.
Restart the machine automatically after backup is finished This option is available only when operating under bootable media. The preset is: Disabled. When the option is enabled, Acronis Backup & Recovery 10 will restart the machine after the backup process is completed. For example, if the machine boots from a hard disk drive by default and you select this check box, the machine will be restarted and the operating system will start as soon as the bootable agent has finished creating the backup.
3.4.2 Default recovery options Each Acronis agent has its own default recovery options. Once an agent is installed, the default options have pre-defined values, which are referred to as presets in the documentation. When creating a recovery task, you can either use a default option, or override the default option with the custom value that will be specific for this task only. You can also customize a default option itself by changing its value against the pre-defined one.
Check file system after recovery + - + - + - Reboot machine automatically if it is required for recovery + + + + - - Windows recovery - Windows recovery - Windows recovery - E-mail (p. 122) + + + + - - Win Pop-up (p. 123) + + + + - - Windows events log (p. 124) + + - - - - SNMP (p.
4. Depending on the result you want to obtain, select the appropriate options as described in the table below. 5. Click Test command to check if the command is correct. Check box Selection Fail the task if the command execution fails Selected Cleared Selected Cleared Do not recover until the command execution is complete Selected Selected Cleared Cleared N/A Perform the recovery concurrently with the command execution and irrespective of the command execution result.
To specify the recovery process priority Select one of the following: Low – to minimize resources taken by the recovery process, leaving more resources to other processes running on the machine Normal – to run the recovery process with normal speed, allocating resources on a par with other processes High – to maximize the recovery process speed by taking resources from the other processes. File-level security This option is effective only for recovery from file-level backup of Windows files.
Use encryption – you can opt for encrypted connection to the mail server. SSL and TLS encryption types are available for selection. Some Internet service providers require authentication on the incoming mail server before being allowed to send something. If this is your case, select the Log on to incoming mail server check box to enable a POP server and to set up its settings: Incoming mail server (POP) – enter the name of the POP server. Port – set the port of the POP server.
Windows event log This option is effective only in Windows operating systems. This option is not available when operating under the bootable media. This option defines whether the agent(s) operating on the managed machine have to log events of the recovery operations in the Application Event Log of Windows (to see this log, run eventvwr.exe or select Control Panel > Administrative tools > Event Viewer). You can filter the events to be logged. The preset is: Use the setting set in the Machine options.
Types of events to send – choose the types of events to be sent: All events, Errors and warnings, or Errors only. Server name/IP – type the name or IP address of the host running the SNMP management application, the messages will be sent to. Community – type the name of SNMP community to which both the host running SNMP management application and the sending machine belong. The typical community is "public". Click Send test message to check if the settings are correct.
This option defines whether to validate a backup to ensure that the backup is not corrupted, before data is recovered from it. Check file system after recovery This option is effective only when recovering disks or volumes. When operating under bootable media, this option is not effective for the NTFS file system. The preset is Disabled. This option defines whether to check the integrity of the file system after a disk or volume recovery.
Recovery to an existing virtual machine is not possible if the machine is online, and so the machine is powered off automatically as soon as the recovery task starts. Users will be disconnected from the machine and any unsaved data will be lost. Clear the check box for this option if you prefer to power off virtual machines manually before the recovery. Power on the target virtual machine when recovery is completed The preset is: Off.
4 Vaults A vault is a location for storing backup archives. For ease of use and administration, a vault is associated with the archives' metadata. Referring to this metadata makes for fast and convenient operations with archives and backups stored in the vault. A vault can be organized on a local or networked drive, detachable media or a tape device attached to the Acronis Backup & Recovery 10 Storage Node. There are no settings for limiting a vault size or number of backups in a vault.
Way of working with the "Vaults" view Vaults (on the navigation pane) - top element of the vaults tree. Click this item to display groups of centralized and personal vaults. Centralized. This group is available when the console is connected to a managed machine or to a management server. Expand this group to display a list of centralized vaults added by the management server administrator. Click any centralized vault in the vaults tree to open the detailed view of this vault (p.
To learn more about privileges depending on the user rights, see the User privileges on a storage node (p. 80) section. Unmanaged vaults An unmanaged vault is a centralized vault that is not managed by a storage node. To access an unmanaged vault, a user has to have access privileges for the location from the network. Any user that has permission to read/write files in an unmanaged vault can: back up data to the unmanaged vault recover data from any backup located in the unmanaged vault.
Operations with backups (p. 162) Filtering and sorting archives (p. 163) Bars of the "Actions and tools" pane [Vault Name] The Actions bar is available when clicking the vault in the vaults tree. Duplicates actions of the vault's toolbar. [Archive Name] The Actions bar is available when you select an archive in the archives table. Duplicates actions of the archives toolbar. [Backup Name] The Actions bar is available when you expand the archive and click on any of its backups.
another storage node. Explore an unmanaged vault 1. Select the unmanaged vault. 2. Click Explore. The vault will be available for examination with the standard file manager program. Attach the managed vault that was deleted without removing its content. Change user credentials for accessing a vault Refresh a vault's information Click Attach. The procedure of attaching a managed vault to a storage node is described in-depth in the Attaching a managed vault (p. 135) section. Click Change user.
Path (p. 133) Specify where the vault will be created. Managed centralized vaults can reside on a network share, SAN, NAS, or on a hard drive local to the storage node. Database path (p. 133) Specify a local folder on the storage server to create a vault-specific database. This database will store the metadata required for cataloguing the archives and performing deduplication. Deduplication [Optional] Select whether to enable archive deduplication in the vault.
To create a new folder for the database, click 2. Click OK. Create folder. When choosing a folder for the vault's database, follow these considerations: The folder size may become large—one estimate is 200 GB per 8 TB of used space, or about 2.5 percent. The folder permissions must allow the user account under which the storage node's service is running (by default, ASN User) to write to the folder. When assigning permissions, specify the user account explicitly (not just Everyone).
Enter the distinctive description of the vault. Type Select the Unmanaged type. Path (p. 135) Specify where the vault will be created. After you have performed all the required steps, click OK to commit creating the unmanaged centralized vault. Vault path To specify the path where the unmanaged vault will be created 1. Enter the full path to the folder in the Path field or select the desired folder in the folders tree.
For the vault that was encrypted, provide the encryption password. After you have performed all the required steps, click OK to commit to attaching the vault. This procedure may last for quite a while since the storage node has to scan the archives, write the metadata in the database, and deduplicate the archives if the vault was originally deduplicating. 4.1.3 Tape libraries This section describes in detail how to use robotic tape devices as vaults for storing backup archives.
Hardware A tape library (robotic library) is a high-capacity storage device that contains the following: one or more tape drives barcode readers (optional).
System media pools include Free pool, Import pool and Unrecognized pool. The System pools hold media that are not currently used by applications. The Free pool holds media that are considered as free and can be used by applications. The Import and Unrecognized pools are temporary pools for media that are new in certain library.
1. Click Administrative Tools > Server Manager > Features > Add Feature. 2. Select the Removable Storage Manager check box. To activate Removable Storage Manager in Microsoft Windows Vista: 1. Click Control Panel > Programs > Programs and Features > Turn Windows features on or off. 2. Select the Removable Storage Management check box. Fill the library slots with tape cartridges. If a tape does not get a barcode or its barcode is corrupted, you can define the tape label for identification purposes later.
It should be noted, these functions have some specific features for a tape library. So the Edit operation enables you to substitute a tape library device without the Rescan operation. The Delete operation clears all the information on the selected tape library vault from the storage node database, i.e. the operation deletes the content data of all the tapes, when ever the data is used by the storage node on the tape library device.
When recovering, you start creating a recovery task, select the tape device vault, and select the archive and the backup to recover data from. At task creation, the program uses the storage node database instead of accessing tapes. However, selection of data to recover (e.g. some files or specific volumes) requires reading of one or more tapes, so it might be durational. The program finds the tapes and inserts them automatically in the right order.
To launch the procedure select the tape library vault in the Navigation pane of the console, click Manage tapes and then click Start inventory on the Tape Management window. When inventorying is completed a user has the list of tapes currently loaded into the library. Perform the procedure every time you load new tapes into tape library slots. Rescan As stated above the storage node keeps information about tapes and their contents in a dedicated database.
To define your own label for a tape, select a related data field, type in a new label, click Eject tape, write the same label on the tape cartridge (to make association with the label) and insert it back into the same slot. Once all the required tape labels are specified press Set labels to store labels in the storage node database. Tape support These options are effective when the backup destination is a managed vault located on a tape library.
Always use a free tape If you leave the options below unchanged, then each backup will be written onto the tape specified by the Use a separate tape set option. With some of the options below enabled, the program will add new tapes to the tape set every time when a full, incremental or differential backup is created. For each full backup The preset is: Disabled. When this option is enabled, each full backup will be written onto a free tape.
If your backup archive must provide recovery with daily resolution for the last several days, weekly resolution for the last several weeks and monthly resolution for any time in the past, the most preferred scheme for you is the Grandfather-Father-Son scheme. If the main goal is to provide data protection for the longest period with the minimal number of used tapes permanently loaded into a small tape library (e.g. autoloader), the best solution is to probably choose the Tower of Hanoi scheme.
Weekly/differential backups (40 GB) are displayed as a blue rectangle: . Any full monthly backup (320 GB) is drawn in orange: . A whole tape (400 GB) is drawn as a gray rectangle: . Using the Grandfather-Father-Son tape rotation scheme Tape rotation for the GFS backup scheme is substantially defined by the tape options specified for the backup policy/plan to be created.
loaded especially for backing up the data. The tape is marked with number 01 in the figure below. In accordance with the legend described in the Case to analyze (p. 145) section, the full data backup is displayed as an orange rectangle in the figure. The specified GFS backup scheme settings force the data to be backed up on Workdays only, so the next backup is created at the same time (11:00 PM) on Monday 4th of January.
Below, the figure shows the deleted backups as actual, but demonstrates tape usage during the whole year for the GFS backup scheme in combination with the specified tape options. A number in the green rectangle marks an incremental backup created on Monday of the corresponding week of the year. Tape usage during the first year The next figure shows the actual usage of the tapes with free space instead of the deleted backups on the first Friday of the following year.
The full backup stored on tape 01 is deleted after the next full backup is created onto both tapes 23 and 24 on Friday of the 52nd week. As all backups of tape 01 have been deleted, the tape is considered as free and can be reused. Further analysis of the example proves that the maximal number of tapes required to store the data backups is 25 tapes. This maximum occurs on the 16th week of the following year.
If all the backups have to be kept during the year, the archive will require 28 tapes. As the GFS backup scheme forces automatic deletion of the outdated backups, on the first Friday of the second year the tapes keep only the backups displayed in the next figure. 150 Copyright © Acronis, Inc.
This figure demonstrates that the GFS Example 2 tape rotation scheme is more suitable for the case than GFS Example 1. The advantages of the GFS Example 2 tape rotation scheme for the analyzed case are the following: it uses 16 tapes instead of 25 a data recovery task requires one (25%) or two (75%) tapes data recovery from a full backup requires only one tape that makes the data recovery from an incremental or differential backup faster.
The main drawback is the large number of required tapes that is used 5-10%. If we have to keep a daily backup for a week (4 backups) and a weekly backup for a month (4 backups), the total number of required tapes will be equal to 4+4+13+1 = 22. Using the Tower of Hanoi tape rotation scheme The ToH scheme requires fewer tapes for rotation as compared with the GFS scheme. So the ToH scheme is the best choice for small tape libraries, especially for autoloaders.
the Use a separate tape set option is selected the Always use a free tape: For each full backup option is cleared the Always use a free tape: For each incremental backup option is cleared the Always use a free tape: For each differential backup option is cleared. The figure below shows the tapes’ usage for the ToH scheme combined with the above mentioned tape options. The recurring part of the scheme contains sixteen backup sessions.
the Use a separate tape set option is selected the Always use a free tape: For each full backup option is selected the Always use a free tape: For each incremental backup option is cleared the Always use a free tape: For each differential backup option is cleared. The only difference between ToH Example 2 and ToH Example 1 is that the Always use a free tape: For each full backup option is selected.
the Always use a free tape: For each full backup option is selected the Always use a free tape: For each incremental backup option is selected the Always use a free tape: For each differential backup option is selected. The figure shows tape rotation for the ToH scheme with these options. Maximal number of tapes used in the rotation is seven that is more than in classical five-level ToH scheme. Two additional tapes used for: 1.
compression level specified for backing up the data tape rotation scheme ( frequency of backups, retention rules) tape-append options requirements to support off-site tape cartridge archives. There is no common formula to calculate a number of tapes required in all possible combinations of above listed considerations. But the general way to get a number of tapes for a case includes the following steps: 1. 2. 3. 4.
compression level provides CL average reduction coefficient selected tape rotation scheme is Custom with the following settings: differential backup - every 2 days incremental backup - every 1 day, every 6 hours retention rules: delete backups older than 5 days tape options are the following: full backup - every 10 days the Use a separate tape set option is selected the Always use a free tape: For each full backup option is selected the Always use a free tape: For each increme
node cannot be read by an agent in a locally attached tape device. However the storage node can read tapes written by an agent. Please refer to the tape compatibility table (p. 50) to get comprehensive information about the compatibility of tape formats in Acronis Backup & Recovery 10.
Vault toolbar The toolbar contains operational buttons that let you perform operations with the selected personal vault. See the Actions on personal vaults (p. 159) section for details. Pie chart with legend The pie chart lets you estimate the vault's load: it shows the proportion of the vault's free space and occupied space. - free space: space on the storage device, where the vault is located.
The following is a guideline for you to perform operations with personal vaults. To Do Create a personal vault Click Create. The procedure of creating personal vaults is described in-depth in the Creating a personal vault (p. 160) section. Edit a vault 1. Select the vault. 2. Click Edit. The Edit personal vault page lets you edit the vault's name and information in the Comments field. Change user account for accessing a vault Click Change user.
Merging and moving personal vaults What if I need to move the existing vault from a one place to another? Proceed as follows 1. Make sure that none of the backup plans uses the existing vault while moving files, or temporarily disable (p. 190) schedules of the given plans. 2. Move the vault folder with all its archives to a new place manually by means of a third-party file manager. 3. Create a new vault. 4. Edit the backup plans and tasks: redirect their destination to the new vault. 5.
or multiple archives 2. Click Delete. The program duplicates your selection in the Backups deletion (p. 163) window that has check boxes for each archive and each backup. Review the selection and correct if need be (select the check boxes for the desired archives), then confirm the deletion. Delete all archives in the Please be aware that if filters have been applied to the vaults list, you see only a part vault of the vault content.
if need be (select the check boxes for the desired backups), then confirm the deletion. Delete all archives and backups in the vault Please be aware that if filters have been applied to the vaults list, you see only a part of the vault content. Be sure that the vault does not contain archives you need to retain before starting the operation. Click Delete all. The program duplicates your selection in the Backups deletion (p. 163) window that has check boxes for each archive and each backup.
To show or hide columns 1. Right-click any column header to open the context menu. The menu items that are ticked off correspond to the column headers presented in the table. 2. Click the items you want to be displayed/hidden. 164 Copyright © Acronis, Inc.
5 Scheduling Acronis scheduler helps the administrator adapt backup plans to the company’s daily routine and each employee’s work style. The plans’ tasks will be launched systematically keeping the critical data safely protected. The scheduler uses local time of the machine the backup plan exists on. Before creating a schedule, be sure the machine’s date and time settings are correct. Schedule To define when a task has to be executed, you need to specify an event or multiple events.
The scheduler behavior, in case the event occurs but the condition (or any of multiple conditions) is not met is defined by the Task start conditions (p. 114) backup option. What-ifs What if an event occurs (and a condition, if any, is met) while the previous task run has not completed? The event will be ignored. What if an event occurs while the scheduler is waiting for the condition required by the previous event? The event will be ignored.
1. Every: 1 day(s). 2. Once at: 06:00:00 PM. 3. Effective: From: not set. The task will be started on the current day, if it has been created before 6PM. If you have created the task after 6 PM, the task will be started for the first time on the next day at 6 PM. To: not set. The task will be performed for an indefinite number of days. "Three-hour time interval lasting for three months" schedule Run the task every three hours.
From: 09/20/2009. To: not set. Second daily schedule 1. Every: 3 day(s). 2. Every: 2 hour(s). From: 03:00:00 PM Until: 07:00:00 PM. 3. Effective: From: 09/20/2009. To: not set. 5.2 Weekly schedule Weekly schedule is effective in Windows and Linux operating systems. To specify a weekly schedule In the Schedule area, select the appropriate parameter as follows: Every: <...> week(s) on: <...> Specify a certain number of weeks and the days of the week you want the task to be run.
3. Effective: From: 05/13/2009. The task will be started on the nearest Friday at 10 PM. To: 11/13/2009. The task will be performed for the last time on this date, but the task itself will still be available in the Tasks view after this date. (If this date were not a Friday, the task would be last performed on the last Friday preceding this date.) This schedule is widely used when creating a custom backup scheme.
From: 12:00:00 PM Until: 09:00:00 PM. 3. Effective: From: not set. To: not set. Second schedule 1. Every 1 week(s) on: Tue, Wed, Thu. 2. Every 3 hours From 09:00:00 AM until 09:00:00 PM. 3. Effective: From: not set. To: not set. Third schedule 1. Every: 1 week(s) on: Sat, Sun. 2. Once at: 09:00:00 PM. 3. Effective: From: not set. To: not set. 5.3 Monthly schedule Monthly schedule is effective in Windows and Linux operating systems.
Advanced scheduling settings (p. 174) are available only for machines registered on Acronis Backup & Recovery 10 Management Server. To specify these settings, click Change in the Advanced settings area. All the settings you made are displayed in the Result field at the bottom of the window. Examples "Last day of every month" schedule Run the task once at 10 PM on the last day of every month. The schedule's parameters are set up as follows. 1. 2. 3. 4. Months: . Days: Last.
During northern summer, the task runs every first and fifteenth of every month at 10 PM. Thus, the following three schedules are added to the task. First schedule 1. 2. 3. 4. Months: December, January, February. On: Once at: 10:00:00 PM. Effective: From: 11/01/2009. To: not set. Second schedule 1. Months: March, April, May, September, October, November. 2. On: . 3. Every: 12 hours From: 12:00:00 AM Until: 12:00:00 PM. 4. Effective: From: 11/01/2009.
Specifies the event type: Error, Warning, Information, Audit success, or Audit failure. Event ID Specifies the event number, which typically identifies the particular kind of events among events from the same source. For example, an Error event with Event source disk and Event ID 7 occurs when Windows discovers a bad block on a disk, whereas an Error event with Event source disk and Event ID 15 occurs when a disk is not ready for access yet.
2. In the Computer Management console, expand System Tools, and then expand Event Viewer. 3. In Event Viewer, click the name of a log that you want to view—for example, Application. Note: To be able to open the security log (Security), you must be a member of the Administrators group. To view properties of an event, including the event source and event number 1. In Event Viewer, click the name of a log that you want to view—for example, Application.
Run the task: Daily Once at: 09:00:00 AM Distribute start time within the time window Maximum delay: 1 Hour(s) Distribution method: Random Then the task's start time on each machine may be any time between 09:00:00 AM and 09:59:59 AM—for instance: First machine: Every day at 09:30:03 AM Second machine: Every day at 09:00:00 AM Third machine: Every day at 09:59:59 AM Example 2 Suppose that you are deploying a backup policy with the following schedule to three machines: Run the task: Daily Every: 2 Hour(s) Fr
task anyway. With this setting, the program will automatically handle the situation when the conditions are not met for too long and further delaying the backup is undesirable. backup task start time matters - skip the backup task if the conditions are not met at the time when the task should be started. Skipping the task run makes sense when you need to back up data strictly at the specified time, especially if the events are relatively often.
Example: Backing up data to the networked location is performed on workdays at 9:00 PM. If the location's host is not available at that moment (for instance, due to maintenance work), skip the backup and wait for the next workday to start the task. It is assumed that the backup task should not be started at all rather than failed. Event: Weekly, Every 1 week(s) on ; Once at 09:00:00 PM. Condition: Location's host is available Task start conditions: Skip the task execution.
In this case, whether and when the task will run depends on the task start conditions: If the task start conditions are Skip the task execution, the task will never run. If the task start conditions are Wait until the conditions are met and the Run the task anyway after check box is cleared, the task (scheduled to run at 3:00 PM) will start at 6:00 PM—the time when the condition is met.
(2) if the free space changes by more than 1GB after 12 hours pass since the last backup successful completion, the backup task will start immediately. (3) if the free space never changes by more than 1GB, the task will never start. You can start the backup manually, if need be, in the Backup plans and tasks view. Copyright © Acronis, Inc.
6 Direct management This section covers operations that can be performed directly on a managed machine by using the direct console-agent connection. The content of this section is applicable to both stand-alone and advanced editions of Acronis Backup & Recovery 10. 6.1 Administering a managed machine This section describes the views that are available through the navigation tree of the console connected to a managed machine, and explains how to work with each view. 6.1.
working. Please make sure you have a valid license on Acronis License Server. Trial version of product expires in X day(s) Connect Once the trial version of the product is installed, the program starts the countdown of days remaining until the trial period expires. Connect 15 day trial period has expired. Enter a full license key.
Warnings Highlight the date in yellow if no "Error" entries appeared and at least one "Warning" entry appeared in the log on this date. Information Highlight the date in green if only "Information" log entries appeared on this date (normal activity.) The Select current date link focuses selection to the current date. System view Shows summarized statistics of backup plans, tasks, and brief information on the last backup. Click the items in this section to obtain the relevant information.
Use the Information panel to review detailed information on the selected plan (task). The panel chevron. The content of the panel is is collapsed by default. To expand the panel, click the also duplicated in the Plan details (p. 192) and Task details (p. 190) windows respectively. Understanding states and statuses Backup plan execution states A backup plan can be in one of the following execution states: Idle; Waiting; Running; Stopping; Need Interaction.
Otherwise, see 2 following: Remove the reason of the failure -> [optionally] Start the failed task manually Edit the local plan to prevent its future failure in case a local plan has failed Edit the backup policy on the management server in case a centralized plan has failed When creating a backup plan or policy the administrator can turn on the option to stop executing the backup plan as soon as the backup plan gets the Error status.
The user can stop a running task or a task that needs interaction. The task changes to the Stopping state and then to the Idle state. A waiting task can also be stopped. In this case, since the task is not running, "stop" means removing it from the queue . Task state diagram Task statuses A task can have one of the following statuses: Error; Warning; OK. A task status is derived from the result of the last run of the task.
Working with backup plans and tasks Actions on backup plans and tasks The following is a guideline for you to perform operations with backup plans and tasks. To Do Create a new backup plan, or a task Click New, then select one of the following: Backup plan (p. 195) Recovery task (p. 215) Validation task (p. 235) View details of a plan/task Backup plan Click View details. In the Plan Details (p. 192) window, review the plan details. Task View details. Click In the Task Details (p.
Stop a plan/task Backup plan Click Stop. Stopping the running backup plan stops all its tasks. Thus, all the task operations will be aborted. Task Click Stop. What will happen if I stop the task? Generally, stopping the task aborts its operation (backup, recovery, validation, exporting, conversion, migration). The task enters the Stopping state first, then becomes Idle. The task schedule, if created, remains valid. To complete the operation you will have to run the task over again.
Edit a plan/task Backup plan Click Edit. Backup plan editing is performed in the same way as creation (p. 195), except for the following limitations: It is not always possible to use all scheme options, when editing a backup plan if the created archive is not empty (i.e. contains backups). 1. It is not possible to change the scheme to Grandfather-Father-Son or Tower of Hanoi. 2. If the Tower of Hanoi scheme is used, it is not possible to change the number of levels.
Delete a plan/task Backup plan Click Delete. What will happen if I delete the backup plan? The plan's deletion deletes all its tasks. Why can't I delete the backup plan? The backup plan is in the "Running" state A backup plan cannot be deleted, if at least one of its tasks is running. Do not have the appropriate privilege Without the Administrator's privileges on the machine, a user cannot delete plans owned by other users. The backup plan has a centralized origin.
Configuring backup plans and the tasks table By default, the table has six columns that are displayed, others are hidden. If required, you can hide the displayed columns and show hidden ones. To show or hide columns 1. Right-click any column header to open the context menu. The menu items that are ticked off correspond to the column headers presented in the table. 2. Click the items you want to be displayed/hidden.
Recovery (file) File and folder recovery Recovery (volume) Recovery of volumes from a disk backup Recovery (MBR) Master boot record recovery Recovery (disk to existing VM) Recovery of a disk/volume backup to an existing virtual machine Recovery (disk to new VM) Recovery of a disk/volume backup to a new virtual machine Recovery (existing VM) Recovery of a virtual machine backup to an existing virtual machine Recovery (new VM) Recovery of a virtual machine backup to a new virtual machine Validat
Backup plan details The Backup plan details window (also duplicated on the Information panel) aggregates in four tabs all the information on the selected backup plan. The respective message will appear at the top of the tabs, if one of the plan's tasks requires user interaction. It contains a brief description of the problem and action buttons that let you select the appropriate action or stop the plan.
6.1.3 Log The Log stores the history of operations performed by Acronis Backup & Recovery 10 on the machine, or actions a user takes on the machine using the program. For instance, when a user edits a task, the respective entry is added to the log. When the program executes a task, it adds multiple entries. With the log, you can examine operations, results of tasks' execution including reasons for failure, if any. Way of working with log entries Use filters to display the desired log entries.
Save the selected log entries to a file 1. Select a single log entry or multiple log entries. 2. Click Save Selected to File. 3. In the opened window, specify a path and a name for the file. Save all the log entries to a file 1. Make sure, that the filters are not set. 2. Click Save All to File. 3. In the opened window, specify a path and a name for the file. Save all the filtered log entries to a file 1. Set filters to get a list of the log entries that satisfy the filtering criteria. 2.
Log entry details Displays detailed information on the log entry you have selected and lets you copy the details to the clipboard. To copy the details, click the Copy to clipboard button.
[Optional] Type a description of the backup plan. To access this option, select the Advanced view check box. What to backup Source type (p. 198) Select the type of data to back up. The type of data depends on the agents installed on the machine. Items to backup (p. 199) Specify the data items to back up. A list of items to backup depends on the data type, specified previously. Access credentials (p.
After any of the settings is changed against the default value, a new line that displays the newly set value appears. The setting status changes from Default to Custom. Should you modify the setting again, the line will display the new value unless the new value is the default one. When the default value is set, the line disappears and so you always see only the settings that differ from the default values in this section of the Create backup plan page.
To specify credentials 1. Select one of the following: Run under the current user The tasks will run under the credentials with which the user who starts the tasks is logged on. If any of the tasks has to run on schedule, you will be asked for the current user's password on completing the plan creation. Use the following credentials The tasks will always run under the credentials you specify, whether started manually or executed on schedule. Specify: User name.
Backing up a virtual machine means backing up all the machine's disks plus the machine configuration. With this source type, you can back up multiple machines. This comes in handy when having small (in terms of virtual disks size) but numerous legacy servers such as those resulting from workload consolidation. A separate archive will be created for each machine. Volumes of a virtual machine Available if Acronis Backup & Recovery 10 Agent for Hyper-V (or for ESX/ESXi) is installed.
Linux A volume backup stores all files and folders of the selected volume independent of their attributes, a boot record and the file system super block. A disk backup stores all disk volumes as well as the zero track with the master boot record. Selecting files and folders To select files and/or folders for backing up 1. Expand the local folders tree items in order to view its nested folders and files. 2. Select an item by checking the corresponding check box in the tree.
Selecting a virtual machine's disks and volumes To back up individual disks or volumes within a virtual machine residing on a virtualization server 1. Select the virtual machine whose volumes you need to back up. Use the right part of the window to view details on the selected virtual machine. 2. Click OK. 3. In the Selecting disks and volumes (p. 199) window, select the virtual machine disks or volumes. Backing up volumes within a virtual machine is similar to backing up a physical machine's volumes.
To specify which files and folders to exclude: Set up any of the following parameters: Exclude all hidden files and folders Select this check box to skip files and folders with the Hidden attribute. If a folder is Hidden, all of its contents — including files that are not Hidden — will be excluded. Exclude all system files and folders Select this check box to skip files and folders with the System attribute.
Note for Linux users: To specify a Common Internet File System (CIFS) network share which is mounted on a mount point such as /mnt/share, select this mount point instead of the network share itself. To back up data to an FTP or SFTP server, type the server name or address in the Path field as follows: ftp://ftp_server:port _number or sftp://sftp_server:port number If the port number is not specified, port 21 is used for FTP and port 22 is used for SFTP.
2. Applying multiple retention rules to an archive makes the archive content in some way unpredictable. Since each of the rules will be applied to the entire archive, the backups belonging to one backup plan can be easily deleted along with the backups belonging to the other. You should especially not expect the classic behavior of the GFS and Tower of Hanoi backup schemes. Normally, each complex backup plan should back up to its own archive. 6.2.
rollback period by deleting the expired backups and keeping the most recent backups of each level. Custom – to create a custom scheme, where you are free to set up a backup strategy in the way your enterprise needs it most: specify multiple schedules for different backup types, add conditions and specify the retention rules. Back up now scheme With the Back up now scheme, the backup will be performed immediately, right after you click the OK button at the bottom of the page.
Mo Tu We Th Fr Sa Su Jan 1—Jan 7 D D D D W - - Jan 8—Jan 14 D D D D W - - Jan 15—Jan 21 D D D D W - - Jan 22—Jan 28 D D D D M - - Jan 29—Feb 4 D D D D W - - Feb 5—Feb 11 D D D D W - - Feb 12—Feb 18 D D D D W - - Feb 19—Feb 25 D D D D M - - Feb 26—Mar 4 D D D D W - - Daily backups run every workday except Friday, which is left for weekly and monthly backups.
Examples Each day of the past week, each week of the past month Let us consider a GFS backup scheme that many may find useful. Back up files every day, including weekends Be able to recover files as of any date over the past seven days Have access to weekly backups of the past month Keep monthly backups indefinitely. Backup scheme parameters can then be set up as follows.
Work schedule Suppose you are a part-time financial consultant and work in a company on Tuesdays and Thursdays. On these days, you often make changes to your financial documents, statements, and update the spreadsheets etc. on your laptop. To back up this data, you may want to: Track changes to the financial statements, spreadsheets, etc. performed on Tuesdays and Thursdays (daily incremental backup). Have a weekly summary of file changes since last month (Friday weekly differential backup).
Tower of Hanoi scheme At a glance Up to 16 levels of full, differential, and incremental backups Next-level backups are twice as rare as previous-level backups One backup of each level is stored at a time Higher density of more recent backups Parameters You can set up the following parameters of a Tower of Hanoi scheme. Schedule Set up a daily (p. 166), weekly (p. 168), or monthly (p. 170) schedule.
Roll-back period The number of days we can go back in the archive is different on different days. The minimum number of days we are guaranteed to have is called the roll-back period. The following table shows full backup and roll-back periods for schemes of various levels.
Parameters Parameter Meaning Full backup Specifies on what schedule and under which conditions to perform a full backup. For example, the full backup can be set up to run every Sunday at 1:00 AM as soon as all users are logged off. Incremental Specifies on what schedule and under which conditions to perform an incremental backup. If the archive contains no backups at the time of the task run, a full backup is created instead of the incremental backup.
Cleanup schedule Specifies a schedule for archive cleanup. (only if On schedule is selected) For example, the cleanup can be scheduled to start on the last day of each month. This option is available only if you selected On schedule in Apply the rules. Examples Weekly full backup The following scheme yields a full backup performed every Friday night. Full backup: Schedule: Weekly, every Friday, at 10:00 PM Here, all parameters except Schedule in Full backup are left empty.
As a result, a full backup—originally scheduled at 9:00 PM—may actually start later: as soon as the backup location becomes available. Likewise, backup tasks for incremental and differential backups will wait until all users are logged off and users are idle, respectively. Finally, we create retention rules for the archive: let us retain only backups that are no older than six months, and let the cleanup be performed after each backup task and also on the last day of every month.
2. What to validate – select either to validate the entire archive or the latest backup in the archive. Validation of a file backup imitates recovery of all files from the backup to a dummy destination. Validation of a volume backup calculates a checksum for every data block saved in the backup. Validation of the archive will validate all the archive’s backups and may take a long time and a lot of system resources. 3.
integration is enabled, such machines appear as unmanageable. A backup policy cannot be applied to them. Agent for Hyper-V is installed on the host You can choose between creating a virtual machine on the Hyper-V server and creating a VMware Workstation, Microsoft Virtual PC or Parallels Workstation machine in the folder you select. Virtual machines created on the Hyper-V server as a result of backup, will not appear on the management server, because such machines are not supposed to be backed up.
A dynamic volume can be recovered over an existing volume, to unallocated space of a disk group, or to unallocated space of a basic disk. To learn more about recovering dynamic volumes, please turn to the Microsoft LDM (Dynamic volumes) (p. 42) section. Acronis Backup & Recovery 10 Agent for Windows has the ability to recover a disk (volume) backup to a new virtual machine of any of the following types: VMware Workstation, Microsoft Virtual PC, Parallels Workstation or Citrix XenServer virtual appliance.
machine becomes operational and ready to provide necessary services. The data required to serve incoming requests is recovered with the highest priority; everything else is recovered in the background. See Acronis Active Restore (p. 55) for details. Files (p. 226) You may have to specify credentials for the destination. Skip this step when operating on a machine booted with bootable media. Access credentials (p.
Run under the current user The task will run under the credentials with which the user who starts the tasks is logged on. If the task has to run on schedule, you will be asked for the current user's password on completing the task creation. Use the following credentials The task will always run under the credentials you specify, whether started manually or executed on schedule. Specify: User name.
If the archive is stored on a locally attached tape device, expand the Tape drives group, then click the required device. 2. In the table to the right of the tree, select the archive. The table displays the names of the archives contained in each vault/folder you select. While you are reviewing the location content, archives can be added, deleted or modified by another user or by the program itself according to scheduled operations. Use the Refresh button to refresh the list of archives. 3. Click OK. 6.
Files selection To select a backup and files to recover: 1. Select one of the successive backups by its creation date/time. Thus, you can revert the files/folders to a specific moment in time. 2. Specify the files and folders to recover by selecting the corresponding check boxes in the archives tree. Selecting a folder automatically selects all its nested folders and files. Use the table to the right of the archives tree to select the nested items.
The selected disks will be recovered to the physical disks of the machine the console is connected to. On selecting this, you proceed to the regular disk mapping procedure described below. New virtual machine (p. 224) If Acronis Backup & Recovery 10 Agent for Windows is installed. The selected disks will be recovered to a new virtual machine of any of the following types: VMware Workstation, Microsoft Virtual PC, Parallels Workstation or Citrix XenServer virtual appliance.
volumes on the second disk will lose their letters, all paths will be invalid on the disk, and programs won't find their files. The operating system on that disk will be unbootable. To retain system bootability on the target disk volume, choose one of the following: Select automatically A new NT signature will be created only if the existing one differs from the one in the backup. Otherwise, the existing NT signature will be kept.
On selecting this, you specify the virtualization server and the target virtual machine. Then you proceed to the regular volume mapping procedure described below. Please be aware that the target machine will be powered off automatically before recovery. If you prefer to power it off manually, modify the VM power management option. Recover [Disk #] MBR to: [If the Master Boot Record is selected for recovery] Disk # (p. 223) Choose the disk to recover the Master Boot Record to. NT signature: (p.
Tip: A volume cannot be resized when being recovered from a backup split into multiple removable media. To be able to resize the volume, copy all parts of the backup to a single location on a hard disk. Properties Type A basic MBR disk can contain up to four primary volumes or up to three primary volumes and multiple logical drives. By default, the program selects the original volume's type. You can change this setting, if required. Primary.
To select the virtualization server the new virtual machine will be created on 1. Choose the Place on the virtualization server that I select option. 2. In the left part of the window, select the virtualization server. Use the right part of the window to review details on the selected server. 3. Click OK to return to the Data recovery page. To select the type of virtual machine 1. Choose the Save as files of the VM type that I select to the folder that I specify option. 2.
multicore host CPU or hyperthreading may enable multiple virtual processors on a single-processor host. File destination To specify a destination: 1. Select a location to recover the backed up files to: Original location - files and folders will be recovered to the same path(s) as they are in the backup. For example, if you have backed up all files and folders in C:\Documents\Finance\Reports\, the files will be recovered to the same path. If the folder does not exist, it will be created automatically.
Overwrite existing file if it is older - this will give priority to the most recent file modification, whether it be in the backup or on the disk. Do not overwrite existing file - this will give the file on the hard disk priority over the file in the backup. If you allow files to be overwritten, you still have an option to prevent overwriting of specific files by excluding (p. 226) them from the recovery operation. 6.3.7 Access credentials for destination To specify credentials 1.
Preparation Before recovering Windows to dissimilar hardware, make sure that you have the drivers for the new HDD controller and the chipset. These drivers are critical to start the operating system. Use the CD or DVD supplied by the hardware vendor or download the drivers from the vendor’s Web site. The driver files should have the *.inf, *.sys or *.oem extensions. If you download the drivers in the *.exe, *.cab or *.zip format, extract them using a third-party application, such as WinRAR (http://www.
When recovering the system to an existing virtual machine that uses SCSI hard drive controller, be sure to specify SCSI drivers for the virtual environment, in the Mass storage drivers to install anyway step. Use drivers bundled with your virtual machine software or download the latest drivers versions from the software manufacturer Web site. 6.3.
10. In When to recover, specify when to start the recovery task. 11. [Optionally] Review Recovery options and change the settings from the default ones, if need be. You can specify in Recovery options > VM power management whether to start the new virtual machine automatically, after the recovery is completed. This option is available only when the new machine is created on a virtualization server. 12. Click OK.
several sectors of the disk and on the file system to which direct access is possible. In other cases, the user has to manually reactivate the boot loader. Solution: Reactivate the boot loader. You might also need to fix the configuration file.
vi /mnt/system/boot/grub/menu.lst 6. In the menu.lst file (respectively grub.conf), find the menu item that corresponds to the system you are recovering. This menu items have the following form: title Red Hat Enterprise Linux Server (2.6.24.4) root (hd0,0) kernel /vmlinuz-2.6.24.4 ro root=/dev/sda2 rhgb quiet initrd /initrd-2.6.24.4.img The lines starting with title, root, kernel, and initrd respectively determine: The title of the menu item.
[boot loader] timeout=30 default=multi(0)disk(0)rdisk(0)partition(1)\WINDOWS [operating systems] multi(0)disk(0)rdisk(0)partition(1)\WINDOWS="Microsoft Windows XP Professional" /noexecute=optin /fastdetect Windows Vista/2008 A part of the loader resides in the partition boot sector, the rest is in the files bootmgr, boot\bcd. At starting Windows, boot\bcd is mounted to the registry key HKLM \BCD00000000. 6.3.
Recover the files as two or more groups. For example, if the problem occurs when recovering 1 million files, try recovering the first 500,000 of them and then the remaining 500,000. Modify the registry as follows: Note: This procedure requires restarting the machine. Use standard precautions when modifying the registry. 1. In Registry Editor, open the following registry subkey: HKEY_LOCAL_MACHINE\SYSTEM\CurrentControlSet\Control\Session Manager\Memory Management 2.
2. Add the storage node to the management server again, by specifiying the machine on which the recovered storage node is installed. 3. Re-create the necessary managed vaults. 6.4 Validating vaults, archives and backups Validation is an operation that checks the possibility of data recovery from a backup. Validation of a file backup imitates recovery of all files from the backup to a dummy destination. Validation of a disk or volume backup calculates a checksum for every data block saved in the backup.
Access Credentials (p. 238) [Optional] Provide credentials for accessing the source if the task account does not have enough privileges to access it. To access this option, select the check box for Advanced view. When to validate Validate (p. 238) Specify when and how often to perform validation. After you configure all the required settings, click OK to create the validation task. 6.4.1 Task credentials Provide credentials for the account under which the task will run. To specify credentials 1.
Note for Linux users: To specify a Common Internet File System (CIFS) network share which is mounted on a mount point such as /mnt/share, select this mount point instead of the network share itself. If the archive is stored on an FTP or SFTP server, type the server name or address in the Path field as follows: ftp://ftp_server:port _number or sftp://sftp_server:port number If the port number is not specified, port 21 is used for FTP and port 22 is used for SFTP.
Using the archives table To assist you with choosing the right location, the table displays the names of the archives contained in each location you select. While you are reviewing the location content, archives can be added, deleted or modified by another user or by the program itself according to scheduled operations. Use the Refresh button to refresh the list of archives. 6.4.5 Access credentials for source Specify the credentials required for access to the location where the backup archive is stored.
6.5 Mounting an image Mounting volumes from a disk backup (image) lets you access the volumes as though they were physical disks. Multiple volumes contained in the same backup can be mounted within a single mount operation. The mount operation is available when the console is connected to a managed machine running either Windows or Linux.
If the archive is located on removable media, e.g. DVDs, first insert the last DVD and then insert the discs in order starting from the first one when the program prompts. If the archive is stored on a network share, expand the Network folders group, then select the required networked machine and then click the shared folder. If the network share requires access credentials, the program will ask for them.
Specify: User name. When entering the name of an Active Directory user account, be sure to also specify the domain name (DOMAIN\Username or Username@domain) Password. The password for the account. 2. Click OK. According to the original FTP specification, credentials required for access to FTP servers are transferred through a network as plaintext. This means that the user name and password can be intercepted by an eavesdropper using a packet sniffer. 6.5.
6.7 Exporting archives and backups The export operation creates a copy of an archive or a self-sufficient part copy of an archive in the location you specify. The original archive remains untouched. The export operation can be applied to: a single archive - an exact archive copy will be created a single backup - an archive consisting of a single full backup will be created.
When the console is connected to a managed machine, you can export an archive or part of an archive to and from any location accessible to the agent residing on the machine. These include personal vaults, locally attached tape devices, removable media and, in the advanced product versions, managed and unmanaged centralized vaults. When the console is connected to a management server, two export methods are available: export from a managed vault.
Backups (p. 245) - specify the archive first, and then select the desired backup(s) in this archive Access credentials (p. 245) [Optional] Provide credentials for accessing the source if the task account does not have enough privileges to access it. To access this option, select the Advanced view check box. Where to export Archive (p. 246) Enter the path to the location where the new archive will be created. Be sure to provide a distinct name and comment for the new archive. Access credentials (p.
If the archive is stored in a local folder on the machine, expand the Local folders group and click the required folder. If the archive is located on removable media, e.g. DVDs, first insert the last DVD and then insert the discs in order starting from the first one when the program prompts. If the archive is stored on a network share, expand the Network folders group, then select the required networked machine and then click the shared folder.
Use the task credentials The program will access the location using the credentials of the task account specified in the General section. Use the following credentials The program will access the location using the credentials you specify. Use this option if the task account does not have access permissions to the location. You might need to provide special credentials for a network share or a storage node vault. Specify: User name.
To export data to a locally attached tape device, expand the Tape drives group, then click the required device. For the management server the folders tree contains: Local folders group to export data onto the hard drives that are local to the storage node. Network folders group to export data to a network share. If the network share requires access credentials, the program will ask for them.
According to the original FTP specification, credentials required for access to FTP servers are transferred through a network as plaintext. This means that the user name and password can be intercepted by an eavesdropper using a packet sniffer. 6.8 Acronis Secure Zone Acronis Secure Zone is a secure partition that enables keeping backup archives on a managed machine disk space and therefore recovery of a disk to the same disk where the backup resides.
Acronis Secure Zone Size Enter the Acronis Secure Zone size or drag the slider to select any size between the minimum and the maximum ones. The minimum size is approximately 50MB, depending on the geometry of the hard disk. The maximum size is equal to the disk's unallocated space plus the total free space on all the volumes you have selected in the previous step.
As is apparent from the above, setting the maximum possible zone size is not advisable. You will end up with no free space on any volume which might cause the operating system or applications to work unstably and even fail to start. 6.8.2 Managing Acronis Secure Zone Acronis Secure Zone is considered as a personal vault (p. 379). Once created on a managed machine, the zone is always present in the list of Personal vaults. Centralized backup plans can use Acronis Secure Zone as well as local plans.
dragging the slider and selecting any size between the current and minimum values. The minimum size is approximately 50MB, depending on the geometry of the hard disk; typing an exact value in the Acronis Secure Zone Size field. 4. Click OK. Deleting Acronis Secure Zone To delete the zone without uninstalling the program, proceed as follows: 1. In the Acronis Secure Zone Actions bar (on the Actions and tools pane), select Delete. 2.
6.10 Bootable media Bootable media Bootable media is physical media (CD, DVD, USB drive or other media supported by a machine BIOS as a boot device) that boots on any PC-compatible machine and enables you to run Acronis Backup & Recovery 10 Agent either in a Linux-based environment or Windows Preinstallation Environment (WinPE), without the help of an operating system.
6.10.1 How to create bootable media To enable creating physical media, the machine must have a CD/DVD recording drive or allow a flash drive to be attached. To enable PXE or WDS/RIS configuration, the machine must have a network connection. Bootable Media Builder can also create an ISO image of a bootable disk to burn it later on a blank disk.
3. Install the Microsoft .NET Framework v.2.0 from this kit (NETFXx86 or NETFXx64, depending on your hardware.) 4. Install Microsoft Core XML (MSXML) 5.0 or 6.0 Parser from this kit. 5. Install Windows AIK from this kit. 6. Install Bootable Media Builder on the same machine. It is recommended that you familiarize yourself with the help documentation supplied with Windows AIK. To access the documentation, select Microsoft Windows AIK -> Documentation from the start menu.
8. [optional] Windows system drivers to be used by Acronis Universal Restore (p. 257). This window appears only if the Acronis Universal Restore add-on is installed and a media other than PXE or WDS/RIS is selected. 9. Path to the media ISO file or the name or IP and credentials for PXE or WDS/RIS. Kernel parameters This window lets you specify one or more parameters of the Linux kernel. They will be automatically applied when the bootable media starts.
nodma Disables direct memory access (DMA) for all IDE hard disk drives. Prevents the kernel from freezing on some hardware. nofw Disables the FireWire (IEEE1394) interface support. nopcmcia Disables detection of PCMCIA hardware. nomouse Disables mouse support. module_name=off Disables the module whose name is given by module_name. For example, to disable the use of the SATA module, specify: sata_sis=off pci=bios Forces the use of PCI BIOS instead of accessing the hardware device directly.
customized. When you select an existing NIC in the wizard window, its settings are selected for saving on the media. The MAC address of each existing NIC is also saved on the media. You can change the settings, except for the MAC address; or configure the settings for a non-existent NIC, if need be. Once the bootable agent starts on the server, it retrieves the list of available NICs. This list is sorted by the slots the NICs occupy: the closest to the processor on top.
The drivers will be placed in the visible Drivers folder on the bootable media. The drivers are not loaded into the target machine RAM, therefore, the media must stay inserted or connected throughout the Universal Restore operation. Adding drivers to bootable media is available on the condition that: 1. The Acronis Backup & Recovery 10 Universal Restore add-on is installed on the machine where the bootable media is created AND 2.
Adding the Acronis Plug-in to a WIM file for any future purpose (manual ISO building, adding other tools to the image and so on). To be able to perform any of the above operations, install Bootable Media Builder on a machine where Windows Automated Installation Kit (WAIK) is installed. If you do not have such machine, prepare as described in How to create bootable media (p. 253). Bootable Media Builder supports only x86 WinPE 2.x or 3.0. These WnPE distributions can also work on x64 hardware.
Building Bart PE with Acronis Plug-in from Windows distribution 1. Get the Bart PE builder. 2. Install Bootable Media Builder from the Acronis Backup & Recovery 10 setup file. 3. Change the current folder to the folder where the Acronis Plug-in for WinPE is installed—by default: C:\Program Files\Acronis\Bootable Components\WinPE.
Be careful! To be on the safe side, it is advisable to assign unique names to the volumes. 2. The Linux-style bootable media shows local disks and volumes as unmounted (sda1, sda2...). 3. The Linux-style bootable media cannot write a backup to an NTFS-formatted volume. Switch to the Windows style if you need to do so. 4. You can switch the bootable media between the Windows style and the Linux style by selecting Tools > Change volume representation. 5. There is no Navigation tree in the media GUI.
2. Click Configure iSCSI/NDAS devices (in a Linux-based media) or Run the iSCSI Setup (in a PEbased media). 3. Specify the IP address and port of the iSCSI device's host, and the name of the iSCSI initiator. 4. If the host requires authentication, specify the user name and password for it. 5. Click OK. 6. Select the iSCSI device from the list, and then click Connect. 7. If prompted, specify the user name and password to access the iSCSI device. To add an NDAS device 1. 2. 3. 4. 5.
dmesg lvm ssh dmraid mdadm sshd e2fsck mkdir strace e2label mke2fs swapoff echo mknod swapon egrep mkswap sysinfo fdisk more tar fsck mount tune2fs fxload mtx udev gawk mv udevinfo gpm pccardctl udevstart grep ping umount growisofs pktsetup uuidgen grub poweroff vconfig gunzip ps vi halt raidautorun zcat hexdump readcd hotplug reboot 6.10.
If disk configuration has changed. An MD device or a logical volume resides on one or more disks, each of its own size. If you replaced any of these disks between backup and recovery—or if you are recovering the volumes to a different machine—make sure that the new disk configuration includes enough disks whose sizes are at least those of the original disks. To create the volume structure by using the management console 1. Boot the machine from a Linux-based bootable media. 2. Click Acronis Bootable Agent.
6. If you previously mounted the backup by using the trueimagemnt utility, use this utility again to unmount the backup (see "Mounting backup volumes" later in this topic). 7. Return to the management console by pressing CTRL+ALT+F1, or by running the command: /bin/product (Do not reboot the machine at this point. Otherwise, you will have to create the volume structure again.) 8. Click Recover, then specify the path to the archive and any other required parameters, and then click OK.
lvm pvcreate /dev/md0 /dev/md1 lvm vgcreate my_volgroup /dev/md0 /dev/md1 lvm vgdisplay The output of the lvm vgdisplay command will contain lines similar to the following: --- Volume group --VG Name my_volgroup ... VG Access read/write VG Status resizable ... VG Size 1.99 GB ... VG UUID 0qoQ4l-Vk7W-yDG3-uF1l-Q2AL-C0z0-vMeACu 5. Run the following command to create the logical volume; in the -L parameter, specify the size given by VG Size: lvm lvcreate -L1.99G --name my_logvol my_volgroup 6.
Num Idx Partition Flags Start Size ---- --- --------- ----- ----- --------Disk 1: Table 0 Disk 2: Table 0 ... Dynamic & GPT Volumes: DYN1 4 my_volgroup-my_logvol 12533760 Type -----Table Table Ext2 You will need the volume's index, given in the Idx column, in the next step. 2. Use the --mount command, specifying the volume's index in the -i parameter. For example: trueimagemnt --mount /mnt --filename smb://server/backups/linux_machine.
Setting up a machine to boot from PXE For bare metal, it is enough that the machine’s BIOS supports network booting. On a machine that has an operating system on the hard disk, the BIOS must be configured so that the network interface card is either the first boot device, or at least prior to the Hard Drive device. The example below shows one of reasonable BIOS configurations. If you don’t insert bootable media, the machine will boot from the network.
Sometimes after the volume has been backed up and its image placed into a safe storage, the machine disk configuration might change due to a HDD replacement or hardware loss. In such case with the help of Acronis Disk Director Lite, the user has the possibility to recreate the necessary disk configuration so that the volume image can be recovered exactly “as it was” or with any alteration of the disk or volume structure the user might consider necessary.
6.11.3 Choosing the operating system for disk management On a machine with two or more operating systems, representation of disks and volumes depends on which operating system is currently running. A volume may have a different letter in different Windows operating systems. For example, volume E: might appear as D: or L: when you boot another Windows operating system installed on the same machine.
6.11.5 Disk operations Acronis Disk Director Lite includes the following operations that can be performed on disks: Disk Initialization (p. 271) - initializes the new hardware added to the system Basic disk cloning (p. 271) - transfers complete data from the source basic MBR disk to the target Disk conversion: MBR to GPT (p. 273) - converts an MBR partition table to GPT Disk conversion: GPT to MBR (p. 274) - converts a GPT partition table to MBR Disk conversion: Basic to Dynamic (p.
case, the reason for the Clone basic disk operation can be summed up as the necessity to transfer all the source disk data to a target disk exactly as it is. Acronis Disk Director Lite allows the operation to be carried out to basic MBR disks only. To plan the Clone basic disk operation: 1. Select a disk you want to clone. 2. Select a disk as target for the cloning operation. 3. Select a cloning method and specify advanced options.
(To finish the added operation you will have to commit (p. 283) it. Exiting the program without committing the pending operations will effectively cancel them.) Using advanced options When cloning a disk comprising of a system volume, you need to retain an operating system bootability on the target disk volume. It means that the operating system must have the system volume information (e.g. volume letter) matched with the disk NT signature, which is kept in the MBR disk record.
2. Right-click on the selected volume, and then click Convert to GPT in the context menu. You will receive a warning window, stating that you are about to convert MBR into GPT. 3. By clicking OK, you'll add a pending operation of MBR to GPT disk conversion. (To finish the added operation you will have to commit (p. 283) it. Exiting the program without committing the pending operations will effectively cancel them.
If you need to convert a basic disk to dynamic: 1. Select the basic disk to convert to dynamic. 2. Right-click on the selected volume, and then click Convert to dynamic in the context menu. You will receive a final warning about the basic disk being converted to dynamic. 3. If you click OK in this warning window, the conversion will be performed immediately and if necessary, your machine will be restarted.
In some cases the possible unallocated space and the proposed maximum volume size might differ (e.g. when the size of one mirror establishes the size of the other mirror, or the last 8Mb of disk space are reserved for the future conversion of the disk from basic to dynamic). System disk conversion Acronis Disk Director Lite does not require an operating system reboot after dynamic to basic conversion of the disk, if: 1. There is a single Windows 2008/Vista operating system installed on the disk. 2.
The full version of Acronis Disk Director will provide more tools and utilities for working with volumes. Acronis Disk Director Lite must obtain exclusive access to the target volume. This means no other disk management utilities (like Windows Disk Management utility) can access it at that time. If you receive a message stating that the volume cannot be blocked, close the disk management applications that use this volume and start again.
Mirrored-Striped Volume A fault-tolerant volume, also sometimes called RAID 1+0, combining the advantage of the high I/O speed of the striped layout and redundancy of the mirror type. The evident disadvantage remains inherent with the mirror architecture - a low disk-to-volume size ratio. RAID-5 A fault-tolerant volume whose data is striped across an array of three or more disks.
To create a basic volume: Select a destination disk and specify the unallocated space to create the basic volume on. To create a Simple/Spanned volume: Select one or more destination disks to create the volume on. To create a Mirrored volume: Select two destination disks to create the volume on. To create a Striped volume: Select two or more destination disks to create the volume on. To create a RAID-5 volume: Select three destination disks to create the volume on.
The wizard will prompt you to choose one of the Windows file systems: FAT16 (disabled, if the volume size has been set at more than 2 GB), FAT32 (disabled, if the volume size has been set at more than 2 TB), NTFS or to leave the volume Unformatted. In setting the cluster size you can choose between any number in the preset amount for each file system. Note, the program suggests the cluster size best suited to the volume with the chosen file system.
(To finish the added operation you will have to commit (p. 283) it. Exiting the program without committing the pending operations will effectively cancel them.) Set active volume If you have several primary volumes, you must specify one to be the boot volume. For this, you can set a volume to become active. A disk can have only one active volume, so if you set a volume as active, the volume, which was active before, will be automatically unset. If you need to set a volume active: 1.
Change volume label The volume label is an optional attribute. It is a name assigned to a volume for easier recognition. For example, one volume could be called SYSTEM — a volume with an operating system, or PROGRAM — an application volume, DATA — a data volume, etc., but it does not imply that only the type of data stated with the label could be stored on such a volume. In Windows, volume labels are shown in the Explorer disk and folder tree: LABEL1(C:), LABEL2(D:), LABEL3(E:), etc.
If you set a 64K cluster size for FAT16/FAT32 or an 8KB-64KB cluster size for NTFS, Windows can mount the volume, but some programs (e.g. Setup programs) might calculate its disk space incorrectly. 6.11.7 Pending operations All operations, which were prepared by the user in manual mode or with the aid of a wizard, are considered pending until the user issues the specific command for the changes to be made permanent.
7 Centralized management This section covers operations that can be performed centrally by using the components for centralized management. The content of this section is only applicable to advanced editions of Acronis Backup & Recovery 10. 7.1 Administering Acronis Backup & Recovery 10 Management Server This section describes the views that are available through the navigation tree of the console connected to the management server, and explains how to work with each view. 7.1.
less than 10% free space. View vaults will take you to the Centralized vaults (p. 130) view where you can examine the vault size, free space, content and take the necessary steps to increase the free space. Bootable media was not created Create now To be able to recover an operating system when the machine fails to boot, you must: 1. Back up the system volume (and the boot volume, if it is different) 2. Create at least one bootable media (p. 369). Create now will launch the Bootable Media Builder (p.
Statistics for the selected date are displayed to the right of the chart. All the statistics fields are interactive, i.e. if you click any field, the Log view will be opened with the log entries pre-filtered by this field. At the top of the chart, you can select the activities to display depending on the presence and severity of the errors. The Select current date link focuses selection to the current date.
Backup policy deployment states A backup policy deployment state is a combination of the policy deployment states on all machines the policy is applied to. For example, if the policy is applied to three machines and has the "Deploying" state on the 1st machine, the "Updating" state on the 2nd machine and the "Deployed" state on the 3rd machine, the state of the policy will be "Deploying, Updating, Deployed.
In the Log view, apply the Error filter if there are too many log entries. You can also sort the "error" entries by backup plans, managed entities or machines. 2. Once the reason of the failure is clear, do one or more of the following: Remove the reason of the failure. After that, you may want to start the failed task manually to maintain the backup scheme consistency, for example, if the policy uses the GFS or Tower of Hanoi backup scheme. Edit the backup policy to prevent future failure.
Edit a policy Click Edit. Editing policies is performed in the same way as creating (p. 346). Once the policy is edited, the management server updates the policy on all machines the policy was deployed to. Delete a policy Click Delete. As a result, the policy will be revoked from the machines it was deployed to and deleted from the management server. If the machine is currently offline, the policy will be revoked when the machine comes online again.
Filter backup policies by name/owner Type a policy's name / owner's name in the fields below the corresponding column's header. As a result you will see the list of the backup policies, whose names (or their owners' names) fully or just partly coincide with the entered value. Filter backup policies by deployment state, status, source type, last result, schedule In the field below the corresponding column's header, select the required value from the list.
machine (group). View log of the machine (group) Revoke policy from the machine (group). 7.1.3 Click View log. The Log (p. 321) view will display a list of the log entries, pre-filtered by the selected machine (group). Click Revoke. The management server will revoke the policy from the selected machine or group of machines. The policy itself remains on the management server.
existing machines' properties and will analyze every newly registered machine. The machine that meets a certain dynamic criterion will appear in all groups that use this dynamic criterion. To learn more about grouping machines, see the Grouping the registered machines (p. 61) section. To learn more about how policies are applied to machines and groups, see the Policies on machines and groups (p. 63) section. Way of working with machines First, add machines to the management server.
In the Import machines from file (p. 297) window, browse for a .txt or .csv file, containing the names (or IP addresses) of machines to import to the management server. The management console addresses to the agent and initiates the registration procedure. Because registration requires the agent's participation, it cannot take place when the machine is offline. An additional agent installed on a registered machine becomes registered on the same management server automatically.
actions will be performed on the machine as soon as the machine becomes available to the management server. Other actions Direct management operations Create a backup plan on a machine Click Recover data Click Backup. This operation is described in depth in the Creating a backup plan (p. 195) section. Recover. This operation is described in depth in the Recovering data (p. 215) section. Connect to a machine directly Click Connect directly. Establishes a direct connection to the managed machine.
Note for Virtual Edition users: When adding a VMware ESX/ESXi host, enter the IP of the virtual appliance running Acronis Backup & Recovery 10 Agent for ESX/ESXi. 4. Specify the user name and password of a user who is a member of the Administrators group on the machine. Note for Virtual Edition users: When adding a VMware ESX/ESXi host, specify the user name and password for your vCenter or ESX/ESXi host. Click Options>> and specify: User name.
Deletes and then tries again to add registered machines that are present in the list, but their current availability (p. 298) is Withdrawn. As a result, only those physical machines that are listed in the file will be present in the All physical machines group. Text file requirements The file should contain machine names or IP addresses, one machine per line. Example: Machine_name_1 Machine_name_2 192.168.1.14 192.168.1.
{username password} belong to a user who is a member of the Administrators group on all machines listed in the file. If not specified, the single sign-on mechanism is used to operate on all the machines. Importing machines from a text file To import machines from a file 1. In the Navigation tree, select Physical machines, or All physical machines. Import machines from file on the toolbar. 2. Click 3. In the Path field, enter a path to the .txt or .
Once the machines appear in the group, the policy that was applied to the group (if any), is deployed to the machines. If any of the selected machines is not available or reachable at the moment, the action will be kept in the management server as pending and will be performed as soon as the machine becomes available to the server. Machine details Accumulates in four tabs all information on the selected machine.
Backup policies Displays a list of backup policies applied to the selected machine and lets the management server administrator perform the following operations: To Do View details of a policy Click View details. In the Policy details (p. 290) window, examine all information related to the selected backup policy. View tasks of a policy Click View tasks. The Tasks (p. 319) view will display a list of the tasks related to the selected backup policy. View log of a policy Click View log. The Log (p.
You will be taken to the Log (p. 193) view containing the list of the plan-related log entries. Task Click View log. You will be taken to the Log (p. 193) view containing the list of the task-related log entries. Run a plan/task Backup plan Click Run. In the Run Backup Plan (p. 190) window, select the task you need to run. Running the backup plan starts the selected task of that plan immediately in spite of its schedule and conditions. Task Click Run.
Edit a plan/task Backup plan Click Edit. Backup plan editing is performed in the same way as creation (p. 195), except for the following limitations: It is not always possible to change backup scheme properties if the created archive is not empty (i.e. contains backups). 1. It is not possible to change the scheme to Grandfather-Father-Son or Tower of Hanoi. 2. If the Tower of Hanoi scheme is used, it is not possible to change the number of levels.
Task belongs to a backup plan A task belonging to a backup plan cannot be deleted separately from the plan. Edit the plan to remove the task or delete the entire plan. Refresh table Click Refresh. The management console will update the list of backup plans and tasks existing on the machine with the most recent information. Though the list is refreshed automatically based on events, the data may not be retrieved immediately from the managed machine, due to some latency.
You can create a dynamic group based on the list of the hosted virtual machines. To do this, click Create a dynamic group. The created group will be accessible in the Virtual machines view (p. 309). Inheritance order The Inheritance order window lets you examine where the policy applied to the machine came from.
Create a custom static or a dynamic group Click Create group. In the Create group (p. 304) window, specify the required parameters of the group. Custom groups can be created in the root folder ( other custom groups. Apply a backup policy to a group View detailed information on a group Rename a custom group/subgroup Click Physical machines), or in Apply backup policy. In the Policy selection window, specify the backup policy you need to apply to the selected group.
All the machines running the selected operating system will be members of the dynamic group. Organizational unit (p. 305) All the machines belonging to the specified organizational unit (OU) will be members of the dynamic group. IP address range All the machines whose IP addresses are within the specified IP range will be members of the dynamic group. Listed in txt/csv file (p. 306) All the machines that are listed in the specified .txt or .csv file will be members of the dynamic group. 3.
Select an organizational unit from the Active Directory tree by clicking Browse, or typing it manually. If the domain access credentials were not specified in the management server options, the program will ask you to provide them. The credentials will be saved in the Domain access credentials (p. 92) option. For example, suppose that the domain us.corp.example.com has OU1 (which is in the root), OU1 has OU2, and OU2 has OU3. And you need to add the machines of OU3.
Changing the type of group will result in its conversion. Any custom group can be converted to a dynamic group if it was static, and vice versa. When converting a static group to dynamic, provide grouping criteria. All the members that exist in the static group that do not match the provided criteria will be removed from the dynamic group. When converting a dynamic group to static, two options are available – either to leave the current content of the group or to empty the group.
Filtering and sorting Filtering and sorting of the backup policies is performed in the same way as for the Backup policies view. See the Filtering and sorting backup policies (p. 289) section for details. Inheritance order The Inheritance order window lets you examine where the policy applied to the group came from.
3. Register (p. 294) the Hyper-V host on the management server. If the machine is already registered, skip this step. 4. The virtual machines hosted on the Hyper-V server appear in the All virtual machines group. Adding ESX/ESXi virtual machines 1. VMware Tools (p. 49) have to be installed in the guest systems. 2. Acronis Backup & Recovery 10 Agent for ESX/ESXi is delivered as a virtual appliance. Do either of the following: Deploy the agent (p.
Grouping of virtual machines The Virtual machines section of the navigation tree contains one built-in group called All virtual machines. You cannot modify this group manually, delete or move it. You can apply policies that back up disks or volumes to this group. You can create both static and dynamic groups of virtual machines. Any virtual machine that is currently available can be added to a static group. You cannot create groups that contain both physical and virtual machines.
Deploying and updating Agent for ESX/ESXi Acronis Backup & Recovery 10 Management Server provides an easy way to deploy Agent for ESX/ESXi to every VMware ESX or ESXi server whose virtual machines you want to back up. A virtual appliance with an agent will be created on every ESX/ESXi server you specify and registered on the management server.
The management server will use this account to establish a trusted relationship with the agent during registration. Centralized backup plans and recovery tasks, originating from the management server, will run under this account by default. This means the account must have the necessary privileges (p. 313) on the vCenter Server. By default, the software will use the account that you have already specified, either when configuring integration with the vCenter, or when getting access to the ESX/ESXi server.
Server 3 uses storages B, C, D The VA can be deployed to either C or D. If there is no storage shared by all the servers, you can import the VA manually into any of the hosts. This will work, but backup performance will be far from optimal. After deployment, the agent virtual appliance can appear on any of the hosts included in the cluster, depending on how the load balancing is configured.
Global Licenses + + (required (required on ESX host on ESX host only) only) + + Network Assign network + + + Resource Assign VM to resource pool + + + Virtual machine > Configuration Add existing disk + + + + + Add new disk + Add or remove device + Change CPU count + Memory + Remove disk + + Rename + + + Settings Virtual machine > Interaction + + Configure CD media + Console interaction + Power off Virtual machine > Inventory + + Power on + + Create from e
Privileges for a folder To enable a user to operate within a specific vCenter folder, assign the user the following privileges on the folder.
To remove Agent for ESX/ESXi automatically: 1. In the Navigation tree, right click the group that has the same name as the vCenter Server. 2. Click Remove ESX agents. 3. A list of ESX/ESXi hosts obtained from the vCenter Server will be displayed. Select the hosts to remove the agents from, or check the Select all check box. 4. Click Remove ESX agents. What happens when you remove an agent The virtual appliance that contains the agent will be deleted from the server's disk.
3. Add (p. 318) the storage node to the Acronis Backup & Recovery 10 Management Server. 4. Create a managed vault (p. 132): specify the path to the vault, select the storage node that will manage the vault and select the management operations such as deduplication or encryption. 5. Create a backup policy (p. 346) or a backup plan that will use the managed vault. Actions on storage nodes All the operations described here, are performed by clicking the corresponding buttons on the toolbar.
the Information panel), examine information about the storage node and the vaults managed by this node. You can also manage the compacting task: manually start and stop the task. Refresh the list of storage nodes Click Refresh. The management console will update the list of storage nodes from the management server with the most recent information.
Offline - the storage node is unavailable. Withdrawn - the storage node was registered on another management server. As a result, it is not possible to control the node from the current management server. Archives - the total number of archives stored in all the vaults managed by the storage node Backups - the total number of backups stored within the archives in all the vaults managed by the storage node. Vaults This tab displays a list of the vaults, managed by the storage node.
View details of a task Click View details. In the Tasks details (p. 190) window, examine all information related to the selected task. View a task's log Click View log. The Log (p. 321) view will display a list of the log entries related to the selected task. Run a task Click Run. The task will be executed immediately in spite of its schedule. Stop a task Click Stop.
task cannot be deleted. Refresh tasks table Click Refresh. The management console will update the list of tasks existing on the machines with the most recent information. Though the list of tasks is refreshed automatically based on events, the data may not be retrieved immediately from the managed machine due to some latency. Manual refresh guarantees that the most recent data is displayed. Filtering and sorting tasks The following is a guideline for you to filter and sort tasks.
added to the log. When the software executes a task, it adds multiple entries saying what it is currently doing. Local and centralized logging in Acronis Backup & Recovery 10 Acronis Backup & Recovery 10 has local and centralized logs of events. Local event log A local event log holds information about Acronis Backup & Recovery 10 operations on a managed machine.
Actions on log entries All the operations described below are performed by clicking the corresponding items on the log toolbar. All these operations can also be performed with the context menu (by right-clicking the log entry), or with the Log actions bar (on the Actions and tools pane). The following is a guideline for you to perform actions on log entries. To Do Select a single log entry Click on it.
Filter log entries by type Press or release the following toolbar buttons: to filter error messages to filter warning messages to filter information messages Filter log entries by the original backup plan or managed entity type Under the Backup plan (or Managed entity type) column header, select the backup plan or the type of managed entity from the list. Filter log entries by task, Type the required value (task name, machine name, owner name, etc.
Message - The event text description. The log entry's details that you copy will have the following appearance: ---------------------------Log Entry Details--------------------------Type: Information Date and time: DD.MM.
The report will contain the information selected, grouped and sorted according to the template settings. The report appears in a separate interactive window that enables expanding and collapsing the tables. You can export the report to an XML file and open it later using Microsoft Excel or Microsoft Access. Report about the machines In this view, you can generate a report about the machines that are registered on the management server. This report consists of one or more tables.
Schedule: The types of the backup policies' schedules—Manual and/or Scheduled. Manual schedule means that the corresponding centralized backup plan runs only when you start it manually. Owner: The list of users who created the backup policies. With the default filter settings, the report includes all backup policies. Report view Under Report view, choose how the report will look: Select whether to show all items in a single table or to group them by a particular column.
Filters Under Filters, choose which tasks to include in the report. Only the tasks that meet all filter criteria are included. Origin: The types of origin of the tasks—Centralized, Local, and/or Local without backup plan. A centralized task belongs to a centralized backup plan. A local task might not belong to a backup plan (for example, a recovery task). Backup policies (centralized tasks only): The backup policies on which the tasks are based.
Report view Under Report view, choose how the report will look: Select whether to show all items in a single table or to group them by a particular column. Specify which table columns to show, and in which order. Specify how to sort the table. Report about the vaults' statistics In this view, you can generate a report about the use of the centralized managed vaults that are currently added to the management server. This report consists of one or more tables and diagrams.
Backup policies (centralized tasks only): The backup policies on which the tasks are based. The default setting means all backup policies that ever existed during the report period. Machines: The list of machines on which the tasks exist. Type: The task types—for example, disk backup tasks. Owner: The list of users who created the tasks. With the default filter settings, the report includes all tasks that existed on the registered machines any time during the report period.
By using the graphical user interface (GUI) By modifying the Windows registry In Linux, instead of using the administrative template and modifying the registry, parameters are configured by editing the corresponding configuration files.
http://msdn2.microsoft.com/en-us/library/aa374177.aspx Acronis Backup & Recovery 10 Storage Node The following are the parameters of Acronis Backup & Recovery 10 Storage Node that can be set by using Acronis Administrative Template. Client Connection Limit Description: Specifies the maximum number of simultaneous connections to the storage node by the agents that perform backup or recovery.
Vault Warnings and Limits Specifies the amount of free space in a vault (both as an absolute value and as a percentage) below which a warning or error is recorded in the log. This parameter contains the following settings: Vault Free Space Warning Limit Description: Specifies the amount of free space in a managed vault, in megabytes, below which a warning is recorded in the storage node's log.
Description: Specifies the amount of free space, in megabytes, on the volume containing a managed vault's database, below which a warning is recorded in the storage node's log. Possible values: Any integer number between 0 and 2147483647 Default value: 20 If the amount of free space on the volume containing a managed vault's database is less than the value in Vault Database Free Space Warning Limit, a warning is recorded in the storage node's log, indicating the vault in question.
Specifies how to clean up the centralized event log stored in the management server's reporting database. This parameter has the following settings: Max Size Description: Specifies the maximum size of the centralized event log, in kilobytes.
Description: Specifies the network name or IP address of the SNMP server. Possible values: Any string 0 to 32765 characters long Default value: Empty string SNMP Community Description: Specifies the community name for the SNMP notifications.
Default value: 120 Acronis Backup & Recovery 10 Management Server tries to perform synchronization for each normal-priority machine once in the number of seconds given by Period, by using an available worker thread (see Maximum Workers described previously). If there are fewer worker threads than normal-priority machines, the actual interval between synchronizations may be longer than the value of this parameter.
Offline Period Threshold (in seconds) Description: Specifies the maximum interval, in seconds, between attempts to connect to a registered machine which appears to be offline. Possible values: Any integer number between 120 and 2147483647 Default value: 1800 Normally, the management server connects to each registered machine with a certain time interval (see Period and Period-High Priority earlier in this section).
If this setting is 0, the snapshot storage will not be created. The initial size will not exceed the available space minus 50 MB. Without the snapshot storage, taking snapshots is still possible. The size of the snapshot storage does not affect the size of the backup. Acronis Backup & Recovery 10 Agent for Windows The following are the parameters of Acronis Backup & Recovery 10 Agent that can be set by using Acronis Administrative Template.
If the value is 0, no reconnection attempts will be performed; the agent will only check for the license as determined by License Check Interval. License Server Address Description: Specifies the network name or IP address of Acronis License Server. Possible values: Any string 0 to 32765 characters long Default value: Empty string Log Cleanup Rules Specifies how to clean up the agent log.
Description: Specifies the minimum level of severity of events for sending SNMP notifications about them. Only notifications about events of levels greater than or equal to Trace Level will be sent. Possible values: 0 (Internal event), 1 (Debugging information), 2 (Information), 3 (Warning), 4 (Error), or 5 (Critical error) Default value: 4 (only errors and critical errors will be recorded—if Trace State is set to True) SNMP Address Description: Specifies the network name or IP address of the SNMP server.
Possible values: Any integer number between 0 and 100 Default value: 50 If this setting is 0, the snapshot storage will not be created. The initial size will not exceed the available space minus 50 MB. Without the snapshot storage, taking snapshots is still possible. The size of the snapshot storage does not affect the size of the backup.
Authentication parameters Selecting the Trust self-signed certificates check box allows the client to connect to the server applications that use self-signed SSL certificates such as certificates created during the installation of Acronis Backup & Recovery 10 components—see SSL certificates (p. 86). You should keep this check box selected, unless you have a Public Key Infrastructure (PKI) in your environment.
Always use The use of SSL certificates is enabled. The connection will be established only if the use of SSL certificates is enabled on the client application. Disabled The same as Not configured. Event tracing parameters In Windows, the events occurring in Acronis Backup & Recovery 10 can be recorded into the event log, a file, or both.
Specifies whether the machine where the Acronis Backup & Recovery 10 component is installed will participate in the Customer Experience Program. Select one of the following: Not Configured By default, the machine does not participate in the Customer Experience Program.
This database contains a list of vaults that are managed by the storage node, other than tape vaults (see the next parameter). Its typical size does not exceed a few kilobytes. Possible values: Any string 0 to 32765 characters long Default value: C:\Program Files\Acronis\StorageNode Registry key: HKEY_LOCAL_MACHINE\SOFTWARE\Acronis\ASN\Configuration\StorageNode\DatabasePath TapesDatabasePath Description: Specifies the folder where Acronis Backup & Recovery 10 Storage Node stores its tape vaults database.
Where to back up Archive (p. 354) Specify the path to the location, where the backup archive will be stored, and the archive name. It is advisable that the archive name be unique within the location. The location must be available at the time when the management server starts to deploy the policy. Access credentials (p. 355) [Optional] Provide credentials for the location if the backup policy account does not have access permissions to the location. To access this option, select the Advanced view check box.
When to convert (p. 214) [Optional] Specify whether to convert every full, every incremental or every differential backup or convert the last created backup on schedule. Specify the conversion schedule if required. Host (p. 214) Specify the machine that will perform the conversion. The machine has to have Acronis Backup & Recovery 10 Agent for Windows, Agent for ESX/ESXi or Agent for Hyper-V installed. Virtualization server (p. 214) Here you select the resulting virtual machine type and location.
7.3.2 Items to back up Specify selection rules for backing up items, selected in the Source type field of the General section. Volumes to back up selection rules (p. 349) Files to back up selection rules (p. 352) Volumes to back up selection rules Define volume selection rules, according to which the volumes will be backed up on the machines the policy will be applied to. To define volume selection rules In the first line, select the rule from the list, or type it manually.
All fixed volumes Type or select: [Fixed Volumes] Refers to all volumes other than removable media. Fixed volumes include volumes on SCSI, ATAPI, ATA, SSA, SAS and SATA devices, and on RAID arrays. Linux volumes First partition on the first IDE hard disk of a Linux machine Type or select: /dev/hda1 hda1 is the standard device name for the first partition of the first IDE hard disk drive. For more details, see "Note on Linux machines" below.
Operating systems starting from Windows 7 and Windows Server 2008 R2 create a dedicated system volume called System Reserved. If you select [SYSTEM], only this dedicated volume will be backed up. Always select both [SYSTEM] and [BOOT] when backing up machines running these operating systems.
/dev/mda1 Files to back up selection rules Define file selection rules, according to which the files and (or) folders will be backed up on the machines the policy will be applied to. To define file selection rules In the first line, select the rule from the list, or type it manually. To add another rule, click the next empty line, and select the rule from the list, or type it manually.
All files on all volumes on [All Files] a machine Points to all files on all volumes of the machine. All user profiles existing on a machine Points to the folder where all user profiles are located (typically, C:\Documents and Settings in Windows XP, and C:\Users in Windows Vista). [All Profiles Folder] Linux To include In the Files and folders column, type or select: Text file file.txt on the volume /dev/hda3 mounted on /home/usr/docs /dev/hda3/file.
Exclude all hidden files and folders Select this check box to skip files and folders with the Hidden attribute. If a folder is Hidden, all of its contents — including files that are not Hidden — will be excluded. Exclude all system files and folders Select this check box to skip files and folders with the System attribute. If a folder is System, all of its contents — including files that are not System — will be excluded.
Enter the full path to the folder in the Path field. This path will be created on each machine the policy will be applied to. Store each machine's archive in the machine's Acronis Secure Zone Acronis Secure Zone has to be created on each machine the policy will be applied to. For information on how to create Acronis Secure Zone, see the Creating Acronis Secure Zone (p. 248) section. 2. Naming the archives Data from each machine will be backed up to a separate archive. Specify names for the archives.
Password. The password for the account. 2. Click OK. Warning: According to the original FTP specification, credentials required for access to FTP servers are transferred through a network as plaintext. This means that the user name and password can be intercepted by an eavesdropper using a packet sniffer. 7.3.7 Backup scheme selection Choose one of the available backup schemes: Back up now – to create a backup task for manual start and run the task immediately after its creation.
The task will be started manually Select this check box, if you do not need to put the backup task on a schedule and wish to start it manually afterwards. Simple scheme With the simple backup scheme you just schedule when and how often to back up data and set the retention rule. At the first time a full backup will be created. The next backups will be incremental. To set up the simple backup scheme, specify the appropriate settings as follows.
Start backup at: Specifies when to start a backup. The default value is 12:00 PM. Back up on: Specifies the days on which to perform a backup. The default value is Workdays. Weekly/Monthly: Specifies which of the days selected in the Back up on field you want to reserve for weekly and monthly backups. A monthly backup will be performed every fourth such day. The default value is Friday. Keep backups: Specifies how long you want the backups to be stored in the archive.
Weekly: 1 month Monthly: indefinitely As a result, an archive of daily, weekly, and monthly backups will be created. Daily backups will be available for seven days since creation. For instance, a daily backup of Sunday, January 1, will be available through next Sunday, January 8; the first weekly backup, the one of Saturday, January 7, will be stored on the system until February 7. Monthly backups will never be deleted.
Keep backups: Daily: 6 months Weekly: 6 months Monthly: 5 years Here, daily incremental backups will be created on Tuesdays and Thursdays, with weekly and monthly backups performed on Fridays. Note that, in order to choose Friday in the Weekly/monthly field, you need to first select it in the Back up on field. Such an archive would allow you to compare your financial documents as of the first and the last day of work, and have a five-year history of all documents, etc.
levels you select. See the example below for details. Example Schedule parameters are set as follows Recur: Every 1 day Frequency: Once at 6 PM Number of levels: 4 This is how the first 14 days (or 14 sessions) of this scheme's schedule look. Shaded numbers denote backup levels.
1 4 2 1 3 2 4 1 5 3 6 1 7 2 8 1 9 4 10 1 11 2 12 1 A new level 3 differential backup has not yet been created, so the backup of day five is still stored. Since it depends on the full backup of day one, that backup is available as well. This enables us to go as far back as 11 days, which is the best-case scenario. The following day, however, a new third-level differential backup is created, and the old full backup is deleted.
When there is insufficient space while backing up The archive will be cleaned up only during backup and only if there is not enough space to create a new backup.
Retention rules: Delete backups older than 12 months Apply the rules: After backing up By default, a one-year-old full backup will not be deleted until all incremental backups that depend on it become subject to deletion too. For more information, see Retention rules (p. 39). Monthly full, weekly differential, and daily incremental backups plus cleanup This example demonstrates the use of all options available in the Custom scheme.
In the first of the previous examples, we set up a schedule only for full backups. However, the scheme will still result in three backup tasks, enabling you to manually start a backup of any type: Full backup, runs every Friday at 10:00 PM Incremental backup, runs manually Differential backup, runs manually You can run any of these backup tasks by selecting it from the list of tasks in the Backup plans and tasks section in the left pane.
Glossary A Acronis Active Restore The Acronis proprietary technology that brings a system online immediately after the system recovery is started. The system boots from the backup (p. 372) and the machine becomes operational and ready to provide necessary services. The data required to serve incoming requests is recovered with the highest priority; everything else is recovered in the background.
Agent (Acronis Backup & Recovery 10 Agent) An application that performs data backup and recovery and enables other management operations on the machine (p. 375), such as task management and operations with hard disks. The type of data that can be backed up depends on the agent type. Acronis Backup & Recovery 10 includes the agents for backing up disks and files and the agents for backing up virtual machines residing on virtualization servers. Agent-side cleanup Cleanup (p. 370) performed by an agent (p.
Backup options Configuration parameters of a backup operation (p. 367), such as pre/post backup commands, maximum network bandwidth allotted for the backup stream or data compression level. Backup options are a part of a backup plan (p. 368). Backup plan (Plan) A set of rules that specify how the given data will be protected on a given machine. A backup plan specifies: what data to back up [optionally] the archive validation rules (p. 379) where to store the backup archive (p.
5. On each machine, the agent installed on the machine creates a backup plan (p. 368) using other rules specified by the policy. Such backup plan is called a centralized plan (p. 370). 6. On each machine, the agent installed on the machine creates a set of centralized tasks (p. 370) that will carry out the plan. Backup scheme A part of the backup plan (p. 368) that includes the backup schedule and [optionally] the retention rules and the cleanup (p. 370) schedule. For example: perform full backup (p.
built-in group except for deleting the machine from the management server. Virtual machines are deleted as a result of their host server deletion. A backup policy (p. 368) can be applied to a built-in group. C Centralized backup plan A backup plan (p. 368) that appears on the managed machine (p. 375) as a result of deploying a backup policy (p. 368) from the management server (p. 376). Such plan can be modified only by editing the backup policy.
Cleanup consists in applying to an archive the retention rules set by the backup plan (p. 368) that produces the archive. This operation checks if the archive has exceeded its maximum size and/or for expired backups. This may or may not result in deleting backups depending on whether the retention rules are violated or not. For more information please refer to Retention rules (p. 39). Console (Acronis Backup & Recovery 10 Management Console) A tool for remote or local access to Acronis agents (p.
operations are configured on the management server (p. 376) and propagated by the server to the managed machines). The direct management operations include: creating and managing local backup plans (p. 375) viewing and managing the log of the agent's operations creating and managing local tasks (p. 375), such as recovery tasks creating and managing personal vaults (p. 376) and archives stored there viewing the state, progress and properties of the centralized tasks (p.
Dynamic disk A hard disk managed by Logical Disk Manager (LDM) that is available in Windows starting with Windows 2000. LDM helps flexibly allocate volumes on a storage device for better fault tolerance, better performance or larger volume size. A dynamic disk can use either the master boot record (MBR) or GUID partition table (GPT) partition style. In addition to MBR or GPT, each dynamic disk has a hidden database where the LDM stores the dynamic volumes' configuration.
Dynamic volume Any volume located on dynamic disks (p. 372), or more precisely, on a disk group (p. 372). Dynamic volumes can span multiple disks. Dynamic volumes are usually configured depending on the desired goal: to increase the volume size (a spanned volume) to reduce the access time (a striped volume) to achieve fault tolerance by introducing redundancy (mirrored and RAID-5 volumes.) E Encrypted archive A backup archive (p. 367) encrypted according to the Advanced Encryption Standard (AES).
G GFS (Grandfather-Father-Son) A popular backup scheme (p. 369) aimed to maintain the optimal balance between a backup archive (p. 367) size and the number of recovery points (p. 376) available from the archive. GFS enables recovering with daily resolution for the last several days, weekly resolution for the last several weeks and monthly resolution for any time in the past. For more information please refer to GFS backup scheme (p. 34). I Image The same as Disk backup (p. 372).
Physically, managed vaults can reside on a network share, SAN, NAS, on a hard drive local to the storage node or on a tape library locally attached to the storage node. The storage node performs storage node-side cleanup (p. 377) and storage node-side validation (p. 378) for each archive stored in the managed vault. An administrator can specify additional operations that the storage node will perform (deduplication (p. 371), encryption).
R Recovery point Date and time to which the backed up data can be reverted to. Registered machine A machine (p. 375) managed by a management server (p. 376). A machine can be registered on only one management server at a time. A machine becomes registered as a result of the registration (p. 377) procedure. Registration A procedure that adds a managed machine (p. 375) to a management server (p. 376). Registration sets up a trust relationship between the agent (p.
Since the cleanup schedule exists on the machine (p. 375) the agent (p. 366) resides on, and therefore uses the machine’s time and events, the agent has to initiate the storage node-side cleanup every time the scheduled time or event comes. To do so, the agent must be online. The following table summarizes the cleanup types used in Acronis Backup & Recovery 10.
the image being recovered is located in Acronis Secure Zone (p. 366) or when using Acronis Active Restore (p. 366), because these features are primarily meant for instant data recovery on the same machine. Universal Restore is not available when recovering Linux. Unmanaged vault Any vault (p. 379) that is not a managed vault (p. 375). V Validation An operation that checks the possibility of data recovery from a backup (p. 367).
Windows Server 2003 with Service Pack 1 (PE 1.6) Windows Vista (PE 2.0) Windows Vista SP1 and Windows Server 2008 (PE 2.1). WinPE is commonly used by OEMs and corporations for deployment, test, diagnostic and system repair purposes. A machine can be booted into WinPE via PXE, CD-ROM, USB flash drive or hard disk. The Acronis Plug-in for WinPE (p. 366) enables running the Acronis Backup & Recovery 10 Agent (p. 366) in the preinstallation environment. 380 Copyright © Acronis, Inc.
Action pages • 12, 13, 15 Index A A policy on a machine or a group • 66 Actions on a tape library vault • 143 Actions on backup plans and tasks • 187, 190 Actions on backup policies • 292, 294 About Windows loaders • 238 Actions on centralized vaults • 60, 132, 133, 134 Access credentials • 245, 246 Actions on groups • 65, 298, 311 Access credentials for archive location • 202, 209 Actions on log entries • 198, 199, 331, 332 Access credentials for destination • 223, 233, 250, 253 Actions on person
Archive • 201, 208, 357, 365, 379, 380 Archive protection • 100, 101 Archive selection • 222, 224, 241, 242, 245, 249, 250 Backup policy's state and statuses • 69, 293 Backup priority • 100, 108 Backup scheme • 381, 382, 388, 391 Archive validation • 202, 219, 377 Backup scheme selection • 357, 367 At Windows Event Log event • 177 Backup schemes • 202, 210 Attaching a managed vault • 135, 139 Backup selection • 241, 243, 245, 246, 250, 251 B Backup splitting • 100, 113 Back up later scheme • 210,
Client and server applications • 83 Cloning method and advanced options • 278 Collecting system information • 289 Column selection • 340 Creating the volume structure manually • 269, 270 Criteria of the choice • 148 Cumulative state and status of a policy • 72 Common operations • 165 Custom backup scheme • 41, 173, 175, 216, 374 Communication between Acronis Backup & Recovery 10 components • 83 Customer Experience Program • 99 Components for centralized management • 18 Compression level • 100, 108 Con
Disk destination • 227 Disk group • 43, 385, 387 Disk initialization • 276, 277 Disk management • 45, 222, 274 Filtering and sorting backup plans and tasks • 186, 195, 309 Filtering and sorting backup policies • 292, 296, 306, 316 Disk operations • 276 Filtering and sorting log entries • 198, 199, 331, 333 Disks • 222, 226 Filtering and sorting machines • 298, 311 Disks/volumes selection • 225 Filtering and sorting tasks • 328, 330 Domain access credentials • 94, 314 Fits time interval • 181 Drive
How to load Acronis Administrative Template • 84, 341 M How to reactivate GRUB and change its configuration • 237 Machine • 19, 380, 381, 382, 383, 385, 386, 388, 389, 390, 391, 392 I Machine details • 297, 298, 301, 302, 305 Machine management • 96, 302, 305 Image • 388 Machine options • 95, 112, 127, 128 Importing machines from a text file • 299, 303 Machines selection • 295 Importing machines from Active Directory • 299, 302 Increasing Acronis Secure Zone • 256 Incremental backup • 380, 382, 38
Network port configuration • 85, 86 Policy deployment state on a machine • 69 Network settings • 260, 262 Policy details • 292, 295, 296, 306, 316 Notifications • 110, 125 Policy status on a group • 71 NT signature • 227, 229 Policy status on a machine • 70, 95 Number of tasks • 91, 330 Pop-up messages • 90 O Post-backup command • 104 Post-data capture command • 106 Operations with a machine • 66 Post-recovery command • 124 Operations with archives stored in a vault • 132, 133, 163, 165 Pre/P
Recovering the storage node • 240 Selecting source and target disks • 278 Recovery exclusions • 232, 233 Selection rule • 70, 381, 390 Recovery point • 388, 390, 391 Set active volume • 282, 287 Recovery priority • 123, 125 Set the volume options • 285 Registered machine • 91, 383, 389, 390 Set the volume size • 285, 286 Registration • 20, 58, 62, 96, 297, 390 Setting up a conversion schedule • 202, 220, 358 Removing Agent for ESX/ESXi • 324 Report about the archives and backups • 338 Report abo
System requirements • 25 T Tape compatibility table • 51, 140, 141, 162 Tape libraries • 51, 139 Tape library as a managed vault • 142 Tape planning • 148, 159 Example 1 • 160 Example 2 • 161 U Understanding Acronis Backup & Recovery 10 • 27 Understanding centralized management • 57 Understanding states and statuses • 187 Universal Restore • 17, 21, 223, 233, 263 Universal Restore (Acronis Backup & Recovery 10 Universal Restore) • 52, 54, 221, 233, 391 Tape rotation • 140, 148 Unmanaged vault • 380, 392
Virtual machines • 316 Virtual machines on a management server • 63, 310, 317 VM power management • 49, 130 VM protection options • 94 VMware vCenter integration • 95, 318, 319 Volume destination • 227, 229 Volume operations • 282 Volume properties • 229 Volume selection • 245, 247 Volume Shadow Copy Service • 100, 105, 107 Volumes • 222, 228 Volumes to back up selection rules • 359 W Weekly schedule • 172, 215, 326, 372 What if • 161 When deduplication is most effective • 74 When to recover • 223, 233 Whe