
User`s guide

318 Copyright © Acronis, Inc., 2000-2009
the selected storage
node
The Create managed vault page (p. 128) will be opened with the pre-selected storage
node. Perform the remaining steps to create the vault.
Change the
compacting task
schedule
After deleting backups from deduplicating vaults, either manually or during cleanup,
unreferenced data may appear in the deduplicating vaults and their databases. The
compacting procedure deletes such data in order to free up more storage space. Only
one compacting task is available per storage node.
Click
Reschedule compacting.
In the Schedule window, set up the schedule for the compacting procedure. Only the
time events (daily (p. 163), weekly (p. 165), and monthly (p. 167) schedules) are
available for setting up.
The preset is: Start the task every 1 week on Sunday at 03:00:00 AM. Repeat once.
View details of the
storage node
Click
View details.
In the Storage node details (p. 319) window (the content of which is duplicated on
the Information panel), examine information about the storage node and the vaults
managed by this node. You can also manage the compacting task: manually start and
stop the task.
Refresh the list of
storage nodes
Click
Refresh.
The management console will update the list of storage nodes from the management
server with the most recent information. Though the list of storage nodes is
refreshed automatically based on events , the data may not be retrieved immediately
from the management server due to some latency. Manual refresh guarantees that
the most recent data is displayed.
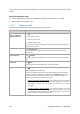
Adding a storage node
To add a storage node
1. In the IP/Name field, enter the name or the IP address of the machine the storage node resides
on, or click Browse... and browse the network for the machine.
Use the fully-qualified domain name (FQDN) of the storage node, that is, a completely specified
domain name ending in a top-level domain. Do not enter “127.0.0.1” or “localhost” as the storage
node IP/name. These settings are no good even if the management server and the storage node
are on the same machine, because, after the policy using the storage node is deployed, each
agent will try to access the storage node as if it were installed on the agent's host.
2. To provide a valid user account for the machine, click Options>>, and specify:
o User name. When entering a name of an Active Directory user account, be sure to also
specify the domain name (DOMAIN\Username or Username@domain). The user account has
to be a member of the Administrators group on the machine.
o Password. The password for the account.
Select the Save password check box to store the password for the account.
3. Click OK.
Because registration requires the storage node's participation, it cannot take place when the machine
is offline.