
APS 2.0 Deployment Guide

8 Copyright © Acronis International GmbH, 2002-2015
Order allow,deny
Allow from all
</Directory>
<VirtualHost _default_:10443>
ErrorLog logs/acronis_ssl_error_log
TransferLog logs/acronis_ssl_access_log
LogLevel warn
SSLEngine on
SSLProtocol all -SSLv2
SSLCipherSuite ALL:!ADH:!EXPORT:!SSLv2:RC4+RSA:+HIGH:+MEDIUM:+LOW
SSLCertificateFile /etc/pki/tls/certs/clientcert.crt
SSLCertificateKeyFile /etc/pki/tls/private/clientcert.key
SSLVerifyClient optional_no_ca
SSLOptions +StdEnvVars +ExportCertData
SetEnvIf User-Agent ".*MSIE.*" \
nokeepalive ssl-unclean-shutdown \
downgrade-1.0 force-response-1.0
CustomLog logs/ssl_request_log \
"%t %h %{SSL_PROTOCOL}x %{SSL_CIPHER}x \"%r\" %b"
</VirtualHost>
10. Restart the web server by running the following command:
service httpd restart
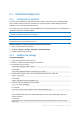
5.2.2 Importing the package
To import the package
1. Log in to Operations Automation.
2. In the Operations Automation Control Panel, go to Services > Applications.
3. On the APS Packages tab, click Import Package.
4. Click Local file, and then select the .zip file of the package (normally, the AcronisBackupCloud-
2.0-XXX.app.zip file).
5. Select the Enabled check box.
6. Click Submit.
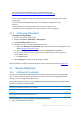
5.2.3 Creating an application instance
To create an application instance
1. In the Operations Automation Control Panel, go to Services > Applications.
2. Click the package in the list of packages.
3. Click Instances.
4. Click Install.