
User`s guide

Does not include USB, PC Card, or SCSI drivers. Recommended for use in case of
problems with running Full version
To find more about components of other SonicWALL products, see the respective user
guides.
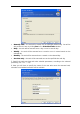
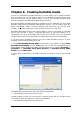
The Start automatically after parameter specifies the timeout interval for the boot
menu. If this parameter is not specified, at booting a computer the program will display
the boot menu and wait for someone to select whether to boot the OS or the SonicWALL
component. If you set 10 sec for SonicWALL Bare Metal Recovery, for example, it will
start launching it in 10 seconds after the menu is displayed. This enables fully remote
operations if you are booting from a RIS server.
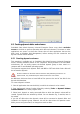
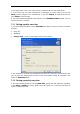
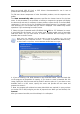
3. Select the type of bootable media (CD-R/RW, DVD+
R/RW or 3.5” diskettes) to create.
If your BIOS has this feature, you can create other bootable media such as removable
USB flash drives. You can also choose to create a bootable disk ISO image or save
bootable data on the RIS server.
When using 3.5” diskettes, you will be able to write on a diskette (or a set of the
diskettes) only one component at a time — for example, SonicWALL Bare Metal Recovery.
To write another component, start the Bootable Media Builder once again.
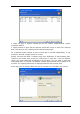
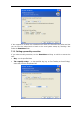
4. If you are creating a CD, DVD, diskettes or any removable media, insert the blank disk
so the program can determine its capacity. If you chose to create a bootable disk ISO
image, specify the ISO file name and the folder in which to place it. If you chose to save
bootable data on a RIS server, specify the server and provide the user name and
password to access it.
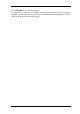
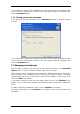
5. Next, the program will calculate how many blank disks are required (in case you have
not chosen ISO or RIS) and give you time to prepare them. When you are finished, click
Proceed.
After you create a boot disk, mark it and keep it in a safe place.
60 Copyright © SonicWALL, Inc., 2000-2008