
Quick Start
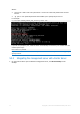
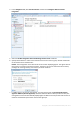
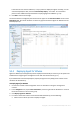
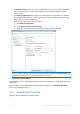
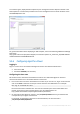


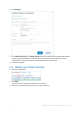
Table Of Contents
- 1 What is Acronis Backup Advanced for vCloud?
- 2 Software requirements
- 3 Components
- 4 What you need to start
- 5 Step-by-step instructions
- 5.1 Installing and configuring RabbitMQ Server
- 5.2 Installing Acronis Backup Advanced for vCloud
- 5.3 Enabling backup for an organization
- 5.4 Backing up virtual machines
- 5.5 Applying a backup plan
- 5.6 Overwriting a virtual machine with its backed-up version
- 5.7 Recovering a virtual machine
- 5.8 Recovering files from a virtual machine backup

15 Copyright © Acronis International GmbH, 2002-2014
b. In Network interface, select the network interface that provides access to the management
server, the vCenter Server for the resource group, the cluster virtual machines, and the
backup storage.
c. The Network configuration link enables you to select whether the agent will use a dynamic
(provided by a DHCP server) or a static IP address. If you want to leave the default setting of
using a dynamic address, skip this step.
If you want the agent to use a static IP address:
Click Network configuration.
Select Use the following network settings.
Specify the appropriate network settings for the agent, and then click OK.
Tip: You will be able to change the network settings after the agent is deployed. To do so, select the virtual
appliance in VMware vSphere inventory and go to the virtual appliance console. Under Agent options, click
the Change link next to the name of the network interface, such as eth0.
5. Click Deploy Agent for VMware.
The management server starts deploying Agent for VMware. The progress is shown at the bottom of
the window.
Once the agent is successfully deployed, the agent machine appears in the Machines with agents
view of the management server.
5.2.5 Installing Agent for vCloud
Agent for vCloud is delivered as an OVF template.