Copyright © Acronis International GmbH, 2002-2014
Copyright Statement Copyright © Acronis International GmbH, 2002-2014. All rights reserved. “Acronis” and “Acronis Secure Zone” are registered trademarks of Acronis International GmbH. "Acronis Compute with Confidence", “Acronis Startup Recovery Manager”, “Acronis Active Restore”, “Acronis Instant Restore” and the Acronis logo are trademarks of Acronis International GmbH. Linux is a registered trademark of Linus Torvalds. VMware and VMware Ready are trademarks and/or registered trademarks of VMware, Inc.
Table of contents 1 Installing..........................................................................................................................5 1.1 Requirements ............................................................................................................................5 1.1.1 1.1.2 1.1.3 1.1.4 1.1.5 1.2 Installing Acronis Access Advanced on your server ...................................................................8 1.3 Using the Configuration Utility ..................
7 Quick Start: Sync & Share ............................................................................................. 168 7.1 First Run .................................................................................................................................168 7.2 Using the web interface to access files..................................................................................171 7.3 Using the desktop client .......................................................................
1 Installing In this section Requirements ............................................................................................. 5 Installing Acronis Access Advanced on your server ................................... 8 Using the Configuration Utility .................................................................. 9 Using the Setup wizard ............................................................................13 Clustering Acronis Access..........................................................
Supported OS's: iOS 6 or later Android 2.2 or later (Devices with x86 processor architecture are not supported) The Acronis Access app can be downloaded from: For iOS http://www.grouplogic.com/web/meappstore For Android https://play.google.com/store/apps/details?id=com.grouplogic.mobilecho 1.1.3 Minimum Hardware Recommendation Processor: Intel/AMD Note: Acronis Access server can be installed on virtual machines. Memory: Production environments: 8 GB minimum. More recommended.
If you want to allow mobile devices access from outside your firewall, there are several options: Port 443 access: Acronis Access uses HTTPS for encrypted transport, so it fits in naturally with common firewall rules allowing HTTPS traffic on port 443. If you allow port 443 access to your Acronis Access server, authorized iPad clients can connect while inside or outside of your firewall. Acronis Access can also be configured to use any other port you prefer.
Note: You can support an unsecure version of Internet Explorer 8 if necessary by following the Changing the Acronis Access Tomcat SSL Ciphers article. Internet Explorer 8 is not supported for Server Administration. Note: When using Internet Explorer you have to make sure that Do not save encrypted pages to disk is unchecked in order to be able to download files. This setting is found under Internet Options -> Advanced -> Security. Google Chrome Safari 5.1.10 or later 1.
Note: If you're deploying multiple Acronis Access servers, or you are installing a non-standard configuration, you can select which components to install from the Custom Install button. 7. Either use the default path or select a new one for the Acronis Access main folder and press OK. 8. Set a password for the user Postgres and write it down. This password will be needed for database backup and recovery. 9. A window displaying all the components which will be installed appears. Press OK to continue. 10.
The Gateway Server is used by mobile clients to access both files and shares. The Access Server provides the web user interface for Acronis Access clients, and is also the administration console for both Mobile Access and Sync & Share. Note: See the Network Requirements (p. 6) section for more information on best practices for the IP address configurations of Acronis Access. Note: For information on adding your certificate to the Microsoft Windows Certificate Store, visit the Using Certificates article.
Gateway Server Overview The Gateway Server is used by mobile clients to access both files and shares. Address - The DNS name or IP address of your Gateway Server or pick All Addresses to listen on all interfaces. Port - The port of your Gateway Server. Service Account - This allows the Gateway Server service to run in the context of another account. This is normally not required in typical installations.
File Repository Overview The File Repository is used by Sync & Share functionality. If you are haven't enabled Sync & Share, you can accept the standard values. If you are using Sync & Share, the file store path should specify the disk location to be used for storage. If you plan to use Amazon S3 for storage, then the default values are ok. Address - The DNS name or IP address of your File Repository or pick All Addresses to listen on all interfaces.
Note: Write down the administrator password, as it cannot be recovered if forgotten. Note: If you need to change any of the network IP addresses/ports or certificates used by the Acronis Access components, you can run the Configuration Utility again at any time to make these changes. It will automatically adjust the necessary configuration files and restart the services for you. 1.
Going through the initial configuration process Licensing To start a trial: 1. Select Start Trial and press Continue. To license your Access Server: 1. Select Enter license keys. 2. Enter your license key and mark the checkbox. 3. Press Save. General Settings 1. Enter a Server Name.
2. Specify the root DNS name or IP address where users can access the website (starting with http:// or https://). 3. Specify the DNS name or IP address to which the mobile users will enroll to. 4. Select the default language for the Audit Log. The current options are English, German, French and Japanese. 5. Press Save. SMTP Note: You can skip this section, and configure SMTP later. 1. 2. 3. 4. 5. 6. Enter the DNS name or IP address of your SMTP server Enter the SMTP port of your server.
LDAP Note: You can skip this section, and configure LDAP later. 1. Mark Enable LDAP.
2. Enter the DNS name or IP address of your LDAP server. 3. Enter the port of your LDAP server. 4. If you use a certificate for connections with your LDAP server, mark Use Secure LDAP Connection. 5. Enter your LDAP credentials, with the domain. (e.g. acronis\hristo). 6. Enter your LDAP search base. 7. Enter the desired domain(s) for LDAP authentication. (i.e.to enable LDAP authentication for an account with the email joe@glilabs.com, you would enter glilabs.com) 8. Press Save.
1.5 Clustering Acronis Access Acronis Access allows the configuration of high-availability setups without needing third-party clustering software. This is configured through the new Cluster Groups feature introduced in Acronis Access 5.1. The setup procedure is simple, but provides high-availability for the Acronis Access Gateway Servers as they are the component under the heaviest load. All of these configurations are managed through the Acronis Access Server.
2. Disable any anti-virus software you have or it may interrupt the installation procedure resulting in a failed installation. 3. Double-click on the installer executable. 4. Press Next to begin. 5. Read and accept the license agreement. 6. Press Install. Note: If you're deploying multiple Acronis Access servers, or you are installing a non-standard configuration, you can select which components to install from the Custom Install button. 7.
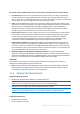
9. Choose a location on a shared disk for the Postgres Data folder and press Next. 10. A window displaying all the components which will be installed appears. Press OK to continue. When the Acronis Access installer finishes, press Exit. Creating the cluster group 1. Open the Cluster Administrator and open Groups. 2. Right-click on Groups and select New and then Group. Give the cluster group a proper name. (e.g.
3. Select the machines which will be a part of this cluster group and press Finish. Configurations on the Active node 1. Configure your Gateway Server's database to be on a location on a shared disk. a. Navigate to C:\Program Files (x86)\Acronis\Access\Gateway Server\ b. Find the database.yml file and open it with a text editor. c. Find this line: database_path: './database/' and replace ./database/ with the path you want to use (e.g. database_path: 'S:/access_cluster/database/').
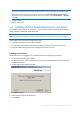
2. Open New and select Resource. 3. Enter a name for the service and select the correct cluster group. 4. From the Resource Type drop down menu select Generic Service and press Next.
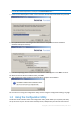
5. Make sure both of your nodes are listed as Possible owners and press Next. 6. Skip the dependencies for now by pressing Next. 7. Enter the correct service name of the service you are adding (e.g. postgresql-x64-9.2) and press Next. 8. Skip the Registry Replication window for now by pressing Next. 9. Press Finish to complete the procedure. Setting an IP address for the cluster group 1. Right-click on the Acronis Access cluster group. 2. Open New and select Resource.
3. Enter a name for the resource and select the correct cluster group. 4. From the Resource Type drop down menu select IP Address and press Next. 5. Make sure both of your nodes are listed as Possible owners and press Next. 6. Skip the dependencies for now by pressing Next. 7. Enter the IP address you will use for this cluster group. 8. Enter the subnet mask and press Finish. Adding a shared disk 1. Right-click on the Acronis Access cluster group.
2. Open New and select Resource. 3. Enter a name for the resource and select the correct cluster group. 4. From the Resource Type drop down menu select Physical Disk and press Next.
5. Make sure both of your nodes are listed as Possible owners and press Next. 6. Skip the dependencies for now by pressing Next. 7. Select an available disk from the drop down menu and press Finish. Configuring dependencies For PostgreSQL and Acronis Access File Repository do the following: 1. 2. 3. 4. Right-click on the appropriate service and select Properties. Click on the Dependencies tab. Click on Modify. Select the shared disk you have added and move it to the right side. 5. Press OK.
For PostgreSQL also do the following: 1. Click on the Registry Replication tab. 2. Press Add and enter the following: SYSTEM\CurrentControlSet\Services\AcronisAccessPostgreSQL\(For older versions of Acronis Access the service may be different. e.g. postgresql-x64-9.2) For the Acronis Access Gateway Server service do the following: 1. Right-click on the appropriate service and select Properties. 2. Click on the Dependencies tab. 3. Click on Modify.
4. Select the IP Address and Physical disk and move them to the right side. 5. Press OK. For the Acronis Access Tomcat service do the following: 1. 2. 3. 4. 28 Right-click on the appropriate service and select Properties. Click on the Dependencies tab. Click on Modify. Select the PostgreSQL and Acronis Access Gateway Server services and move them to the right side.
5. Press OK. Bringing the cluster group online and using the Configuration Utility 1. Right-click on the cluster group and press Bring online. 2. Launch the Configuration Utility. On a clean install, this is generally located at C:\Program Files (x86)\Acronis\Access\Configuration Utility 3. Configure the Acronis Access Gateway Server service to listen on the IP address(es) for the Acronis Access Service group. 4.
Note: If Redirect requests from port 80 is selected, Tomcat will listen for incoming traffic on the unsecure port 80 and redirect it to the HTTPS port you have specified above. If you have another program listening on port 80, do not check this box. 5. Configure the Acronis Access File Repository to listen on localhost and change the Filestore path to be on the shared disk. This path should be the same for both nodes. 6. Click OK to complete the configuration and restart the services.
3. Complete the installation. 4. Configure your Gateway Server's database to be on a location on a shared disk. a. Navigate to C:\Program Files (x86)\Acronis\Access\Gateway Server\ b. Find the database.yml file and open it with a text editor. c. Find this line: database_path: './database/' and replace ./database/ with the path you want to use (e.g. database_path: 'S:/access_cluster/database/'). Note: Use slashes(/) as a path separator. Note: You can copy the configured database.
Note: If Redirect requests from port 80 is selected, Tomcat will listen for incoming traffic on the unsecure port 80 and redirect it to the HTTPS port you have specified above. If you have another program listening on port 80, do not check this box. 9. Configure the Acronis Access File Repository to listen on localhost and change the Filestore path to be on the shared disk. This path should be the same for both nodes. 10. Click OK to complete the configuration and restart the services. 2.
2. Disable any anti-virus software you have or it may interrupt the installation procedure resulting in a failed installation. 3. Double-click on the installer executable. 4. Press Next to begin. 5. Read and accept the license agreement. 6. Press Install. Note: If you're deploying multiple Acronis Access servers, or you are installing a non-standard configuration, you can select which components to install from the Custom Install button. 7.
9. Choose a location on a shared disk for the Postgres Data folder and press Next. 10. A window displaying all the components which will be installed appears. Press OK to continue. When the Acronis Access installer finishes, press Exit. Creating the Service group 1. Open the Failover Cluster Manager and expand your cluster. 2. Right-click on Services and Applications and select More Actions.
3. Select the Create Empty Service or Application and press Next. Give the service group a proper name. (e.g. Acronis Access, AAS Cluster). Configurations on the Active node 1. Configure your Gateway Server's database to be on a location on a shared disk. a. Navigate to C:\Program Files (x86)\Acronis\Access\Gateway Server\ b. Find the database.yml file and open it with a text editor. c. Find this line: database_path: './database/' and replace ./database/ with the path you want to use (e.g.
2. Select Generic Service. 3. Select the proper service and press Next. 4. On the confirmation window press Next.
5. Press Next on the Replicate Registry Settings window. 6. On the summary window press Finish. Setting a Client Access Point 1. Right-click on the Acronis Access service group and select Add a resource. 2. Select Client Access Point. 3. Enter a name for this access point.
4. Select a network. 5. Enter the IP address and press Next. 6. On the Confirmation window press Next. 7. On the summary window press Finish. Adding a shared disk 1. Right-click on the Acronis Access service group and select Add a resource. 2. Select the desired shared drive. 3. On the Confirmation window press Next. 4. On the summary window press Finish.
Configuring dependencies 1. Double click on the Acronis Access Service group. For PostgreSQL and Acronis Access File Repository services do the following: 1. Right-click on the appropriate service and select Properties. 2. Click on the Dependencies tab. 3. Click on Resource and select the shared disk you have added. 4. Press Apply and close the window. For PostgreSQL also do the following: 1. Click on the Registry Replication tab.
2. Press Add and enter the following: SYSTEM\CurrentControlSet\Services\AcronisAccessPostgreSQL\(For older versions of Acronis Access the service may be different. e.g. postgresql-x64-9.2) For the Acronis Access Gateway Server service do the following: 1. Right-click on the appropriate service and select Properties. 2. Click on the Dependencies tab.
3. Click on Resource and select the shared disk you have added and the Network Name (this is the name of the Client access point). 4. Press Apply and close the window. For the Acronis Access Tomcat service do the following: 1. Right-click on the appropriate service and select Properties. 2. Click on the Dependencies tab.
3. Click on Resource and select the PostgreSQL and Acronis Access Gateway Server services as dependencies.Press Apply and close the window. Note: If you want to run the Gateway and Access servers on different IP addresses add the second IP as a resource to the Acronis Access Service group and set it as a dependency for the network name. Bringing the service group online and using the Configuration Utility 1.
3. Configure the Acronis Access Gateway Server service to listen on the IP address(es) for the Acronis Access Service group. 4. Configure the Acronis Access Server service to listen on the IP address(es) for the Acronis Access Service group. Note: If Redirect requests from port 80 is selected, Tomcat will listen for incoming traffic on the unsecure port 80 and redirect it to the HTTPS port you have specified above. If you have another program listening on port 80, do not check this box.
5. Configure the Acronis Access File Repository to listen on localhost and change the Filestore path to be on the shared disk. This path should be the same for both nodes. 6. Click OK to complete the configuration and restart the services. Installation and configuration on the second node 1. Disable any anti-virus software you have or it may interrupt the installation procedure resulting in a failed installation. 2.
7. Configure the Acronis Access Gateway Server service to listen on the IP address(es) for the Acronis Access Service group. 8. Configure the Acronis Access Server service to listen on the IP address(es) for the Acronis Access Service group. Note: If Redirect requests from port 80 is selected, Tomcat will listen for incoming traffic on the unsecure port 80 and redirect it to the HTTPS port you have specified above. If you have another program listening on port 80, do not check this box.
9. Configure the Acronis Access File Repository to listen on localhost and change the Filestore path to be on the shared disk. This path should be the same for both nodes. 10. Click OK to complete the configuration and restart the services. 2.3 Installing Acronis Access on a Windows 2012 Microsoft Failover Cluster Installing Acronis Access Please make sure you are logged in as an administrator before installing Acronis Access. 1. Download the Acronis Access installer. 2.
Note: If you're deploying multiple Acronis Access servers, or you are installing a non-standard configuration, you can select which components to install from the Custom Install button. 7. Either use the default path or select a new one for the Acronis Access main folder and press OK. 8. Set a password for the user Postgres and write it down. This password will be needed for database backup and recovery. 9. Choose a location on a shared disk for the Postgres Data folder and press Next. 10.
2. Select Create empty role. Give the role a proper name. (e.g. Acronis Access, AAS Cluster) Configurations on the Active node 1. Configure your Gateway Server's database to be on a location on a shared disk. a. Navigate to C:\Program Files (x86)\Acronis\Access\Gateway Server\ b. Find the database.yml file and open it with a text editor. c. Find this line: database_path: './database/' and replace ./database/ with the path you want to use (e.g. database_path: 'S:/access_cluster/database/').
Adding all of the necessary services to the Acronis Access role Complete the following procedure for each of the following services: AcronisAccessGateway, AcronisAccessPostgreSQL (this may be different depending on the version of Acronis Access), AcronisAccessRepository and AcronisAccessTomcat 1. Right-click on the Acronis Access role and select Add a resource. 2. Select Generic Service.
3. Select the proper service and press Next. 4. On the Confirmation window press Next. 5. On the summary window press Finish. Setting an Access Point 1. Right-click on the Acronis Access role and select Add a resource.
2. Select Client Access Point. 3. Enter a name for this access point. 4. Select a network. 5. Enter the IP address and press Next. 6. On the Confirmation window press Next.
7. On the summary window press Finish. Adding a shared disk 1. Right-click on the Acronis Access role and select Add Storage. 2. Select the desired shared drive. Configuring dependencies 1. Select the Acronis Access role and click on the Resources tab For PostgreSQL and Acronis Access File Repository services do the following: 1. Right-click on the appropriate service and select Properties. 2. Click on the Dependencies tab.
3. Click on Resource and select the shared disk you have added. 4. Press Apply and close the window. For the Acronis Access Gateway Server service do the following: 1. Right-click on the appropriate service and select Properties. 2. Click on the Dependencies tab. 3. Click on Resource and select the shared disk you have added and the Network Name (this is the name of the Client access point).
4. Press Apply and close the window. For the Acronis Access Tomcat service do the following: 1. Right-click on the appropriate service and select Properties. 2. Click on the Dependencies tab. 3. Click on Resource and select the PostgreSQL and Acronis Access Gateway Server services as dependencies.Press Apply and close the window.
3. Configure the Acronis Access Gateway Server service to listen on the IP address(es) for the Acronis Access Service group. 4. Configure the Acronis Access Server service to listen on the IP address(es) for the Acronis Access Service group. Note: If Redirect requests from port 80 is selected, Tomcat will listen for incoming traffic on the unsecure port 80 and redirect it to the HTTPS port you have specified above. If you have another program listening on port 80, do not check this box.
5. Configure the Acronis Access File Repository to listen on localhost and change the Filestore path to be on the shared disk. This path should be the same for both nodes. 6. Click OK to complete the configuration and restart the services. Installation and configuration on the second node 1. Disable any anti-virus software you have or it may interrupt the installation procedure resulting in a failed installation. 2.
4. Open the key: DataDirectory and change the value to the path you have selected for the PostgreSQL data folder location (e.g. E:/PostgreSQL/data). 5. Close Regedit and continue with the steps below. 6. Move the Acronis Access role to the second node. Using the Configuration Utility on the second node 1. Launch the Configuration Utility.
2. Configure the Acronis Access Gateway Server service to listen on the IP address(es) for the Acronis Access Service group. 3. Configure the Acronis Access Server service to listen on the IP address(es) for the Acronis Access Service group. Note: If Redirect requests from port 80 is selected, Tomcat will listen for incoming traffic on the unsecure port 80 and redirect it to the HTTPS port you have specified above. If you have another program listening on port 80, do not check this box.
4. Configure the Acronis Access File Repository to listen on localhost and change the Filestore path to be on the shared disk. This path should be the same for both nodes. 5. Click OK to complete the configuration and restart the services.
3 Upgrading In this section Upgrading from Acronis Access to a newer version ................................60 Upgrading to Acronis Access Advanced ...................................................61 Upgrading from mobilEcho 4.5 or earlier ................................................61 Upgrading from activEcho 2.7 or earlier ................................................100 Upgrading Clustered Configurations ......................................................119 3.
8. You will be prompted to open the Configuration Utility, press OK. 9. Verify that none of the settings in the Configuration Utility have changed. After you have verified all of your settings are as expected, press OK to close the Configuration Utility and start the Acronis Access services. 3.2 Upgrading to Acronis Access Advanced In order to upgrade your Acronis Access Server to the Advanced version, all you need is a Acronis Access Advanced license key. To do so: 1.
Upgrade your version of mobilEcho to version 4.5 before proceeding with the upgrade to Acronis Access.
Installing and upgrading mobilEcho on a Windows Failover Cluster is a complicated process. The architecture changes introduced in mobilEcho 5.0 require change to the way mobilEcho works on Windows Failover Clusters. For instructions on installing Acronis Access on a cluster, visit the Installing Acronis Access on a cluster (p. 18) article. For instructions on upgrading a mobilEcho cluster to a Acronis Access cluster, visit the Upgrading Acronis Access on a cluster (p. 123) article.
automatically within the mobilEcho app. With the release of Acronis Access, these two management consoles have been combined into a single web-based console called Acronis Access Server.
Earlier versions of mobilEcho stored mobilEcho File Access Server settings and configured Volumes in the Windows Registry. When upgrading to Acronis Access, these settings are moved to an internal SQL database. If you have any automated processes that add mobilEcho Volumes directly to the Windows Registry, or that back up mobilEcho’s registry settings, these processes will need to be modified to act on the SQL database instead.
Email Templates If you have customized the email template used for the mobilEcho Enrollment Invitation email that is sent to your users, this email template is not migrated when upgrading to Acronis Access. There is a new interface for editing email templates. In the Acronis Access Console, you will need to open the Email Templates page in the General Settings menu and modify the email template as required. For more information, visit the Email Template Settings article.
6. Assign this folder to a collection of Active Directory (AD) users or groups so that it automatically appears in their mobilEcho app. To configure a Gateway Server to automatically appear in the mobilEcho client app, use the Gateway Servers Visible on Clients tab. On this page you can assign AD users or groups to your Gateway Server(s) and these users will see these servers listed in their mobilEcho app.
Once this configuration is performed, you can take advantage of user and group policies, per-device tracking and many additional features. New Audit Logging option Acronis Access includes a new Audit Logging feature that allows Acronis Access Gateway servers to report all file activities back to the Acronis Access web console. These activities are stored in a consolidated Audit Log that can be used to audit all file operations being performed by users.
Important notes on Scenario 4 – Load Balanced mobilEcho File Access Servers If you are running multiple mobilEcho File Access Servers front-ended by a load balancer, each of these mobilEcho servers must be kept configured with identical mobilEcho Volumes, so that users can connect to any node to access their files. The most common way to maintain identical Volumes on these sets of load balanced servers is to replicate the mobilEcho Volumes settings, which are stored in the registry in mobilEcho 4.
When upgrading to Acronis Access, your mobilEcho File Access Server is upgraded to an Acronis Access Gateway Server. This service will continue to accept connections from mobilEcho clients and to act as the gateway to any file server, NAS or SharePoint data sources your users are accessing. The upgrade will also install the Acronis Access Server web console. This new console replaces the mobilEcho Administrator Windows program previously used to administer your mobilEcho server.
5. Please accept the license agreement. 6. Click the Upgrade option to automatically upgrade your mobilEcho File Access Server service to an Acronis Access Gateway Server. In the upgrade process, the Acronis Access Server and its required services will also be installed. Note: Do not choose Custom and install only the Acronis Access Gateway Server. The Acronis Access Server is the new web console that replaces the mobilEcho Administrator Windows program. It is required to administer your mobilEcho server.
7. Select an installation location for the Acronis Access components being installed. If you are upgrading an existing mobilEcho server, these paths will default to your existing installation location. We recommend you do not change these installation paths. 8. The Acronis Access Server uses a PostgreSQL database to store its settings. This database is required and is installed automatically. Note: Please enter and confirm a Super-User password for the “postgres” administrative account.
9. Please review the services being installed and upgraded. Then click Install to begin the upgrade. Note: All required components will be automatically installed in sequence. This may take 5 to 15 minutes depending on your server. Future upgrade installs will be quicker. 10. Once installation has completed, a summary of the components installed is shown. Click Exit to continue. 11.
IMPORTANT NOTE: If you do not proceed with this configuration step, your mobilEcho server will not be functional. This step is mandatory. When exiting the installer, you will be prompted to run the Acronis Access Configuration Utility. Click OK to continue. If you accidently skip this step or need to change your network interfaces, ports, or certificates in the future. You can manually run the configuration utility at any time.
13. The Access Server tab is used to configure your Acronis Access Server’s network address, port, and certificate. The Acronis Access Server is the web console that is used to perform all server administration and remote client management. This console replaces the mobilEcho Administrator Windows program and is required. Note: Please review the settings for the Access Server. The default settings are recommended. This web console typically runs on all available network addresses on port 3000.
If you would like to try out activEcho in the future, you may want to select a location on a data drive instead of the C: drive. This location can be modified post-install, too. 15. Click OK to exit the Configuration Utility and apply these settings. 16. You will now log into the Acronis Access Server web console for the first time to complete your configuration. You will be prompted to click OK to launch a web browser and complete this configuration. Required initial configuration of Acronis Access: 1.
Note: Most of the settings in the SMTP, General Settings and LDAP pages should already be present from your mobilEcho installation. 3. Acronis Access Server requires that a local administrator account be created. Please enter and confirm a password for this local administrator account. a. The username for this local administrator account is: administrator b. Keep this local administrator password in a safe place.
a. You will be prompted to configure the SMTP settings used by the Access Server to send email alerts and client enrollment invitations. b. There is an option to send a test email to confirm these settings. 7. LDAP settings a. The Acronis Access Server needs an LDAP connection to search your Active Directory for the users and groups you would like to assign policies and data sources to. b. Please enter the LDAP information for an Active Directory server on your network.
Working with your mobilEcho Gateway Server Your Gateway Server is automatically registered during the setup process and will appear in the Gateway Servers list, where you can adjust its settings and view its details and status. When it was registered, the Volumes that existed on the mobilEcho Gateway Server prior to being upgraded to Acronis Access were imported into the Data Sources – Folders list.
There are no longer “Volumes” in mobilEcho 5.0. Instead of using Volumes to share data sources, you will now create Folders. These Folders have an optional “Show when browsing server” property. When this option is enabled, the Folder will appear when a user browses the root of the Gateway Server in their mobilEcho app, just as Volumes were displayed in mobilEcho 4.5 or earlier. All the Volumes from your mobilEcho 4.
You can also begin to create and use client policies and officially enroll users with your server so that they are managed by these policies. A Default policy that applies to all users can be enabled and configured, or you can add custom policies based on Active Directory users and groups. Once policies have been configured, you can use the Enroll Users page to send enrollment invitation emails to your users so that they can enroll as managed users. 3.3.2.
c. The installer file is named: AcronisAccessSetup.exe 4. Click Next on the Welcome Screen. 5. Please accept the license agreement. 6. Click the Upgrade option to automatically upgrade your mobilEcho File Access Server service to an Acronis Access Gateway Server. In the upgrade process, the Acronis Access Server and its required services will also be installed.
Note: Do not choose Custom and install only the Acronis Access Gateway Server. The Acronis Access Server is the new web console that replaces the mobilEcho Administrator Windows program. It is required to administer your mobilEcho server. If you do not install it, you will have no means to change your mobilEcho settings or to give access to new file shares. 7. Select an installation location for the Acronis Access components being installed.
Note: It is not recommended that you alter the PostgresSQL install location or port. 9. Please review the services being installed and upgraded. Then click Install to begin the upgrade. Note: All required components will be automatically installed in sequence. This may take 5 to 15 minutes depending on your server. Future upgrade installs will be quicker.
10. Once installation has completed, a summary of the components installed is shown. Click Exit to continue. 11. At this point in the upgrade process, all necessary software has been installed, but you must now configure the network interfaces, ports, and certificates that will be used. IMPORTANT NOTE: If you do not proceed with this configuration step, your mobilEcho server will not be functional. This step is mandatory.
Note: You existing settings are retained. Please confirm that these settings match your existing mobilEcho File Access Server settings. This service typically runs on all available network addresses on port 443. If you have an existing SSL server identity certificate, it will be automatically selected. If you do not, a self-signed certificate will be generated. 13. The Access Server tab is used to configure your Acronis Access Server’s network address, port, and certificate.
This repository is used by Acronis’ activEcho file sync and share features. These features will not be enabled if you are upgrading a server that does not already have them installed, but you can chose to enable them at a later time, if desired. The default location for the File Repository is: C:\ProgramData\Acronis\Access\FileStore If you would like to try out activEcho in the future, you may want to select a location on a data drive instead of the C: drive.
Note: Most of the settings in the SMTP, General Settings and LDAP pages should already be present from your mobilEcho installation. 3. Acronis Access Server requires that a local administrator account be created. Please enter and confirm a password for this local administrator account. a. The username for this local administrator account is: administrator b. Keep this local administrator password in a safe place.
a. You will be prompted to configure the SMTP settings used by the Access Server to send email alerts and client enrollment invitations. b. There is an option to send a test email to confirm these settings. 7. LDAP settings a. The Acronis Access Server needs an LDAP connection to search your Active Directory for the users and groups you would like to assign policies and data sources to. b. Please enter the LDAP information for an Active Directory server on your network.
All the existing Folders configured in the mobilEcho 4.5 Client Management Administrator are first migrated into the Legacy Data Sources tab on the Data Sources page. You can continue to add and modify the folders on this page until you upgrade their associated Gateway Server to Acronis Access.
In this scenario, you should only have one Windows Server running the Acronis Access console and the Gateway Server, so you will have just one server listed on the Gateway Servers page. This server needs to be registered so that you can administer it. 1. Click the menu button for the Gateway Server on your Acronis Access server and select Register. 2. You will be asked if the existing network address for the server you are registering can be used to directly access the server.
5. Enter the 12 digit Administration Key (including dashes) into the registration form and click Save. Note: Once the server has been registered it will appear in the Gateway Servers list as registered and you can adjust its settings and view its details and status. When registered, the Volumes that existed on the mobilEcho Gateway Server prior to being upgraded to Acronis Access are imported into the Data Sources – Folders list.
There are no longer “Volumes” in mobilEcho 5.0. Instead of using Volumes to share data sources, you will now create Folders. These Folders have an optional “Show when browsing server” property. When this option is enabled, the Folder will appear when a user browses the root of the Gateway Server in their mobilEcho app, just as Volumes were displayed in mobilEcho 4.5 or earlier. All the Volumes from your mobilEcho 4.
As shown below, the 4 existing Volumes from this mobilEcho 4.5 server were imported into the Folders list after Gateway Server registration, and they continue to appear when browsing the server from the mobilEcho app. 3.3.2.
In this scenario, you have a multiple Windows servers running mobilEcho 4.5 or earlier. One server has both the required mobilEcho File Access Server service running and the optional mobilEcho Client Management Server service enabled. The other servers are just acting as mobilEcho File Access Servers. When upgrading to Acronis Access, your mobilEcho File Access Servers will be upgraded to Acronis Access Gateway Servers.
2. Run the Acronis Access installer on the desired server. 3. Press Next on the Welcome screen. 4. Read and accept the license agreement. 5. Click Custom.
6. Select only the Acronis Access Gateway Server component and press Next. 7. The rest of the installation and Configuration Utility steps follow what is outlined in the earlier scenarios, with the exception that you will not need to configure the Access Server and File Repository in the Configuration Utility. 8. When you complete the Configuration Utility process, there will be no additional web console configuration, as the Acronis Access Server console was not installed. 9.
10. You will be asked if the existing network address for the server you are registering can be used to directly access the server. The existing address is typically the network address that your mobile device users must use to access the Gateway Server, so it’s possible this address points to a proxy server or load balancer.
14. All management of this Gateway Server is now done from within Acronis Access Server web console. When creating new Folders on the Data Sources page, this Gateway Server will now appear in the list of Gateway Servers available to give access to the new Folder. 15. If you have any additional Gateway Servers to upgrade and register, please follow the same procedure as above. 3.3.2.
a. Copy the invitation.html.erb and invitation.txt.erb files to: C:\Program Files (x86)\Group Logic\mobilEcho Server\ManagementUI\app\views\user_mailer b. Copy the mobilEcho_manager file to: C:\Program Files (x86)\Group Logic\mobilEcho Server\ManagementUI c. Copy the production.sqlite3 file to: C:\Program Files (x86)\Group Logic\mobilEcho Server\ManagementUI\db d. There may be a 4th file called priority.txt, if present, copy it to C:\Program Files (x86)\Group Logic\mobilEcho Server\Management.
Which port is activEcho using? Is the File Repository on the same machine? 3.4.2 The Upgrade Process activEcho 5.0 Upgrade Process First, please identify the type of activEcho deployment you will be upgrading. The instructions for these scenarios are detailed in the next section of this document. The most common scenarios are: 1. Single activEcho Server without a mobilEcho Client Management Server A single Windows server, running the activEcho Server only. 2.
c. The installer file is named: AcronisAccessSetup.exe 4. Click Next on the Welcome Screen. 5. Please accept the license agreement. 6. Click Upgrade to automatically upgrade your activEcho Server to the new Acronis Access Server. In the upgrade process, a Gateway Server and it's required services will also be installed. 7. A prompt for remote mobilEcho Servers will be shown. If you don't have a mobilEcho Client Management Server, press No.
location. We recommend you do not change these installation paths. Click Next. 9. Please review the services being installed and upgraded. 10. Press Install to begin the upgrade. Once the installation is complete, you will be shown a summary of the installed components. Press Exit. Note: All required components will be automatically installed in sequence. This may take 5 to 15 minutes depending on your server. Future upgrades will be quicker. 11.
have an existing SSL server identity certificate, it will be automatically selected. If you do not, a self-signed certificate will be generated. 13. The Access Server tab is used to configure your Acronis Access Server’s network address, port, and certificate. The Acronis Access Server is the web console that is used to configure all Sync & Share features and your activEcho users as well as perform all server administration and remote client management.
14. Click OK to exit the Configuration Utility and apply these settings. 15. You will now log into the Acronis Access Server web console for the first time to complete your configuration. You will be prompted to click OK to launch a web browser and complete this configuration. 3.4.2.
c. The installer file is named: AcronisAccessSetup.exe 4. Click Next on the Welcome Screen. 5. Please accept the license agreement.
6. Click Upgrade to automatically upgrade your activEcho Server and mobilEcho Client Management Server to the new Acronis Access Server. In the upgrade process, a Gateway Server and it's required services will also be installed. If a File Server is present, the installer will upgrade the File Server to the new Gateway Server instead of installing a new one. 7. Select an installation location for the Acronis Access components being installed.
11. Within the Configuration Utility, the Gateway Server tab is used to configure your Acronis Access Gateway Server’s network address, port, and certificate. The Acronis Access Gateway Server is the core Acronis Access service that your mobilEcho clients connect to and that gives access to your file servers, NAS, and SharePoint servers. Note: You existing settings are retained. Please confirm that these settings match your existing mobilEcho File Access Server settings.
Note: Acronis Access Server requires that a File Repository location be selected. This repository is used by Acronis’ activEcho file sync and share features. 13. Click OK to exit the Configuration Utility and apply these settings. 14. You will now log into the Acronis Access Server web console for the first time to complete your configuration. You will be prompted to click OK to launch a web browser and complete this configuration.
2. You will be asked if the existing network address for the server you are registering can be used to directly access the server. The existing address is typically the network address that your mobile device users must use to access the Gateway Server, so it’s possible this address points to a proxy server or load balancer.
Note: Once the server has been registered it will appear in the Gateway Servers list as registered and you can adjust its settings and view its details and status. 3.4.2.3 Upgrading an activEcho server with a mobilEcho Client Management Server on another server Scenario 3 - Upgrading an activEcho server with a mobilEcho Client Management Server on another server Warning! For this scenario, we recommend that you keep your activEcho and mobilEcho servers separate and upgrade each one individually.
c. The installer file is named: AcronisAccessSetup.exe 6. Click Next on the Welcome Screen. 7. Please accept the license agreement. 8. Click Upgrade to automatically upgrade your activEcho Server to the new Acronis Access Server. In the upgrade process, a Gateway Server and it's required services will also be installed. 9. If you have a mobilEcho Client Management Server, press Yes.
have been copied, press OK to continue. Note: These files are generally located at: C:\Program Files (x86)\Group Logic\mobilEcho Server\ManagementUI\db\production.sqlite3 C:\Program Files (x86)\Group Logic\mobilEcho Server\ManagementUI\mobilEcho_manager.
C:\Program Files (x86)\Group Logic\mobilEcho Server\Management\priority.txt 11. Select an installation location for the Acronis Access components being installed. If you are upgrading an existing activEcho server, these paths will default to your existing installation location. We recommend you do not change these installation paths. Click Next. 12. Please review the services being installed and upgraded. 13. Press Install to begin the upgrade.
Using the Configuration Utility On the Gateway Server tab 1. For the Address field, enter the IP address of your server that was running mobilEcho. This is the address you wrote down at the beginning. 2. For the Port field, enter the port number that your mobilEcho File Server used. 3. Add the certificate you have been using for the mobilEcho File Server. On the Access Server 1. For the Address field, enter the IP address you've been using for your activEcho server until now. This should be the default. 2.
3. Add the certificate you have been using for your activEcho server. On the File Repository tab 1. For the Address field, enter the IP address or DNS name of your Repository Service. This should be the default. 2. For the Port field, enter the port number for your Repository Service. This should be the default. 3. Select the path to your FileStore folder. This should be the default. After you have made all the necessary configurations, press OK to exit the Configuration Utility.
2. 3. 4. 5. 6. Stop the mobilEcho Management Server service. Run the installer and press Next on the Welcome Screen. Read and accept the license agreement. Press Custom. Select only the Gateway Server component and press Next. 7. Review the installation path and press Next. This should be the default. 8. Review the components which will be installed and press Install. 9.
15. Locate the Gateway Server with a Legacy status, open the drop down menu for that gateway and select Register. 16. A dialog will appear, press Yes. 17. In the Address for administration and client connections field, enter the IP address of your upgraded Gateway Server. This is the new IP address you gave to the machine previously hosting mobilEcho. 18. In the Administration Key field, enter the key of your Gateway Server. To obtain it, open the IP address of the Gateway in a browser. (e.g.
Registering your local Gateway server While on the Gateway Servers page: 1. Press the Add Gateway Server button. 2. Enter a display name for your new Gateway Server. 3. Enter the IP address of the Gateway. This is the IP address that was previously used by your mobilEcho server (this is the IP you wrote down at the beginning). 4. Enter the administration key for that Gateway. To obtain it, open the IP address of the Gateway in a browser. (e.g. https://192.168.1.1).
Upgrading a Gateway Server 1. Run the Acronis Access installer on the desired server. 2. Press Next on the Welcome screen. 3. Read and accept the license agreement. 4. Click Custom. 5. Select only the Acronis Access Gateway Server component and press Next.
6. Review the components and press Install. 7. Once the installation finish, review the Summary, and close the installer. You will be prompted to open the Configuration Utility. Open it to review that all of your previous Gateway Server settings are in place. Make any changes if necessary and press OK. 4 Upgrading Acronis Access on a Microsoft Failover Cluster The following steps will help you upgrade your Acronis Access Server cluster to a newer version of Acronis Access. 1. Go to the the active node. 2.
4. Disable any anti-virus software you have or it may interrupt the installation procedure resulting in a failed installation. 5. Double-click on the installer executable. 6. Press Next to begin. 7. Read and accept the license agreement. 8. Press Upgrade. 9. Review the components which will be installed and press Install.
10. Enter the password for your postgres super-user and press Next. 11. When the installation finishes, press Exit to close the installer. Warning! Do not bring the cluster group online! 12. Move the cluster group to the second node. 13. Complete the same installation procedure on the second node. 14. Bring all of the Acronis Access services online. 5 Upgrading from mobilEcho 4.5 on a Microsoft Failover Cluster Warning! Acronis Access failover clustering is not supported by versions older than 5.0.3.
6. Press Next to begin. 7. Read and accept the license agreement. 8. Press Install. Note: If you're deploying multiple Acronis Access servers, or you are installing a non-standard configuration, you can select which components to install from the Custom Install button. 9. Either use the default path or select a new one for the Acronis Access main folder and press OK. 10. Set a password for the user Postgres and write it down. This password will be needed for database backup and recovery. 11.
Configurations on the Active node 1. Configure your Gateway Server's database to be on a location on a shared disk. a. Navigate to C:\Program Files (x86)\GroupLogic\mobilEcho Server\ b. Find the database.yml file and open it with a text editor. c. Find this line: database_path: './database/' and replace ./database/ with the path you want to use (e.g. database_path: 'S:/mobilEcho_cluster/database/'). Note: Use slashes(/) as a path separator. Note: You can copy the configured database.
4. From the Resource Type drop down menu select Generic Service and press Next. 5. Make sure both of your nodes are listed as Possible owners and press Next. 6. Skip the dependencies for now by pressing Next. 7. Enter the correct service name of the service you are adding (e.g. postgresql-x64-9.2) and press Next. 8. Skip the Registry Replication window for now by pressing Next. 9. Press Finish to complete the procedure.
4. Select the shared disk you have added and move it to the right side. 5. Press OK. For PostgreSQL also do the following: 1. Click on the Registry Replication tab. 2. Press Add and enter the following: SYSTEM\CurrentControlSet\Services\AcronisAccessPostgreSQL\(For older versions of Acronis Access the service may be different. e.g. postgresql-x64-9.
For the Acronis Access Gateway Server service do the following: 1. 2. 3. 4. Right-click on the appropriate service and select Properties. Click on the Dependencies tab. Click on Modify. Select the IP Address and Physical disk and move them to the right side. 5. Press OK. For the Acronis Access Tomcat service do the following: 1. Right-click on the appropriate service and select Properties. 2. Click on the Dependencies tab. 3. Click on Modify.
4. Select the PostgreSQL and Acronis Access Gateway Server services and move them to the right side. 5. Press OK. Bringing the cluster group online and using the Configuration Utility 1. Right-click on the cluster group and press Bring online. 2. Launch the Configuration Utility. On an upgrade from mobilEcho, this is generally located at C:\Program Files (x86)\GroupLogic\Configuration Utility 3.
4. Configure the Acronis Access Server service to listen on the IP address(es) for the Acronis Access Service group. Note: If Redirect requests from port 80 is selected, Tomcat will listen for incoming traffic on the unsecure port 80 and redirect it to the HTTPS port you have specified above. If you have another program listening on port 80, do not check this box. 5. Configure the Acronis Access File Repository to listen on localhost and change the Filestore path to be on the shared disk.
2. Install Acronis Access on the second node, but this time use the default Postgres Data location and the same postgres user password as for the first node. 3. Complete the installation. 4. Configure your Gateway Server's database to be on a location on a shared disk. a. Navigate to C:\Program Files (x86)\GroupLogic\mobilEcho Server\ b. Find the database.yml file and open it with a text editor. c. Find this line: database_path: './database/' and replace ./database/ with the path you want to use (e.g.
Note: If Redirect requests from port 80 is selected, Tomcat will listen for incoming traffic on the unsecure port 80 and redirect it to the HTTPS port you have specified above. If you have another program listening on port 80, do not check this box. 9. Configure the Acronis Access File Repository to listen on localhost and change the Filestore path to be on the shared disk. This path should be the same for both nodes. 10. Click OK to complete the configuration and restart the services. 5.
3. Launch the installer on the active node. 4. Disable any anti-virus software you have or it may interrupt the installation procedure resulting in a failed installation. 5. Double-click on the installer executable. 6. Press Next to begin. 7. Read and accept the license agreement. 8. Press Install. Note: If you're deploying multiple Acronis Access servers, or you are installing a non-standard configuration, you can select which components to install from the Custom Install button. 9.
11. Choose a location on a shared disk for the Postgres Data folder and press Next. 12. A window displaying all the components which will be installed appears. Press OK to continue. 13. When the Acronis Access installer finishes, press Exit.Navigate to your shared disk, locate and copy these 3 files: production.sqlite3, mobilEcho_manager.cfg and priority.txt (this one might not exist) and paste them to the Acronis Access installation directory, replacing the existing files.
2. Select Generic Service. 3. Select the proper service and press Next. 4. On the confirmation window press Next.
5. Press Next on the Replicate Registry Settings window. 6. On the summary window press Finish. Configuring dependencies 1. Double click on the Acronis Access Service group. For PostgreSQL and Acronis Access File Repository services do the following: 1. Right-click on the appropriate service and select Properties. 2. Click on the Dependencies tab. 3. Click on Resource and select the shared disk you have added. 4. Press Apply and close the window. For PostgreSQL also do the following: 1.
2. Press Add and enter the following: SYSTEM\CurrentControlSet\Services\AcronisAccessPostgreSQL\(For older versions of Acronis Access the service may be different. e.g. postgresql-x64-9.2) For the Acronis Access Gateway Server service do the following: 1. Right-click on the appropriate service and select Properties. 2. Click on the Dependencies tab.
3. Click on Resource and select the shared disk you have added and the Network Name (this is the name of the Client access point). 4. Press Apply and close the window. For the Acronis Access Tomcat service do the following: 1. Right-click on the appropriate service and select Properties. 2. Click on the Dependencies tab.
3. Click on Resource and select the PostgreSQL and Acronis Access Gateway Server services as dependencies.Press Apply and close the window. Note: If you want to run the Gateway and Access servers on different IP addresses add the second IP as a resource to the Acronis Access Service group and set it as a dependency for the network name. Bringing the service group online and using the Configuration Utility 1.
3. Configure the Acronis Access Gateway Server service to listen on the IP address(es) for the Acronis Access Service group. 4. Configure the Acronis Access Server service to listen on the IP address(es) for the Acronis Access Service group. Note: If Redirect requests from port 80 is selected, Tomcat will listen for incoming traffic on the unsecure port 80 and redirect it to the HTTPS port you have specified above. If you have another program listening on port 80, do not check this box.
5. Configure the Acronis Access File Repository to listen on localhost and change the Filestore path to be on the shared disk. This path should be the same for both nodes. 6. Click OK to complete the configuration and restart the services. Installation and configuration on the second node 1. Disable any anti-virus software you have or it may interrupt the installation procedure resulting in a failed installation. 2.
7. Configure the Acronis Access Gateway Server service to listen on the IP address(es) for the Acronis Access Service group. 8. Configure the Acronis Access Server service to listen on the IP address(es) for the Acronis Access Service group. Note: If Redirect requests from port 80 is selected, Tomcat will listen for incoming traffic on the unsecure port 80 and redirect it to the HTTPS port you have specified above. If you have another program listening on port 80, do not check this box.
9. Configure the Acronis Access File Repository to listen on localhost and change the Filestore path to be on the shared disk. This path should be the same for both nodes. 10. Click OK to complete the configuration and restart the services. 5.3 Upgrading a mobilEcho server on a Windows 2012 Failover Cluster to Acronis Access 1. Open the Failover Cluster Manager and double-click on your service group. 2. Delete the mobilEcho service resources.
8. Press Install. Note: If you're deploying multiple Acronis Access servers, or you are installing a non-standard configuration, you can select which components to install from the Custom Install button. 9. Either use the default path or select a new one for the Acronis Access main folder and press OK. 10. Set a password for the user Postgres and write it down. This password will be needed for database backup and recovery. 11. Choose a location on a shared disk for the Postgres Data folder and press Next.
Configurations on the Active node 1. Configure your Gateway Server's database to be on a location on a shared disk. a. Navigate to C:\Program Files (x86)\GroupLogic\mobilEcho Server\ b. Find the database.yml file and open it with a text editor. c. Find this line: database_path: './database/' and replace ./database/ with the path you want to use (e.g. database_path: 'S:/mobilEcho_cluster/database/'). Note: Use slashes(/) as a path separator. Note: You can copy the configured database.
3. Select the proper service and press Next. 4. On the Confirmation window press Next. 5. On the summary window press Finish. Setting an Access Point 1. Right-click on the Acronis Access role and select Add a resource.
2. Select Client Access Point. 3. Enter a name for this access point. 4. Select a network. 5. Enter the IP address and press Next. 6. On the Confirmation window press Next.
7. On the summary window press Finish. Adding a shared disk 1. Right-click on the Acronis Access role and select Add Storage. 2. Select the desired shared drive. Configuring dependencies 1. Select the Acronis Access role and click on the Resources tab For PostgreSQL and Acronis Access File Repository services do the following: 1. Right-click on the appropriate service and select Properties. 2. Click on the Dependencies tab.
3. Click on Resource and select the shared disk you have added. 4. Press Apply and close the window. For the Acronis Access Gateway Server service do the following: 1. Right-click on the appropriate service and select Properties. 2. Click on the Dependencies tab. 3. Click on Resource and select the shared disk you have added and the Network Name (this is the name of the Client access point).
4. Press Apply and close the window. For the Acronis Access Tomcat service do the following: 1. Right-click on the appropriate service and select Properties. 2. Click on the Dependencies tab. 3. Click on Resource and select the PostgreSQL and Acronis Access Gateway Server services as dependencies.Press Apply and close the window.
3. Configure the Acronis Access Gateway Server service to listen on the IP address(es) for the Acronis Access Service group. 4. Configure the Acronis Access Server service to listen on the IP address(es) for the Acronis Access Service group. Note: If Redirect requests from port 80 is selected, Tomcat will listen for incoming traffic on the unsecure port 80 and redirect it to the HTTPS port you have specified above. If you have another program listening on port 80, do not check this box.
5. Configure the Acronis Access File Repository to listen on localhost and change the Filestore path to be on the shared disk. This path should be the same for both nodes. 6. Click OK to complete the configuration and restart the services. Installation and configuration on the second node 1. Disable any anti-virus software you have or it may interrupt the installation procedure resulting in a failed installation. 2.
4. Open the key: DataDirectory and change the value to the path you have selected for the PostgreSQL data folder location (e.g. E:/PostgreSQL/data). 5. Close Regedit and continue with the steps below. 6. Move the Acronis Access role to the second node. Using the Configuration Utility on the second node 1. Launch the Configuration Utility.
2. Configure the Acronis Access Gateway Server service to listen on the IP address(es) for the Acronis Access Service group. 3. Configure the Acronis Access Server service to listen on the IP address(es) for the Acronis Access Service group. Note: If Redirect requests from port 80 is selected, Tomcat will listen for incoming traffic on the unsecure port 80 and redirect it to the HTTPS port you have specified above. If you have another program listening on port 80, do not check this box.
4. Configure the Acronis Access File Repository to listen on localhost and change the Filestore path to be on the shared disk. This path should be the same for both nodes. 5. Click OK to complete the configuration and restart the services.
6 Quick Start: Mobile Access This guide provides the essential steps for setting up a Gateway Server, adding a Data Source and installing the Access Mobile Client app. For more detailed instructions on configuring the Acronis Access Gateway Server and the Client Management components, see the Managing Gateway Servers and Mobile Access sections. In this section First Run .................................................................................................
2. Specify the root DNS name or IP address where users can access the website (starting with http:// or https://). 3. Specify the DNS name or IP address to which the mobile users will enroll to. 4. Select the default language for the Audit Log. The current options are English, German, French and Japanese. 5. Press Save. SMTP Note: You can skip this section, and configure SMTP later. 1. 2. 3. 4. 5. 6. Enter the DNS name or IP address of your SMTP server Enter the SMTP port of your server.
LDAP Note: You can skip this section, and configure LDAP later. 1. Mark Enable LDAP.
2. Enter the DNS name or IP address of your LDAP server. 3. Enter the port of your LDAP server. 4. If you use a certificate for connections with your LDAP server, mark Use Secure LDAP Connection. 5. Enter your LDAP credentials, with the domain. (e.g. acronis\hristo). 6. Enter your LDAP search base. 7. Enter the desired domain(s) for LDAP authentication. (i.e.to enable LDAP authentication for an account with the email joe@glilabs.com, you would enter glilabs.com) 8. Press Save.
Note: The port 443 is the default port. If you have changed the default port, add your port number after localhost. 3. Write down the Administration Key. 4. 5. 6. 7. Open the Acronis Access Web Interface. Open the Mobile Access tab. Open the Gateway Servers page. Press the Add New Gateway Server button. 8. Enter a Display Name for your Gateway Server. 9. Enter the DNS name or IP address of your Gateway Server.
Creating a Data Source To create a Data source: 1. 2. 3. 4. 5. 6. 7. 161 Open the Acronis Access Web Interface. Open the Mobile Access tab. Open the Data Sources tab. Go to Folders. Press the Add New Folder button. Enter a display name for the folder. Select the Gateway Server which will give access to this folder.
8. Select the location of the data. This can be on the actual Gateway Server, on another SMB server, on a SharePoint Site or Library or on a Sync & Share server. Note: When selecting Sync & Share, make sure to enter the full path to the server with the port number. e.g.: https://mycompany.com:3000 9. Based on your choice of location, enter the path to that folder, server, site or library. 10. Select the Sync type of this folder. 11.
1. Open the User policies tab. 2. Click the Add new policy button to add a new user policy. This will open the Add a new user policy page. 3. In the Find user field, enter the partial or complete Active Directory user name for which you'd like to create a policy. You can perform 'begins with' or 'contains' searches for Active Directory users. Begins with search will complete much faster than contains searches. 4. Click Search and then find and click the user name in the listed results. 5.
4. 5. 6. 7. 8. 9. On Android, open the Settings menu and tap Add Server. Enter the Server Name or IP address of the server you installed the Acronis Access Server or Gateway Server on. You can optionally enter a Display Name for this server, which will appear in the server list. Enter a Username that has access to the Gateway Server. uses standard NTFS permissions to regulate access. Toggle Save Password to ON if you would like to save your password, then enter and confirm your password.
The email guides them through the process of installing the Access Mobile Client and entering their enrollment information. If the Access Mobile Client app has already been installed, and the user taps the "Tap this link to automatically begin enrollment..." option while viewing this email on their device, Acronis Access will automatically launch and the enrollment form will be displayed.
If their management policy requires an application lock password, they will be prompted to enter one. All password complexity requirements configured in their policy will be enforced for this initial password, and for any change of their application lock password in the future.
A confirmation window may appear if your management policy restricts the storage of files in Acronis Access or disables your ability to add individual servers from within the Access Mobile Client app. If you have files stored locally in the Access Mobile Client app, you will be asked to confirm that any files in your My Files local file storage will be deleted. If you select No, the management enrollment process will be canceled and your files will remain unchanged.
7 Quick Start: Sync & Share This guide provides the essential steps for setting up Sync & Share, using the web interface to access files and using the Acronis Access desktop client. For more detailed instructions on configuring these components, see the Sync & Share and Desktop Client sections. In this section First Run .................................................................................................168 Using the web interface to access files ................................................
4. Select the default language for the Audit Log. The current options are English, German, French and Japanese. 5. Press Save. SMTP Note: You can skip this section, and configure SMTP later. 1. 2. 3. 4. 5. 6. Enter the DNS name or IP address of your SMTP server Enter the SMTP port of your server. If you do not use certificates for your SMTP server, unmark Use secure connection?. Enter the name which will appear in the "From" line in emails sent by the server.
LDAP Note: You can skip this section, and configure LDAP later. 1. Mark Enable LDAP.
2. Enter the DNS name or IP address of your LDAP server. 3. Enter the port of your LDAP server. 4. If you use a certificate for connections with your LDAP server, mark Use Secure LDAP Connection. 5. Enter your LDAP credentials, with the domain. (e.g. acronis\hristo). 6. Enter your LDAP search base. 7. Enter the desired domain(s) for LDAP authentication. (i.e.to enable LDAP authentication for an account with the email joe@glilabs.com, you would enter glilabs.com) 8. Press Save.
1. Launch you web browser and navigate to: https://myserver https://myserver, where myserver is the URL or IP address of the computer running the Acronis Access server. 2. Login with your credentials. a. If you have just installed the Acronis Access server, login as administrator with the password you set after the installation process. If this is the first time you open the web interface, you will be asked to set the password now. b.
Uploading files 1. Navigate into the new folder by clicking its name. 2. Click the Upload Files button, click the Add Files... button and select a file or files from your computer. 3. The file(s) will be uploaded to the folder you are in. Press Done.
Clicking on a file or folder shows the available actions in the right sidebar. Downloading a file If you want to download a file, simply click on its name. You can also click on the row to the right of the file or folder name and press Download from the sidebar. Note: When using Internet Explorer you have to make sure that Do not save encrypted pages to disk is unchecked in order to be able to download files. This setting is found under Internet Options -> Advanced -> Security.
not be able to share the files and folders with another user. The option Sharing in the right sidebar will not be visible as well. To share a folder with a colleague or business partner, do the following: 1. Click on Sync&Share. 2. Click on the folder you want to share and select Sharing from the sidebar. 3. In the Sharing lightbox, enter an email address and an appropriate text message. An email containing your information and access instructions will be generated and sent to the recipient.
Sharing a single file Note: If you want to share a file or folder that was shared with you by another user, you need to have the permissions to invite other users to that share. If you do not have the permissions to invite other users, you will not be able to share the files and folders with another user. The option Sharing in the right sidebar will not be visible as well. 1. Open the Acronis Access Web Interface. 2.
1. To do so, simply enter the shared folder and click on Notifications in the sidebar. 2. Select the conditions you want to be notified for and press Save. 7.3 Using the desktop client First Steps Note: If you haven't installed your Acronis Access Desktop Client yet, you can do so by following the Client Installation and Configuration guide. 1. Open the folder you selected for syncing during the configuration process.
4. Create another folder inside My Projects with a name Collaterals. 5. Place some files into it by copying them from your computer. 6. Now it’s time to share a folder with a colleague. You can do this in two different ways: directly from Windows Explorer or using your web browser. Follow step 7 to share content from your desktop using Windows Explorer, or follow step 8 to share content using your preferred web browser. Note: You can also share just a single file as described at the bottom of this article.
c. This will launch a web browser and show you the invite dialog. d. In the Invite others dialog enter an email address and an appropriate text message. If you prefer to use your web browser instead: 1. Open https://server.com/ https://server.com/, where server.com is the Acronis Access server address, and log in using your username and password credentials. 2. Click on Sync&Share. 3. Click on the folder you want to share and select Sharing from the sidebar.
4. In the Sharing lightbox, enter an email address and an appropriate text message. An email containing your information and access instructions will be generated and sent to the recipient. Note: If the Allow editing and deletion check box is disabled, invited users can only download and read documents included in the shared folder.