
Technical data


3.7 Battery Witness Seal Life
If your PLB flashes an initial Red LED at the beginning of the Self Test, this indicates that your electronic witness
has been broken and you have used more than 1 hour of battery life. While the PLB will still operate normally in a
distress situation, ACR strongly recommends you have your battery replaced and the electronic witness reset to
ensure that you will have 24 hours of battery power.
3.8 GPS Testing
This test is NOT required as 100% of all GPS receivers that leave ACR have been tested to ensure they perform
perfectly. However, if you would like to ensure your GPS receiver is working, please follow these instructions very
closely.
Warning: To conserve battery power the following test should not be performed more than once during
the five-year life of the battery pack!
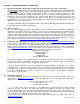
Note: The GPS receiver is located under the front portion of the case (See figure 3). It is imperative that the
receiver is not obstructed during self test or activation to ensure that the GPS receiver is acquiring your latitude
(LAT) and longitude (LON) position.
This test must be performed outside with a clear view of the sky.
To test the internal GPS you must be outdoors and have a clear view of the sky. You must observe the PLB for the
entire GPS test. Pressed the Self Test button for greater than 5 seconds, a BEEP and green LED will indicate that
the GPS has been turned ON. The PLB will BEEP every 5 seconds and the GPS will remain ON until LAT/LON
coordinates have been obtained or until 10 minutes have elapsed. If good navigation data has been obtained, the
GPS will be turned OFF and the green LED will light for at least 3 seconds along with a long beep. This LAT/LON
data is not saved for use when the PLB is turned ON. The green LED is proof that the GPS is functioning properly
and that the PLB is in a location or environment where it can receive the necessary signals from satellites. If the
GPS does not acquire good navigation data, the GPS will turn OFF after 10 minutes and a RED LED will light for 3
seconds along with a long beep.
GPS Test Sequences (max. 10 minutes) GPS Test Guide
Green LED and BEEP at start followed by continuous
BEEPS every 5 seconds,
Green LED & Long BEEP
Successfully acquired GPS data
Green LED and BEEP at start followed by continuous
BEEPS every 5 seconds,
Red LED & Long BEEP
GPS data was not successfully downloaded
SECTION 4 – Accessories
c
d
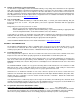
4.1 PLB Attachment Holster
The ResQFix™ comes standard with an attachment holster. To
install the holster, simply align the bottom tabs on the holster with the
insert holes located on the bottom of the PLB. Snap the holster in
place by pressing the top of the holster so that the two top tabs
engage in the two insert holes on the top of the PLB (See figure 4).
To remove the holster, push up and back on the top tabs one at a
time to disengage from the PLB.
The ResQFix™ holster has been designed to accommodate your
extreme adventures. You can secure your PLB directly to backpack
webbing straps, life jackets or belts to ensure the PLB is close at
hand. ACR recommends that you secure your PLB someplace that is
easily accessible in case of an emergency for rapid activation.
Ensure the PLB is secured and protected before heading out to avoid
damage or loss.
Note: ACR recommends that once you have clipped your PLB in
place that you also secure the PLB with the lanyard to your life jacket,
backpack, etc. to ensure the unit will not be lost if it should break out
of the holster.
Figure 4- PLB Clip
Y1-03-0215 Rev. B 6