
Installation Guide

4
August 12, 2019
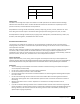
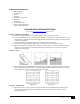
Blending of Cartons
To achieve a uniform appearance across the entire floor, we require that you open and work from a minimum of
four cartons at a time and lay out the flooring ahead of time. Be sure to mix the planks for the best aesthetic
appearance. Make certain the room is well lit to ensure color is consistent and that any visual defects can be seen
and removed prior to installation. “Racking the Floor” is essential to achieve a random appearance. As you
continue working across the floor remember to maintain a six-inch minimum space between the end joints.
Randomly install different lengths to avoid a patterned appearance. Never waste materials; the end cuts from
starter rows should be used at the opposite side of the room to complete rows or may be used to start the next
row.
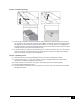
Undercut Door Casings
Undercut all door casings 1/16” higher than the thickness of the flooring being installed. To do this, use a scrap
piece of flooring as a guide. Lay it on the substrate and cut the casing with a handsaw or use a power jamb saw set
at the correct height. Failure to undercut casings will result in automatic void in warranty coverage.
Expansion Space
An expansion space of ½” must be left around the perimeter of the room and at all vertical obstructions. More or
less spacing may be needed depending on the geographical region, interior climate, and or time of the year. Your
WSPC flooring WILL move/shrink/expand. This is a normal occurrence of flooring products.
Coordinating Transition Moldings
Always have all necessary transition moldings on site prior to beginning installation. Make sure all transitions and
moldings have been coordinated with planks that have similar color and graining. Set them aside for use when a
transitioning is necessary. Acqua Floors™ cannot be held liable for color variations that may exist between flooring
and coordinating trim accessories under any circumstances.
We require any installation of this floor that is installed in the floating method to use a T-Molding once the
installation has gone more than 35 feet in any single direction. Installations of the flooring beyond this distance
must use a T-Molding to release stress from the floor and allow the floating installation to properly expand and
contract. T-moldings are also required in narrow flooring areas 36” or less in width; floor areas interrupted by wall
sections extending out of the wall, including cabinets; floor areas which are not rectangular; wall openings-with or
without a door; L shaped rooms or otherwise not rectangular rooms will require T-moldings to split into
rectangular sections. Failure to use appropriate T-moldings will void warranty coverage.
Underlayment
Underlayment should be used in any floating installation and be no more than 3mm in thickness (cork products up
to ½”). We approve the use of 2-in-1 underlayment’s with attached poly-backings for moisture protection. Foam,
Cork, Rubber, EVA and similar underlayment’s are acceptable. Please contact our technical department for specific
product compatibility.
Floor Protection During Construction:
Always protect the surface of the installed flooring during construction. Cover the floor with quality rosin paper or
other paper that will allow the floor to breathe and secure it to the baseboards; Never tape directly to flooring. Do
not use plastic or polyethylene sheeting to cover the floor since they will trap moisture that will damage the
flooring. The flooring must be cleaned and completely free of any and all debris to minimize damage.
If you have any questions regarding installation of flooring not addressed in our guidelines, please contact our technical
department.