OTHER AWARD-WINNING ACOMDATA PRODUCTS FOR YOUR WINDOWS PC & MACINTOSH: RocketPod™ Hi-Performance Peripherals A patented, modular system of portable USB 2.0 and FireWire hard drives and other devices that stack without cables or power cords. External USB 2.0 & FireWire/ USB 2.0 Combo Hard Drives External FireWire Tape Back-up Drives USB 2.0 PCI Adapter Card FireWire PCI Adapter Card USB 2.0 Hub Remote Laser Pointer Mouse Wireless device helps you make more effective presentations.
64 1 CONTACT INFORMATION WELCOME TO AWEGO FROM ACOMDATA AcomData PO BOX 5499 Diamond Bar, California 91765-7499 Thank you for purchasing the AWEGO Tablet DVD Player from AcomData, and welcome to the exciting world of portable DVD. Think of AWEGO as your very own personal entertainment center. With AWEGO you can watch movies, listen to music, and view your digital photos just about anywhere. Telephone: (909) 348-0680 Fax: (909) 598-8663 Web: www.acomdata.com Customer Service: customerservice@acomdata.
2 63 CONTENTS ORDERING ACCESSORIES Important Safety Precautions . . . . . . . . . . .5 What’s in the Box . . . . . . . . . . .7 Features Overview . . . . . . . . . . .8 Types of Discs & File Formats Playable on the AWEGO . . . . . . .9 Part Names and their Functions The Player Front Panel . . . . . . . . . . . . . . Back Panel . . . . . . . . . . . . . . Left Side Panel . . . . . . . . . . . Disc Tray . . . . . . . . . . . . . . . Bottom . . . . . . . . . . . . . . . . Control Strip . . . . . . . . . .
62 3 determined by AcomData that there is no fault with this Product itself. This Limited Warranty is invalid if the factory applied serial number has been altered or removed from the Product. REPAIR OR REPLACEMENT AS PROVIDED UNDER THIS WARRANTY IS THE EXCLUSIVE REMEDY OF THE CONSUMER. ACOMDATA SHALL NOT BE LIABLE FOR ANY INCIDENTAL OR CONSEQUENTIAL DAMAGES FOR BREACH OF ANY EXPRESS OR IMPLIED WARRANTY, BREACH OF CONTRACT, NEGLIGENCE, STRICT LIABILITY OR ANY OTHER LEGAL THEORY RELATED TO THIS PRODUCT.
4 61 Viewing Digital Photos . . . . . . .47 Loading a Disc . . . . . . . . . . . . .47 Viewing Selected Photos from the File List Screen . . . . .47 Viewing Selected Photos from the Thumbnail View Screen . . . . . .47 Viewing Photos Sequentially . . . . . .48 Playing a Slide Show . . . . . . . . . .48 Enhancing Image Quality . . . . . . . .48 Rotating Photos . . . . . . . . . . . . .48 Photo Zoom . . . . . . . . . . . . . . . .48 Using the Car Adapter . . . . . .49 Mounting Options . . . . . . . . . .
60 5 ONE YEAR LIMITED WARRANTY AcomData warrants this product (the "Product") against defects in material or workmanship as follows: 1. LABOR: For a period of one (1) year from the original date of purchase from AcomData or its local representative supplier, AcomData will repair defective Product (or, at its option, replace with a new or recertified product) at no charge. After this 1 year period, you must pay for all labor charges. 2.
6 59 the Player or of the TV. If this should happen, turn off the Player's power; • The DVD Player may interfere with radio reception when the power is on. Using the Player in vehicles Do not use the Player while driving a vehicle. Only passengers should use the Player. Preferably, passengers using the Player should be seated in the back seat so as not to distract the driver.
58 7 also uses an interframe coding technique, which further compresses the video data by encoding only the differences in the images between key frames. Speech Enhancer - Audio technology that enhances certain frequencies, to increase clarity of dialogue, especially when the volume is low. PCM - (Pulse Code Modulation) A technique for converting analog signals into digital form.
8 57 multi-channel (surround sound) audio.
56 9 Composite Video (CVBS) - The recording and transmission of video which mixes the color information and synchronization signals together. NTSC, PAL and SECAM are the primary composite video color TV standards used worldwide. DAC (Digital to Analog Converter) – A device that converts digital pulses into analog signals.
10 55 PART NAMES & THEIR FUNCTIONS GLOSSARY THE PLAYER AC-3 (Active Coding-3) - An audio encoding technology developed by Dolby Laboratories. AC-3 provides six channels of audio (known as 5.1) for front left, front right, front center, rear left, rear right, and subwoofer. AC-3 technology is used in Dolby Digital surround sound. Front Panel 1. 7" TFT LCD 2. Stereo Speakers 3. Control Strip 4. Remote Sensor 5. Power Indicator MEANING STATUS Off: No power Red: Standby mode. Blue: Power on.
54 11 TECHNICAL SPECIFICATIONS Left Side Panel 1. Headphones Jack 2. Volume Control Model No: PDVD7 Dimensions (L X W X D): 202 x 154 x 26 mm 7.9" x 6.1" x 1" Weight: (without Battery Pack): 650 g (1.43 lbs) Power Input:12 VDC/1.5 A Power Consumption: < 10 W Display: Type: Thin Film Transistor, Liquid Crystal Display Size: 7" Pixels: 480 X 234 Aspect Ratio: 16:9 and 4:3 Laser: Type: Semiconductor GaAIAs Wavelength: 650/780 nm Output Power: 5 mW Beam Divergence: 60 degrees 3.
12 53 Control Strip 1. ON/PLAY/PAUSE button • Press for 2 seconds to power on the Player. • Press to play a loaded disc. • Press during playback to pause. Press again to resume. 2. OFF/STOP button • Press to stop playback. • Press for 2 seconds to put the Player into Standby mode. 3. PREVIOUS/NEXT buttons Press to skip to the next/previous track or chapter. 4. LCD MODE button • Press the LCD MODE button to toggle through the LCD control modes. • The volume is set to minimum. • Headphones are plugged in.
52 13 TROUBLESHOOTING COMMON ISSUES REMOTE CONTROLLER (Part 1: Frequently Used Buttons) FYI: Most operations can be performed from the Remote Controller. However, some operations must be performed from the Player. There is no power to the Player. • If running off of AC power, make sure the AC Adapter is securely plugged in at both ends. • If running off of the Battery Pack, make sure the Battery Pack is charged and securely connected to the Player. nected to a TV, or other equipment.
14 51 REMOTE CONTROLLER (Part 2: Other Buttons) 1. AUDIO button Press to change DVD audio language and to access special DVD audio features, such as voice over commentaries (if available). 2. SETUP button • Press when playback is stopped to display the Setup Screen. (See page 31) • Press once during playback to display the Video Enhance screen. (See page 45) • Press twice during music playback to access the Equalizer. (See page 46) 3. CURSOR buttons Used for on-screen navigation. 4.
50 15 MOUNTING OPTIONS THE PLAYER ON A WALL OR IN YOUR CAR USING THE OPTIONAL MOUNTING (only for VCDs with playback control). MOUNTING One of the most versatile features of the AWEGO is the ability to mount the Player in your car or on a wall using one of the sturdy, optional Mounting Kits, available for purchase directly from AcomData. AcomData offers three mounting kits: 7. NUMBER buttons Press these buttons while pressing the SHIFT button to input numbers.
16 49 14. ANGLE button Press to switch the DVD's angle or to view other special on-screen features that may be available. USING THE CAR ADAPTER 15. SEARCH button Used to find a specific location on a disc, such as a title or chapter on a DVD, or elapsed time and track on a CD. Use the NUMBER buttons to enter the desired information. Press the ENTER button to complete selection.
48 17 Viewing Photos Sequentially With a photo on screen, use the NEXT and PREVIOUS buttons on the Remote Controller or the Player. Playing a Slide Show If the list menu is displayed, press the PLAY button on the Remote Controller or the ON button on the Player. If a photo is displayed, press the STOP button on the Remote Controller or the OFF button on the Player. The file list screen will appear. Press the PLAY button on the Remote Controller or the ON button on the Player.
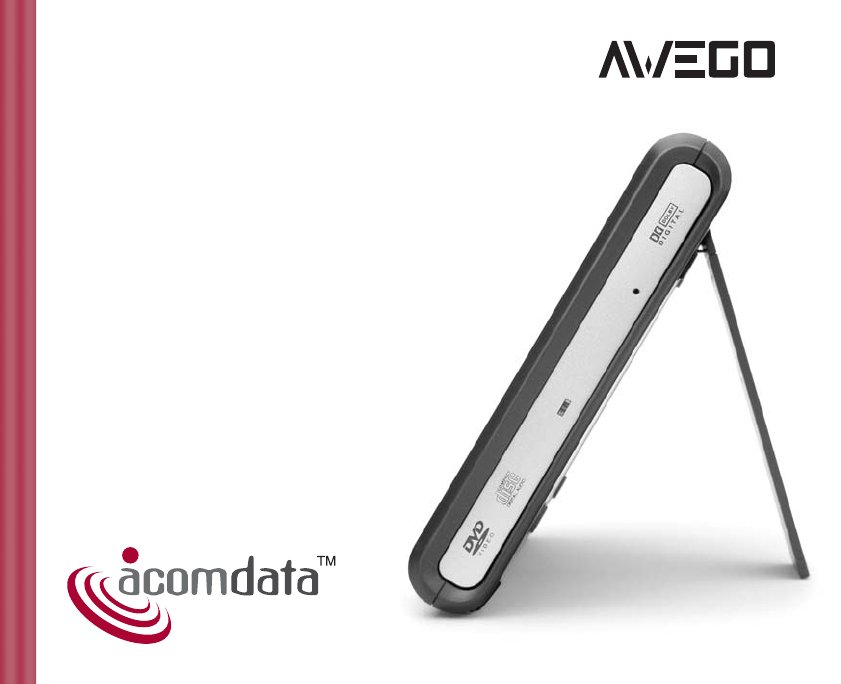
18 47 GETTING STARTED Standing the Player on a Tabletop 1. Swing out the support. 2. Draw out the support to the desired length. 3. Use the lock button to lock the support. VIEWING DIGITAL PHOTOS Using the Remote Controller Important Notes: • Do not drop or step on the Remote Controller, or subject it to shocks. Doing so may damage it. • Obstacles between the Remote Controller and the Player may impede remote operation. • Do not expose the remote sensor on the Player to strong light.
46 19 Video Enhance 6-Band Equalizer Video Enhance allows you to adjust two settings: Brightness and Edges. Brightness adjusts the screen brightness. Edges enhances the edge sharpness of images. (Audio CDs) 1. Press SETUP during playback to display the Video Enhance screen. 2. Use the Left and Right CURSOR buttons to adjust the settings. Use the Up and Down CURSOR buttons to select Brightness or Edges. 3. When you are done, press the SETUP button or the ENTER button to exit Video Enhance. 1.
20 45 Remote Controller Range The remote controller has a range of approximately 5 meters (about 16 feet) and works best when positioned within 60º in front of the Player. Repeat Play Using “In” and “Out” points 1. During playback, press the A-B button to set an “in” point. 2. Press the A-B button again to set the “out” point. The segment defined by the “in” and “out” points will play repeatedly. 3. Press the A-B button again to cancel the A-B repeat function. Viewing Elapsed Time and Time Remaining 1.
44 21 Disc Search or a Track Search. When playback is stopped you can only conduct a Disc Search. Whether you conduct a Disc Search or a Track Search you will see the Time field and a Track field. The Time field is hi-lighted by default. 2. If you want to input numbers into a field other than the Time field select the field using the CURSOR buttons, then use the NUMBER buttons to input the numbers. The first number you input will be the leading number.
22 43 Using the Battery Pack Important Notes: • Charge the Battery Pack fully before using it for the first time. • Place the Battery Pack on a level, flat surface when charging. • The Battery Pack will last for about 300 charging cycles, though this can vary depending on operating conditions. • If the Battery Pack is very warm, wait for it to cool down before recharging it. • If the LED does not light when the AC Adapter is connected, disconnect and reconnect the AC Adapter.
42 23 PLAYBACK FUNCTIONS Pausing Playback Resume Play Function Press the PLAY/PAUSE button on the Remote Controller, or the ON button on the Player. (DVDs and Video CDs) To resume playback press the button again. Skipping to the Next/ Previous Chapter or Track Press the NEXT button during playback to jump to the beginning of the next chapter or track. Press the PREVIOUS button during playback to jump to the beginning of the previous chapter or track.
24 41 Connecting the Battery Pack to the Player Color Saturation 1. Press the LCD MODE button on the Player three times to access the color control. 1. Place the Battery Pack against the bottom of the Player as shown so that the Guide Stems on the Battery Pack align with the Battery Guide Holes on the Player. 2. Use the – or + button on the Player to adjust the color saturation setting between levels 0 and 8.
40 25 LCD MODES Aspect Ratio Brightness You can select either 16:9 (widescreen) or 4:3 (standard TV) screen proportions regardless of the format used by the video. However, if you select 16:9 for a video meant to be viewed in 4:3, the screen image will be stretched. Changing aspect ratios using the Player may have no effect on video displayed on a TV. 1. Press the LCD MODE button on the Player twice to access the brightness control. 1. Press the LCD MODE button on the Player once.
26 39 Using Headphones (not included) 1. Plug your headphones into the Headphones jack on the Player. Displaying a Disc’s Menu During Playback Removing a Disc When There is no Power 2. Before you put on your headphones, turn the Volume Control knob (located on the left side panel of the Player) all the way down. For DVDs, press the MENU or TITLE button on the Remote Controller. 3. Put on the Headphones and then increase the volume to a comfortable level.
38 27 When the disc is properly inserted, you will here it click in place. 3. Close the tray. After a disc has been loaded, the screen will briefly display the disc type (DVD, CD etc). Playback If a VCD's menu screen includes more than one page, use the PREVIOUS and NEXT buttons to select pages. For VCDs with PBC, it is also possible to play a disc without displaying the menu screen.To play from track 1, press the 1 button on the Remote Controller.
28 37 Connecting to a Dolby Digital/DTS/MPEG Decoder or an Amplifier with a Built-in Decoder Important Notes: PLAYING DISCS Loading a Disc • A compatible decoder or amplifier, 5 speakers (front left/right, center and surround left/right) and a subwoofer are required for Dolby Digital/DTS 5.1-channel sound. Important Notes: • Connection to digital components requires an optical digital cable (not included). 1. Press the OPEN button to open the tray.
36 29 Parental Lock With the Parental Lock feature you can create a numerical password to prevent your children from viewMOVIE ing movies with a certain rating RATINGS or higher. For example, if you set the Parental Lock at the R rating, Kid Safe any movie with an R rating or G higher will require the viewer to PG input the password before the PG-13 movie will be played. PG-R R NC-17 Adult Please Note: The password is only required the FIRST time you press PLAY after a disc has been loaded. 1.
30 35 AUDIO MENU OPTIONS Connecting to an Active Speaker System Submenu Options Description Dolby Digital Off Player will not output Dolby Digital audio signals recorded on a disc. PCM Player outputs Dolby Digital signals in PCM mode. Use this setting if the Player is connection to a digital amplifier that is NOT Dolby Digital compatible. Raw Player outputs raw (unmodulated) Dolby Digital signals.
34 31 6. To exit the SETUP screen, press the SETUP button. VIDEO MENU OPTIONS Submenu Options TV Shape* 4:3 Pan & Scan 4:3 LetterBox 16:9 TV System NTSC PAL Auto Brightness On Off Edges Off Sharpen Soften Video Output CVBS (Composite Video)† *Selecting different aspect ratios may have no effect on the image displayed on your TV. † Composite Video is the only option available. Audio Menu 1. With the Audio menu open, use the Up and Down CURSOR buttons to select the menu item you wish to change.
32 33 Language Menu 2. When the desired menu item is highlighted, press the ENTER button to view the language options for that item. Important Note: The Subtitle, Audio and DVD Menu options are shown in the Setup Screen; however, your selection will only work if those options are actually available on the disc being played. For example, if you want to watch a movie with French subtitles, then French subtitles must be available as an option on the disc. 1.
32 33 Language Menu 2. When the desired menu item is highlighted, press the ENTER button to view the language options for that item. Important Note: The Subtitle, Audio and DVD Menu options are shown in the Setup Screen; however, your selection will only work if those options are actually available on the disc being played. For example, if you want to watch a movie with French subtitles, then French subtitles must be available as an option on the disc. 1.
34 31 6. To exit the SETUP screen, press the SETUP button. VIDEO MENU OPTIONS Submenu Options TV Shape* 4:3 Pan & Scan 4:3 LetterBox 16:9 TV System NTSC PAL Auto Brightness On Off Edges Off Sharpen Soften Video Output CVBS (Composite Video)† *Selecting different aspect ratios may have no effect on the image displayed on your TV. † Composite Video is the only option available. Audio Menu 1. With the Audio menu open, use the Up and Down CURSOR buttons to select the menu item you wish to change.
30 35 AUDIO MENU OPTIONS Connecting to an Active Speaker System Submenu Options Description Dolby Digital Off Player will not output Dolby Digital audio signals recorded on a disc. PCM Player outputs Dolby Digital signals in PCM mode. Use this setting if the Player is connection to a digital amplifier that is NOT Dolby Digital compatible. Raw Player outputs raw (unmodulated) Dolby Digital signals.
36 29 Parental Lock With the Parental Lock feature you can create a numerical password to prevent your children from viewMOVIE ing movies with a certain rating RATINGS or higher. For example, if you set the Parental Lock at the R rating, Kid Safe any movie with an R rating or G higher will require the viewer to PG input the password before the PG-13 movie will be played. PG-R R NC-17 Adult Please Note: The password is only required the FIRST time you press PLAY after a disc has been loaded. 1.
28 37 Connecting to a Dolby Digital/DTS/MPEG Decoder or an Amplifier with a Built-in Decoder Important Notes: PLAYING DISCS Loading a Disc • A compatible decoder or amplifier, 5 speakers (front left/right, center and surround left/right) and a subwoofer are required for Dolby Digital/DTS 5.1-channel sound. Important Notes: • Connection to digital components requires an optical digital cable (not included). 1. Press the OPEN button to open the tray.
38 27 When the disc is properly inserted, you will here it click in place. 3. Close the tray. After a disc has been loaded, the screen will briefly display the disc type (DVD, CD etc). Playback If a VCD's menu screen includes more than one page, use the PREVIOUS and NEXT buttons to select pages. For VCDs with PBC, it is also possible to play a disc without displaying the menu screen.To play from track 1, press the 1 button on the Remote Controller.
26 39 Using Headphones (not included) 1. Plug your headphones into the Headphones jack on the Player. Displaying a Disc’s Menu During Playback Removing a Disc When There is no Power 2. Before you put on your headphones, turn the Volume Control knob (located on the left side panel of the Player) all the way down. For DVDs, press the MENU or TITLE button on the Remote Controller. 3. Put on the Headphones and then increase the volume to a comfortable level.
40 25 LCD MODES Aspect Ratio Brightness You can select either 16:9 (widescreen) or 4:3 (standard TV) screen proportions regardless of the format used by the video. However, if you select 16:9 for a video meant to be viewed in 4:3, the screen image will be stretched. Changing aspect ratios using the Player may have no effect on video displayed on a TV. 1. Press the LCD MODE button on the Player twice to access the brightness control. 1. Press the LCD MODE button on the Player once.
24 41 Connecting the Battery Pack to the Player Color Saturation 1. Press the LCD MODE button on the Player three times to access the color control. 1. Place the Battery Pack against the bottom of the Player as shown so that the Guide Stems on the Battery Pack align with the Battery Guide Holes on the Player. 2. Use the – or + button on the Player to adjust the color saturation setting between levels 0 and 8.
42 23 PLAYBACK FUNCTIONS Pausing Playback Resume Play Function Press the PLAY/PAUSE button on the Remote Controller, or the ON button on the Player. (DVDs and Video CDs) To resume playback press the button again. Skipping to the Next/ Previous Chapter or Track Press the NEXT button during playback to jump to the beginning of the next chapter or track. Press the PREVIOUS button during playback to jump to the beginning of the previous chapter or track.
22 43 Using the Battery Pack Important Notes: • Charge the Battery Pack fully before using it for the first time. • Place the Battery Pack on a level, flat surface when charging. • The Battery Pack will last for about 300 charging cycles, though this can vary depending on operating conditions. • If the Battery Pack is very warm, wait for it to cool down before recharging it. • If the LED does not light when the AC Adapter is connected, disconnect and reconnect the AC Adapter.
44 21 Disc Search or a Track Search. When playback is stopped you can only conduct a Disc Search. Whether you conduct a Disc Search or a Track Search you will see the Time field and a Track field. The Time field is hi-lighted by default. 2. If you want to input numbers into a field other than the Time field select the field using the CURSOR buttons, then use the NUMBER buttons to input the numbers. The first number you input will be the leading number.
20 45 Remote Controller Range The remote controller has a range of approximately 5 meters (about 16 feet) and works best when positioned within 60º in front of the Player. Repeat Play Using “In” and “Out” points 1. During playback, press the A-B button to set an “in” point. 2. Press the A-B button again to set the “out” point. The segment defined by the “in” and “out” points will play repeatedly. 3. Press the A-B button again to cancel the A-B repeat function. Viewing Elapsed Time and Time Remaining 1.
46 19 Video Enhance 6-Band Equalizer Video Enhance allows you to adjust two settings: Brightness and Edges. Brightness adjusts the screen brightness. Edges enhances the edge sharpness of images. (Audio CDs) 1. Press SETUP during playback to display the Video Enhance screen. 2. Use the Left and Right CURSOR buttons to adjust the settings. Use the Up and Down CURSOR buttons to select Brightness or Edges. 3. When you are done, press the SETUP button or the ENTER button to exit Video Enhance. 1.
18 47 GETTING STARTED Standing the Player on a Tabletop 1. Swing out the support. 2. Draw out the support to the desired length. 3. Use the lock button to lock the support. VIEWING DIGITAL PHOTOS Using the Remote Controller Important Notes: • Do not drop or step on the Remote Controller, or subject it to shocks. Doing so may damage it. • Obstacles between the Remote Controller and the Player may impede remote operation. • Do not expose the remote sensor on the Player to strong light.
48 17 Viewing Photos Sequentially With a photo on screen, use the NEXT and PREVIOUS buttons on the Remote Controller or the Player. Playing a Slide Show If the list menu is displayed, press the PLAY button on the Remote Controller or the ON button on the Player. If a photo is displayed, press the STOP button on the Remote Controller or the OFF button on the Player. The file list screen will appear. Press the PLAY button on the Remote Controller or the ON button on the Player.
16 49 14. ANGLE button Press to switch the DVD's angle or to view other special on-screen features that may be available. USING THE CAR ADAPTER 15. SEARCH button Used to find a specific location on a disc, such as a title or chapter on a DVD, or elapsed time and track on a CD. Use the NUMBER buttons to enter the desired information. Press the ENTER button to complete selection.
50 15 MOUNTING OPTIONS THE PLAYER ON A WALL OR IN YOUR CAR USING THE OPTIONAL MOUNTING (only for VCDs with playback control). MOUNTING One of the most versatile features of the AWEGO is the ability to mount the Player in your car or on a wall using one of the sturdy, optional Mounting Kits, available for purchase directly from AcomData. AcomData offers three mounting kits: 7. NUMBER buttons Press these buttons while pressing the SHIFT button to input numbers.
14 51 REMOTE CONTROLLER (Part 2: Other Buttons) 1. AUDIO button Press to change DVD audio language and to access special DVD audio features, such as voice over commentaries (if available). 2. SETUP button • Press when playback is stopped to display the Setup Screen. (See page 31) • Press once during playback to display the Video Enhance screen. (See page 45) • Press twice during music playback to access the Equalizer. (See page 46) 3. CURSOR buttons Used for on-screen navigation. 4.
52 13 TROUBLESHOOTING COMMON ISSUES REMOTE CONTROLLER (Part 1: Frequently Used Buttons) FYI: Most operations can be performed from the Remote Controller. However, some operations must be performed from the Player. There is no power to the Player. • If running off of AC power, make sure the AC Adapter is securely plugged in at both ends. • If running off of the Battery Pack, make sure the Battery Pack is charged and securely connected to the Player. nected to a TV, or other equipment.
12 53 Control Strip 1. ON/PLAY/PAUSE button • Press for 2 seconds to power on the Player. • Press to play a loaded disc. • Press during playback to pause. Press again to resume. 2. OFF/STOP button • Press to stop playback. • Press for 2 seconds to put the Player into Standby mode. 3. PREVIOUS/NEXT buttons Press to skip to the next/previous track or chapter. 4. LCD MODE button • Press the LCD MODE button to toggle through the LCD control modes. • The volume is set to minimum. • Headphones are plugged in.
54 11 TECHNICAL SPECIFICATIONS Left Side Panel 1. Headphones Jack 2. Volume Control Model No: PDVD7 Dimensions (L X W X D): 202 x 154 x 26 mm 7.9" x 6.1" x 1" Weight: (without Battery Pack): 650 g (1.43 lbs) Power Input:12 VDC/1.5 A Power Consumption: < 10 W Display: Type: Thin Film Transistor, Liquid Crystal Display Size: 7" Pixels: 480 X 234 Aspect Ratio: 16:9 and 4:3 Laser: Type: Semiconductor GaAIAs Wavelength: 650/780 nm Output Power: 5 mW Beam Divergence: 60 degrees 3.
10 55 PART NAMES & THEIR FUNCTIONS GLOSSARY THE PLAYER AC-3 (Active Coding-3) - An audio encoding technology developed by Dolby Laboratories. AC-3 provides six channels of audio (known as 5.1) for front left, front right, front center, rear left, rear right, and subwoofer. AC-3 technology is used in Dolby Digital surround sound. Front Panel 1. 7" TFT LCD 2. Stereo Speakers 3. Control Strip 4. Remote Sensor 5. Power Indicator MEANING STATUS Off: No power Red: Standby mode. Blue: Power on.
56 9 Composite Video (CVBS) - The recording and transmission of video which mixes the color information and synchronization signals together. NTSC, PAL and SECAM are the primary composite video color TV standards used worldwide. DAC (Digital to Analog Converter) – A device that converts digital pulses into analog signals.
8 57 multi-channel (surround sound) audio.
58 7 also uses an interframe coding technique, which further compresses the video data by encoding only the differences in the images between key frames. Speech Enhancer - Audio technology that enhances certain frequencies, to increase clarity of dialogue, especially when the volume is low. PCM - (Pulse Code Modulation) A technique for converting analog signals into digital form.
6 59 the Player or of the TV. If this should happen, turn off the Player's power; • The DVD Player may interfere with radio reception when the power is on. Using the Player in vehicles Do not use the Player while driving a vehicle. Only passengers should use the Player. Preferably, passengers using the Player should be seated in the back seat so as not to distract the driver.
60 5 ONE YEAR LIMITED WARRANTY AcomData warrants this product (the "Product") against defects in material or workmanship as follows: 1. LABOR: For a period of one (1) year from the original date of purchase from AcomData or its local representative supplier, AcomData will repair defective Product (or, at its option, replace with a new or recertified product) at no charge. After this 1 year period, you must pay for all labor charges. 2.
4 61 Viewing Digital Photos . . . . . . .47 Loading a Disc . . . . . . . . . . . . .47 Viewing Selected Photos from the File List Screen . . . . .47 Viewing Selected Photos from the Thumbnail View Screen . . . . . .47 Viewing Photos Sequentially . . . . . .48 Playing a Slide Show . . . . . . . . . .48 Enhancing Image Quality . . . . . . . .48 Rotating Photos . . . . . . . . . . . . .48 Photo Zoom . . . . . . . . . . . . . . . .48 Using the Car Adapter . . . . . .49 Mounting Options . . . . . . . . . .
62 3 determined by AcomData that there is no fault with this Product itself. This Limited Warranty is invalid if the factory applied serial number has been altered or removed from the Product. REPAIR OR REPLACEMENT AS PROVIDED UNDER THIS WARRANTY IS THE EXCLUSIVE REMEDY OF THE CONSUMER. ACOMDATA SHALL NOT BE LIABLE FOR ANY INCIDENTAL OR CONSEQUENTIAL DAMAGES FOR BREACH OF ANY EXPRESS OR IMPLIED WARRANTY, BREACH OF CONTRACT, NEGLIGENCE, STRICT LIABILITY OR ANY OTHER LEGAL THEORY RELATED TO THIS PRODUCT.
2 63 CONTENTS ORDERING ACCESSORIES Important Safety Precautions . . . . . . . . . . .5 What’s in the Box . . . . . . . . . . .7 Features Overview . . . . . . . . . . .8 Types of Discs & File Formats Playable on the AWEGO . . . . . . .9 Part Names and their Functions The Player Front Panel . . . . . . . . . . . . . . Back Panel . . . . . . . . . . . . . . Left Side Panel . . . . . . . . . . . Disc Tray . . . . . . . . . . . . . . . Bottom . . . . . . . . . . . . . . . . Control Strip . . . . . . . . . .
64 1 CONTACT INFORMATION WELCOME TO AWEGO FROM ACOMDATA AcomData PO BOX 5499 Diamond Bar, California 91765-7499 Thank you for purchasing the AWEGO Tablet DVD Player from AcomData, and welcome to the exciting world of portable DVD. Think of AWEGO as your very own personal entertainment center. With AWEGO you can watch movies, listen to music, and view your digital photos just about anywhere. Telephone: (909) 348-0680 Fax: (909) 598-8663 Web: www.acomdata.com Customer Service: customerservice@acomdata.
OTHER AWARD-WINNING ACOMDATA PRODUCTS FOR YOUR WINDOWS PC & MACINTOSH: RocketPod™ Hi-Performance Peripherals A patented, modular system of portable USB 2.0 and FireWire hard drives and other devices that stack without cables or power cords. External USB 2.0 & FireWire/ USB 2.0 Combo Hard Drives External FireWire Tape Back-up Drives USB 2.0 PCI Adapter Card FireWire PCI Adapter Card USB 2.0 Hub Remote Laser Pointer Mouse Wireless device helps you make more effective presentations.