
Product Overview


BluVac+ LTE User’s Guide
9
Maintenance
The BluVac+ LTE should provide many years of service with no maintenance required. When not in
use, the dust cap should remain in place over the sensor port. Clean the plastic enclosure with a
damp (not wet) rag. Mild detergent is acceptable, but use no solvents. Take care not to expose the
vacuum sensor to oil. If the Oil Sensor (described above) indicates a contaminated sensor, follow the
Sensor Cleaning Procedure below.
Cleaning the Vacuum Sensor
If the vacuum sensor becomes contaminated with oil (as indicated by the Oil Sensor), carefully follow
this procedure:
1. Turn the BluVac+ LTE power off.
2. Shake the gauge to remove any large quantities of oil from the sensor.
3. Apply a few drops of rubbing alcohol inside the sensor vacuum port. (DO NOT INSERT ANY
OBJECT INTO THE PORT, AS THIS WILL PERMANENTLY DAMAGE THE SENSOR).
4. Place your finger over the port and shake for a few moments.
5. Remove your finger and shake out the alcohol.
6. Repeat steps (3) – (5) at least three times.
7. Allow the sensor to air dry over at least an hour, or pull a vacuum on the sensor to dry it more
quickly.
8. Replace the battery and turn on the gauge. The Oil Indicator should be off. If it is still on, repeat
the cleaning procedure.
9. If full accuracy is desired, perform a calibration cycle as detailed in the Calibration section below.
NOTE: It is important to remove all alcohol vapors from the sensor, either through air-drying or via
vacuum. Any remaining vapors will cause an incorrect vacuum reading.
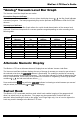
Calibration Test
The BluVac+ LTE should rarely require recalibration, though it may be necessary to know that your
gauge is calibrated properly for full accuracy. The Calibration Test mode assures you that the
BluVac+ LTE is calibrated to factory specifications. Test the calibration as follows:
1. Turn the BluVac+ LTE power off.
2. Important: Expose the BluVac+ LTE to atmospheric pressure.
3. Press and hold (do not release) the key for about 5 seconds.
4. The display will show if the instrument is calibrated properly.
5. The display will show if the instrument requires calibration. Please see the Calibration
section below.