
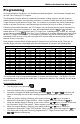
Product Overview


BluVac+ Professional User’s Guide
11
7. If the pressure exceeds the RTT Target Pressure before the RTT Target Time is achieved, the
BluVac+ Pro will alarm and show to indicate that the test has failed.
8. In either case, pressing any key will silence the alarm. In the case of a , the clock will
continue counting for further manual analysis. This can be stopped by pressing the key.
In the case of a , normal operation will immediately resume.
While in the Run Mode, the gauge may sleep after 5 minutes of high pressure. The gauge will wake
and continue the program normally once the pressure drops below 25,000 Microns. The gauge may
be manually wakened from sleep by pressing any key. In the Run Mode, the Auto Power-Off
feature is disabled.
Stopping a Program
At any time during the Run Mode, the program can be canceled by pressing and holding .
NOTE: The units cannot be changed while in the Run Mode. Pressing the Mode key during the run
mode will toggle between leak rate and time.
Maintenance
The BluVac+ Pro should provide many years of service with no maintenance required. When not in
use, the dust cap should remain in place over the sensor port. Clean the plastic enclosure with a
damp (not wet) rag. Mild detergent is acceptable, but use no solvents. Take care not to expose the
vacuum sensor to oil. If the Oil Sensor (described above) indicates a contaminated sensor, follow the
Sensor Cleaning Procedure below.
Cleaning the Vacuum Sensor
If the vacuum sensor becomes contaminated with oil (as indicated by the Oil Sensor), carefully follow
this procedure:
1. Power off the BluVac+ Pro.
2. Shake the gauge to remove any large quantities of oil from the sensor.
3. Using an eyedropper or syringe, carefully apply a few drops of rubbing alcohol inside the sensor
vacuum port. DO NOT INSERT ANY OBJECT INTO THE PORT, AS THIS WILL
PERMANENTLY DAMAGE THE SENSOR.
4. Place your finger over the port and shake for a few seconds.
5. Remove your finger and shake out the alcohol.
6. Repeat steps (3) – (5) at least three times.
7. Allow the sensor to air dry over at least an hour, or pull a vacuum on the sensor to dry it more
quickly (a few seconds).
8. Power on the gauge. The message and OIL indicator should be off. If it is still on, repeat
the cleaning procedure.
9. If, after repeated cleaning, the message or the OIL indicator is still illuminated, or, if full
accuracy is desired, perform a calibration cycle as detailed in the Calibration section below.
NOTE: It is important to remove all alcohol vapors from the sensor, either through air-drying or via
vacuum. Any remaining vapors will cause an incorrect vacuum reading.