
Instruction manual


25
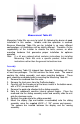
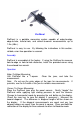
Measurement Table Kit
Measuring Table Kits are easy to install. By following the basics of good
installation in this section, reliable, error-free operation is assured.
Because Measuring Table Kits can be installed in so many different
configurations, all installations will be slightly different. Therefore, it's the
responsibility of the installer to choose the bolts, screws, or other
mounting hardware that guarantee proper installation for optimum
operation.
Note: If a kit was ordered which contains instructions for installing
Measuring Table Kits onto a specific product, follow those
instructions rather than the general instructions here.
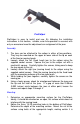
Assembly:
Each Measuring Table Kit shipped from Accurate Technology will have
at least two packages. The first contains the linear scale. The second
contains the sliding assembly, and some mounting hardware. These
parts should be assembled prior to mounting the Measuring Table Kit.
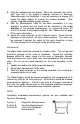
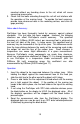
1. Remove the readhead from the scale.
2. Remove the front cover from the ProScale display.
3. Carefully drill the threads out of the brass inserts in the bottom cover,
with a 3/16" (or equivalent) drill.
4. Remove the guide clip attached to the sliding assembly.
5. Note the readhead’s sensitive internal ground fingers. Place the
readhead into the sliding assembly cutout and carefully slide the unit
onto the aluminum scale.
6. Reattach the guide clip to the sliding assembly.
7. Mount the display (top and bottom re-assembled) onto the sliding
assembly using the supplied #8-32 x 1 3/4" screws and spacers.
The spacers are inserted between the display and the moving
assembly.