
Installation guide
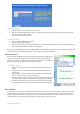
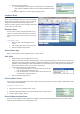
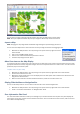

You can import any jpeg or bitmap image file into the map view. The default map is shown above.
NOTE: Once your replace the default map with your image the default map cannot be recovered.
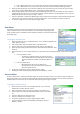
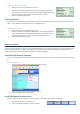
Import a Map
NOTE: Changing the map image deletes the default image making the imported image permanent.
You can move the “Map Controls” box around the screen by clicking the blue bar and dragging the box.
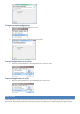
1. Maximize the “Map Controls” menu by clicking on the square at the top right hand corner
of the window.
2. Click on the “Load Map Image” button.
3. Click the “Yes” button when asked if you want to continue.
4. Locate the map image and click “Open”.
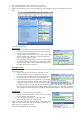
Move Zone Icons on the Map Display
To visually recreate your irrigation site in the map view you can drag each of your system's zones and water sources to their
appropriate locations on the map. Irrigation manager uses icons to represent each zone or water source. Once the icons are
positioned, they can be locked in place.
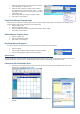
To place icons on your map
1. Maximize the “Map Controls” menu by clicking on the square at the top right hand corner of the window.
2. Uncheck the “Lock Zone Icons” box.
3. Moving the mouse pointer over an icon will display the zone's description. Click and hold on the desired zone and
drag it to the desired location.
4. When all zones have been moved to the desired locations, check the “Lock Zone Icons” box.
Display/Hide the Menu or Navigation Bar
You can use the “Map controls” menu to show or hide the main menu and the navigation bar.
1. Maximize the “Map Controls” menu by clicking on the square at the top right hand corner of the window.
2. Check or uncheck the “Show Menu” or “Navigation Bar” boxes.
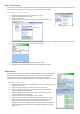
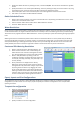
Zone Information Side Panel
The “Zone Information Side Panel” allows you to manage all your zones from within the map view. The panel displays the
zone's status, name, type, moisture sensors and water restrictions. You can test the zone's valve current, read a sensor and
even initiate manually watering.