
User guide
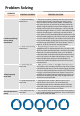


Problem Solving
PROBLEM
POSSIBLE PROBLEM POSSIBLE SOLUTION
Trouble
assembling/
disassembling
attachments
1. Trouble assembling
attachments.
1.
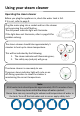
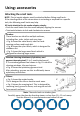
There are a number of attachments that can be used
with this steam cleaner. The steam gun clips in to the
steam socket on the side of the cleaner.
To detach the
base, push the lever on the side of the base and lift the
cleaner using the handle.
The jet nozzle adaptor can be
pushed on the nozzle of the steam gun
– the clip should
protrude through to show it is secure. The extension tubes
attach to the steam gun in the same way and the floor
brush attaches to the assembled elbow attachment on the
extension tubes (page 14). The cotton cloth can be clipped
on to the sides of the brush. The smaller tools attach on to
the jet nozzle adaptor by aligning up the arrows, pushing
on and turning anticlockwise. For more details, refer to
pages
12-15 of the instruction manual provided.
2. Trouble disassembling
attachments.
2.
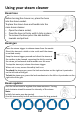
Disassembling the attachments should be
straightforward. To disassemble the hose, the clips in the
side of the head should be pushed in and the hose pulled
backwards. To remove the floor brush,
turn the elbow
attachment 180
° and to disassemble
the extension tubes,
push in the clips on the sides and pull apart. Press in the
button and pull away the jet not nozzle adaptor. To
remove the smaller attachments from the nozzle, twist
them clockwise.
Filling
/Emptying
water tank
1. Trouble filling
the
water tank.
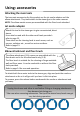
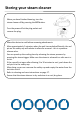
1. Make sure the cleaner is unplugged. With the unit on a
level surface, turn the safety cap on the top of the cleaner
anticlockwise and remove. Fill the measuring jug provided
with up to 750ml cold tap water and pour the contents of
the jug in to the funnel (where the cap was.) Secure the
cap back on to the tank and turn clockwise to secure. For
instructions on refilling the tank, refer to page 10 of the
instruction manual provided.
2. Trouble emptying the
water tank.
2.
Unplug the steam cleaner. Wait a minimum of 5
minutes for the unit to cool. Turn the safety cap
anticlockwise and remove. Hold the cleaner with both
hands and safely pour any remaining water into a sink.
Secure the safety cap back on the cleaner.
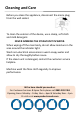
The attachments are
greasy
1. The
attachments are
lubricated.
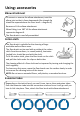
1. It is normal for some of the attachments to be greasy as
they are lubricated during production. They can be wiped
with a damp cloth and dried.
18