
User guide

Administration
51
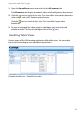
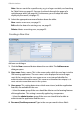
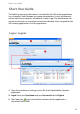
Note: You can search for a specific entry, e.g. in a large user table, see Searching
for Table Entries on page 49. You can also thumb through the pages of a
multiple page table (see page 48). Furthermore, you can adapt the table
display to your needs (see page 47).
2. Select the appropriate command button above the table:
New: creates a new user, see page 51.
Edit: edits the data of an existing user, see page 52.
Delete: deletes an existing user, see page 53.
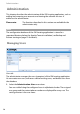
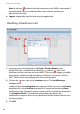
Creating a New User
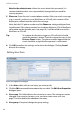
Add new user dialogue
1. Click the New command button above the user table. The Add new user
dialogue opens.
2. User name: Enter a name. This is the name under which the user logs in to the
OM Locating application. The user name is also displayed in text messages
sent. At the same time, the user name serves as an internal identifier for
administration of the data record. This name must therefore be unique, i.e. it
must not exist more than once in the system.
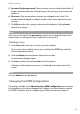
3. User group: This setting determines which menu items (and thus application
features) are available for the user.
– Select the users group if the user should be able to use the locating features
of the application. This setting is normally applied e.g. to operators.
– Select the administrators group if the new user should also be able to
administrate the application and the users.
4. Password, Confirm password: Type in the user password in these fields.