
User guide


Operation and Daily Usage
38
click the appropriate entries. To select all entries, activate the check box in the
first column of the table header.
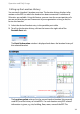
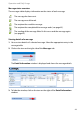
2. Click the Tracking command button above the portable parts table.
Alternatively, you can click on the tracking status icon behind each handset
entry to switch the mode.
Note
Note, that the Tracking option has to be enabled for the respective handset (see
the chapter entitled Configuring the Portable Parts starting on page 16).
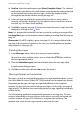
Updating location information
The Updated column indicates the timestamp of the last location update. In
addition, the icons in the Location column indicate the following:
1. To obtain current location information, select the respective handset entry. You
can also select multiple entries: press and hold the [CTRL] key and then click
the appropriate entries. To select all entries, activate the topmost check box in
the table header.
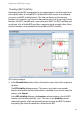
2. Click the Update command button above the portable parts table.
Alternatively, you can click on the update status icon in the appropriate
Location column. This updates the location information and concurrently
opens the RFP visibility dialogue (see also the chapter entitled Checking RFP
Visibility starting on page 41).
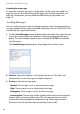
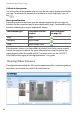
Sending messages
The Portable Parts tab of the Subscriber menu also provides the possibility to
send messages to one or multiple recipients. The procedure is described in the
section entitled Sending Messages on page 44.
Location was recently updated.
Location was recently updated but RFP visibility (see page 41) is not
possible.
Last location update is more than 20 minutes ago.
Last location update is more than 20 minutes ago, RFP visibility is not
possible.
No active location information is available.
No active location information is available, RFP visibility is not possible.