
User guide

Operation and Daily Usage
35
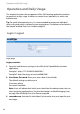
5. Confirm: Accept the preselected Read confirmation type or select another one
from the drop down list (Complete, Order). The selected confirmation type
defines the confirmation sequence that has to be performed on the handset
that receives the locating alert (see also the chapter entitled Message Receipt
on the Handset starting on page 45).
6. Optional: You can enter a message text in the input field. This text will be
displayed on the located handset in addition to the locating alert message
which is automatically generated by the OM system.
7. Click OK to send the locating alert.
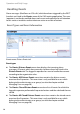
Viewing Event History
For documentation purposes, a history log is created for each event in the
OM Locating server database. The history saves the event’s data and all actions
which have been performed on the event.
1. Select the desired entry in the events table.
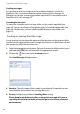
2. To call up the event history, click the History command button above the
events table.
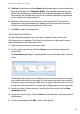
The Event history dialogue is displayed and shows the history of the selected
event.
The dialogue title contains basic information on the event: the event’s number,
the creation date and the event type. For each action item the history displays
a separate entry, consisting of sender, date, assignee and event state. In case of
a large event, the information is spread over multiple pages (see also page 48).
3. In order to show or hide comments stored within the event, click the Show
Comments button.
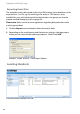
4. To print the event history, click the Print command button in the upper part of
the dialogue.
5. To close the dialogue, click OK or click on the icon.