
User guide

Operation and Daily Usage
33
4. From the Forward to drop-down list, select the user (operator) to whom you
want to forward the event.
5. Enter a comment in the input field to inform the recipient about the reason of
forwarding.
6. Click OK to close the dialogue. If you want to cancel the action, click on the
icon.
The operator to whom the event was forwarded is indicated in the events table in
the Recipient column.
Note: It is possible to reverse the forwarding by pressing the Accept command
button.
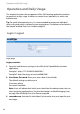
Closing an event
When an event was completely handled, it can be closed by the responsible
operator (Assignee).
1. Select the appropriate event entry. You can also select multiple entries: press
and hold the [CTRL] key and then click the appropriate entries.
2. Press the Close command button.
3. The Comment – Close dialogue opens. You can enter a comment in this
dialogue (optional).
4. Click OK to close the dialogue. If you want to cancel the action, click on the
icon.
The event is moved in the Closed Distress Events / All Closed Distress Events
lists (see page 30).
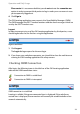
Adding a comment
You can add a comment on a selected event.
1. Select the appropriate event entry.
2. The Comment – Accept/Forward/Close dialogue opens. Enter the comment.
3. Click OK to close the dialogue. If you want to cancel the action, click on the
icon.
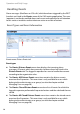
Viewing the event history
For each event, a history is saved, see the chapter entitled page 35.
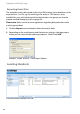
Exporting event data
The events data can be exported, e.g. for archiving, see the chapter entitled
page 36.