
User guide

Configuration
27
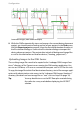
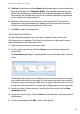
Generated Images (from above example)
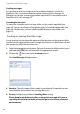
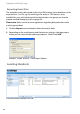
9. While the OMP automatically stores and reopens the current device placement
project, you should create a backup archive of your project. In the Tasks pane,
click the Export project command. Select the desired destination directory in
the file selection dialogue. Confirm the file selection dialogue to export the
device placement project. The project data include all background image files
as well as the information on location devices (“locating_project.xml”).
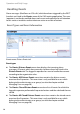
Uploading Images to the OML Server
The resulting image files needs to be copied to the “webapps/OML/images/loca-
tions/” directory of the Tomcat server running the OM Locating application. You
can use an USB drive, a CD rom or a networked transport such as SCP for this task.
To copy the image file to their final destination directory, start a file manager appli-
cation with administrative write access to the “webapps/OML/images/locations/”
directory (for details on how to copy files as “root” user see Step 5 on page 10).
Tip: You may be able to re-use the RFP floor plan created during
the radio site survey made before deploying the SIP-DECT
solution.