
Instruction manual

NOTICE: There is no warranty on kits. It is your responsibility to install the board and lights. Kits cannot be returned. This kit can
consume a lot of current. Be careful if you plan to use a battery source that is capable of delivering a lot of current. Contact a
professional if you need assistance. Hyperdyne Labs assumes no responsibility for the misuse of this kit. Night flying can be
dangerous. User accepts all liability of using this kit in their plane and the responsibility of flying at night.
6
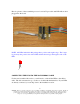
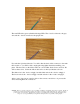
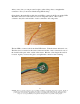
Now you can take the gray extension cable and plug it into the mating header. It is keyed
so it will only go in one way.
You will see that the gray cable has one wire with a black line going down it. This black
mark should line up with the white wire on the main ribbon cable.
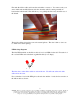
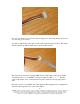
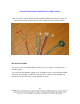
The next step involves the red wingtip LED clusters. Each wing is made up of 3 LEDs
connected in series. So each LED is connected together in a link + - + - + - Then the
outer + lead and the outer – lead left unconnected are soldered to the long wing ribbon
cable.
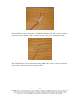
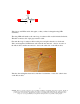
First take 3 of the oval red LEDs and solder them into this triangular series configuration
(remember the long lead is the + lead on the LEDs):