
Instruction manual

NOTICE: There is no warranty on kits. It is your responsibility to install the board and lights. Kits cannot be returned. This kit can
consume a lot of current. Be careful if you plan to use a battery source that is capable of delivering a lot of current. Contact a
professional if you need assistance. Hyperdyne Labs assumes no responsibility for the misuse of this kit. Night flying can be
dangerous. User accepts all liability of using this kit in their plane and the responsibility of flying at night.
5
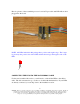
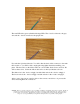
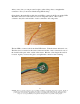
The next LED is the green cylindrical fuselage LED. The + lead is soldered to the gray
wire and the – lead is connected to the purple wire.
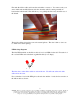
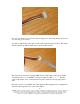
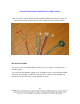
Now take the 4-pin keyed header. You will solder the leads of this connector to the main
ribbon cable, so you will be able to unplug the wing lights when disassembling your
plane. The next wires on the ribbon cable are colored white, black, brown, and red. We
will use these wires. Solder the ribbon cable wires to the keyed header as shown.
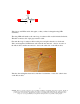
The white wire is the - lead to wingtip 1 and the black wire is the + lead to wingtip 1.
The brown wire is the – lead to wingtip 2 and the red wire is the + lead to wingtip 2.
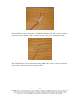
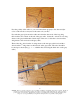
After you are done can use some hot glue on the connector and wires so it protects the
wires and strengthens the connection.