
Instruction manual

NOTICE: There is no warranty on kits. It is your responsibility to install the board and lights. Kits cannot be returned. This kit can
consume a lot of current. Be careful if you plan to use a battery source that is capable of delivering a lot of current. Contact a
professional if you need assistance. Hyperdyne Labs assumes no responsibility for the misuse of this kit. Night flying can be
dangerous. User accepts all liability of using this kit in their plane and the responsibility of flying at night.
2
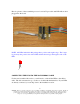
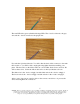
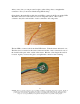
Here is a picture of the assembled processor board w/ X-port cable and LED ribbon cable
plugged into the board:
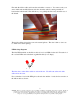
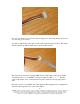
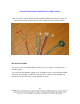
NOTE: All LEDs included in this package have positive and negative legs. The longer
leg is always the positive side of the LED, and the shorter leg is the negative side of the
LED.
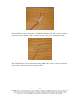
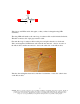
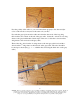
CONNECTING THE LEDS TO THE MAIN RIBBON CABLE
For the semi-assembled kit version, you will need to solder all the LEDs to the ribbon
cable. The below instructions go over how to do this with minimal effort. If your LEDs
are already connected, you can skip down to the installation section.
+
_