
Instruction manual

NOTICE: There is no warranty on kits. It is your responsibility to install the board and lights. Kits cannot be returned. This kit can
consume a lot of current. Be careful if you plan to use a battery source that is capable of delivering a lot of current. Contact a
professional if you need assistance. Hyperdyne Labs assumes no responsibility for the misuse of this kit. Night flying can be
dangerous. User accepts all liability of using this kit in their plane and the responsibility of flying at night.
16
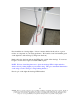
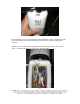
Next unplug the X-port extension cable already plugged into the stock SC receiver. Now
take the X-port cable on the processor board and plug it into your receiver, like shown:
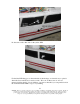
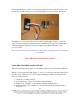
The light processor board also has an X-port male “passthrough” connector. Take the
Super Cub X-port extension cable that runs down the battery box (this is the cable that is
normally plugged into the stock receiver) and plug it into the male header on the
processor board.
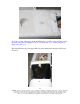
Now you can still use other X-port devices (drop module, combat module, etc) along with
your light kit!
YOU ARE DONE WITH INSTALLATION!
USING THE FEATURES YOUR LIGHT KIT
This section describes the features of your light kit and how to use them after installation.
The kit is powered from the main battery, so once you connect the battery the light board
becomes active. The processor board controls all lighting, and there are 4 light modes
that you can choose from:
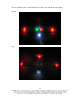
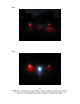
1) Off mode - no lights (default)
2) Taxi light mode - wings, tail, and blue underside blink
3) Flight mode - all lights on, tail and blue underside blink in unison
4) Extended flight mode - all lights on, tail and underside blink, wingtips blink at
faster rate.