
Instruction manual

NOTICE: There is no warranty on kits. It is your responsibility to install the board and lights. Kits cannot be returned. This kit can
consume a lot of current. Be careful if you plan to use a battery source that is capable of delivering a lot of current. Contact a
professional if you need assistance. Hyperdyne Labs assumes no responsibility for the misuse of this kit. Night flying can be
dangerous. User accepts all liability of using this kit in their plane and the responsibility of flying at night.
11
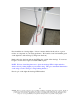
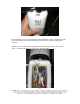
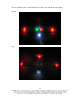
Next install the two fuselage lights. It doesn’t matter which side the yellow or green
resides on, it depends on your flying preference. We found it works well with the green
on the right side of the fuselage (looking from the front).
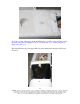
Punch a hole into the foam and run the LED to the outside of the fuselage. You can use
hot glue or foam safe CA glue to hold the LED in place.
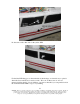
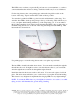
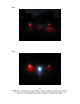
NOTE: We have found the prime area to place the fuselage LEDs is right under the
window decals pointing slightly up towards the wing. This gives maximum illumination
on the wing as well as acting as a wing banking indicator.
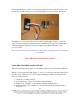
Next is a pic of the right side fuselage LED installed.