
Operating Instructions and Installation Instructions


Remote Display / Remote Display / Ecran de Contrôle Solaire
9
1. Layout
2. Installing and
connecting
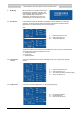
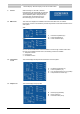
Home - This button directly opens the main menu from each screen.
UP - This button is for scrolling up through the menus.
DOWN - This button is for scrolling down through the menus.
1. Select a two-wire cable for the communication between the solar control and the
Remote Display. The cable diameter is free to choose. However, the maximum length
of the cable depends on the cable diameter, see the table.
Cable diameter
[mm
2
]
Max. cable length
[m]
0,25 100
Attention:
This (communication)cable is not supplied
by A.O. Smith.
0,5 200
0,75 300
1 400
1,5 600
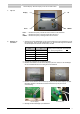
2. Remove the rear side of the Remote Display.
3. Mount the rear side of the Remote Display onto the wall. Before fastening, lead the
communication cable through the round hole on the rear side
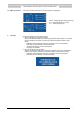
4. Mount the two cables in the connector onto the print of the Remote Display. Mount the
other ends in the blue connector on the rights side above the print of the solar control.
Remote Display
Solar heating system controller
5. Fasten the Remote Display onto the rear side.
Display
DOWN
UP
Home
Display