Radio Wireless 2-Wheel Mouse User’s Guide Model:RFW-23 Trademark Recognition Windows, Office 97 and MS-IntelliMouse are registered trademarks of Microsoft Corp.
THIS DEVICE COMPLIES WITH PART 15 OF THE FCC RULES. OPERATION IS SUBJECT TO THE FOLLOWING TWO CONDITIONS: (1) THIS DEVICE MAY NOT CAUSE HARMFUL INTERFERENCE AND (2) THIS DEVICE MUST ACCEPT ANY INTERFERENCE RECEIVED, INCLUDING INTERFERENCE THAT MAY CAUSE UNDESIRED OPERATION. Federal Communications Commission Requirements The equipment has been tested and found to comply with the limits for Class B Digital Device, pursuant to part 15 of the FCC Rules.
Introduction Congratulations on your purchase! Your new RF-Mouse is easy to install and offers you a host of useful features. The Radio receiver can be conveniently placed to give you the freedom you need while working. The vertical wheel allows you to scroll, or zoom in and out in a document. You can program the mouse buttons to launch the NetJump or LuckyJump for a quick start to programs you run frequently.
Inserting the Batteries The RF-Mouse uses two AAA batteries. For best performance, use only alkaline batteries. Refer to the following to insert the batteries: 1. Press the up cover and move to backward of the mouse up cover as shown here and remove the cover. 2. Insert the two AAA batteries. (The correct polarity is indicated on the battery compartment casing.) 3. Replace the cover. Checking the Batteries power To check the battery power, right-click the mouse icon in the Taskbar.
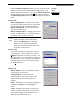
The RF-Mouse ID code Each RF-Mouse is assigned a unique ID code at manufacture, so the receiver only picks up the signal from your mouse and prevents other RF-Mouse radio signals from operating on your computer. This feature can also be disabled, allowing other RF-pointing devices to operate your computer. Connecting the RF-Mouse ID Code When the driver installation is finished your computer reboots and the RF-Mouse window (shown on the right) appears.
IWHEELWORKS DOES THE HEAVY WORK! With iWheelWorks driver/software installed, your Mouse is transformed into much more than just a pointing device. See how easy scrolling through long documents or panning in drawing applications becomes when using the scroll wheels. Office users should love this feature— use the vertical wheel to scroll through your document then just press the [Ctrl] key and use the same wheel to zoom in for a close look.
LuckyJum p With one click you can choose from a range of commonly used commands to launch. In the Mouse Properties window select the Buttons tab and then assign LuckyJump in the drop-down menu for the desired button. See Settings Tab and Executing LuckyJump Commands on page 8 and Take Your mouse on a Test Run on page 15 for more information. NetJump Lets you choose from commands commonly used for Web browsing.
MOUSE PROPERTIES SETTINGS From the Mouse Properties window you can customize many settings for your mouse including button assignments, scroll wheels and cursor movement. To open the Mouse Properties window double-click on the mouse icon in the system tray. The Mouse Properties window has six tabs that are described below. Buttons Tab Button Assignments: Click the down arrow to select the preferred function for each button. (See the Settings Tab for more information.
Wheel Tab Wheel Mode: Select the Enhanced Dual Wheel 4D Wheel function mode radio button to enable both vertical and horizontal wheels. When the MS-IntelliMouse Compatible mode radio button is selected only the vertical wheel will function. Swap Vertical and Horizontal Wheel: Check this box to swap the functions of the Horizontal and Vertical Wheels. Vertical Wheel/Horizontal Wheel: Check the Reverse scrolling direction box to change the scrolling direction when you turn the scroll wheel.
Executing NetJump Commands NetJump combines commonly used tasks for Web browsing into one convenient grid and puts them right under the cursor. To use NetJump, open the Mouse Properties window and select the Buttons tab. Assign NetJump in the drop-down menu of the button you want. Click OK to close the Mouse Properties window. Now click the assigned button to open the NetJump grid and execute your command. (See the Settings Tab section above for instructions on customizing NetJump.
THE USER-DEFINED COMMAND MENU Along with the LuckyJump and NetJump menus you can also create Command Menus to suit your specific work habits. You may want to create a specific command menu for a particular application and then assign it each time you work in that application. Creating a Command Menu Follow these instructions to create a new Command Menu: 1. Double-click the mouse icon in the system tray. In the Mouse Properties window select the Settings tab. 2.
4. Enter a name (e.g., Test Command Menu) for the new Command Menu. Click Select Icon to choose a new icon or click OK to accept the default icon. The Userdefined Options window appears with the new Test Command Menu shown. 5. The Command Type: pane lets you change the kind of command to add. With the default Application/Document selected, click
Comman d Type Applicati on/ Documen t Description Command Type Menu This field lets you add your favorite programs to run or open a document or file that you specify. Enter the path or browse to the application/document that you want to open. This field opens the folder you specify in Windows Explorer. Enter the path or browse to the folder you want to open. The Home Page command takes you to Home the URL address you specify. Enter the Page URL address of the Web site you want to visit.
1. Double-click the mouse icon in the system tray. In the Mouse Properties window select the Settings tab. 2. Click New/Update…to open the Userdefined Options window. 3. Select Keyboard Sequence in the Command Type pane and click
1. Double-click the mouse icon in the system tray. In the Mouse Properties window select the Settings tab. 2. Click New/Update…to open the User-defined Options window. 3. Select Keyboard Sequence in the Command Type pane and click
TAKE YOUR MOUSE ON A TEST RUN For this “Test Run” the LuckyJump grid will be customized to demonstrate how much easier working with the mouse can be. Refer to the following to customize either the LuckyJump or NetJump grid: 1. Double-click the mouse icon in the system tray. In the Mouse Properties window select the Settings tab. 2. You will see the default settings for LuckyJump. Scroll to Help in the Command List and select it. 3.
Volume Control Choose Volume Control from the LuckyJump grid. The volume control screen appears. Click on the slide bars or use the scroll wheels to set the balance and level for each control. This is a convenient way to adjust the volume no matter what application you are working in. E-mail Choose E-mail from the LuckyJump grid. Microsoft Outlook Express opens ready for you to send or receive e-mail.