
Data Sheet

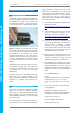

4D SYSTEMS 4DPi-35 Primary Display – Raspberry Pi Compatible
© 2015 4D SYSTEMS Page 8 of 14 www.4dsystems.com.au
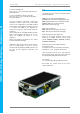
4DPi
-35
Primary Display
– Raspberry Pi
7) Run the following command
sudo nano /etc/X11/xorg.conf.d/99-
calibration.conf
Copy the information shown in step 4 into this
file, save it and exit nano.
8) Restart your Raspberry Pi. You should now
have a perfectly calibrated 4DPi-35.
Change the Display Orientation
To change the display orientation, simply edit the
/boot/cmdline.txt file
Find the parameter:
4dpi.rotate = 0
And change this to have the value of 0, 90, 180 or
270.
Save the file and restart your Raspberry Pi.
The touch screen with automatically remap the
alignment thanks to the custom kernel.
Change the SPI Freq and Compression
The 4DPi-35 can be adjusted to work with a range
of SPI Frequencies and levels of compression,
depending on the requirements of the end
product/project.
Increasing the frequency can result in a higher
Frame Rate (FPS), however will use more power
and processor time.
Increasing the level of the compression can also
result in a higher FPS, but may cause the display to
corrupt.
By default, a SPI Frequency of 48Mhz is used, with
a Compression level of 7.
The following parameters are the defaults in the
/boot/cmdline.txt file, and can be edited to adjust
the Frequency and Compression level.
4dpi.sclk=48000000
4dpi.compress=7
Setting compress to be 1 will enable the kernel to
control the level of compression based on the
frequency selected. This however is not
guaranteed to have a good end result, and may
require manually setting the compression level if
corruption on the display is experienced.
If corruption or display anomalies occur at any
given compression level, try to lower it by 1 value
and check if this has improved.
Note, changing the frequency and compression
require a restart of the Raspberry Pi.
Please refer to Section 4.7 for more information
Backlight Control
The backlight is controllable in two possible ways.
One is using simple on/off control, which is
controllable by sending a SPI command to the on-
board processor, which then turns the backlight on
and off. The other is using a PWM output from the
Raspberry PI and controlling the backlight
brightness.
The control of the backlight is selected using the
Jumper J1, but selecting either ON/OFF or PWM
control.
By default, the Kernel has enabled PWM control,
which is controlled off the GPIO18 pin from the
Raspberry Pi. This can be enabled or disabled by
adding a line in the /boot/cmdline.txt file:
Adding this will disable the PWM and free GPIO18:
4dpi.pwm=0
Adding this will enable the PWM:
4dpi.pwm=1
To control the backlight using ON/OFF control,
ensure the cmdline.txt file has been edited
appropriately (and restart the Pi), place the jumper
in the ON/OFF position and executing the
following commands will control the backlight:
To turn the backlight off:
sudo echo 0 > /sys/class/backlight/4dpi-35-
pwm/brightness
To turn the backlight on:
sudo echo 1 > /sys/class/backlight/4dpi-35-
pwm/brightness
To control the backlight using PWM control,
ensure the cmdline.txt file has been edited
appropriately (and restart the Pi), and place the
jumper in the PWM position.
Executing the following commands will set the
backlight brightness: