
Data Sheet

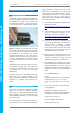
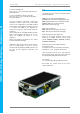

4D SYSTEMS 4DPi-35 Primary Display – Raspberry Pi Compatible
© 2015 4D SYSTEMS Page 7 of 14 www.4dsystems.com.au
4DPi
-35
Primary Display
– Raspberry Pi
change to:
kernel=kernel_hat.img
Save the changes made to /boot/config.txt.
6) Shutdown the Raspberry Pi safely, and
remove the power.
7) Connect the 4DPi-35 to the Raspberry Pi, and
reapply power. The terminal should begin to
show on the 4DPi-35, and will be ready to use
once the Raspberry Pi has booted.
Calibrating the Touch Screen
Each 4DPi-35 which is shipped from the 4D
Systems factory is slightly different, in the sense
that each of the touch screens has a slightly
different calibration. In order to get the best from
your 4DPi-35, you will need to calibrate the display
so it is as accurate as possible.
To do this process, you will need an internet
connection to your raspberry Pi, so packages can
be installed as required.
There are 2 sorts of calibrations which can be
performed, depending on the requirements of the
User. The first process is for calibrating the touch
sensor for everything other than the LXDE GUI
itself. This is required for most applications. The
second is for calibrating the touch controller for
the LXDE GUI, ie when you run startx.
To calibrate the 4DPi-35, there are a few steps
required.
1) Install the "event test" and "touchscreen
library" packages to calibrate and debug the
touchscreen, using the following command:
sudo apt-get install evtest
tslib libts-bin
2) Calibrate the screen manually using the tslib
package, using the following command. You
should only need to do this once.
sudo TSLIB_FBDEVICE=/dev/fb1
TSLIB_TSDEVICE=/dev/input/event0
ts_calibrate
3) Follow the directions displayed on the screen.
It is recommended to use a stylus to achieve
the most accurate calibration. Do not use
anything metal or sharp which could damage
the touch screen.
You should see 5 touch targets, touch them on
by one. If you see less than 5 targets, then for
some reason you have triggered multiple
signals for a single touch, and you should
repeat the process from step 6 again.
4) To test if your calibration was satisfactory, you
can run the following command to draw on
the screen to show the accuracy of the touch.
sudo TSLIB_FBDEVICE=/dev/fb1
TSLIB_TSDEVICE=/dev/input/event0
ts_test
To calibrate the touch screen for the LDXE GUI, the
xinput_calibrator is required and the following
steps should be carried out. Make sure LDXE is not
running before you start, quite LDXE if it is and
return to the terminal prompt.
1) Delete the old calibration file, in preparation
for the new one. Do this BEFORE running
startx and the calibrator.
sudo rm /etc/X11/xorg.conf.d/99-
calibration.conf
2) This step is to be performed via a SSH session
to your Raspberry PI. If you wish to do this
directly with a keyboard on the Raspberry Pi
instead, skip to the next step. Enter the
following two commands:
FRAMEBUFFER=/dev/fb1 startx &
DISPLAY=:0.0 xinput_calibrator
3) This step is instead of step 2, if you are using a
keyboard connected to your Pi. Start the LXDE
GUI using the following command:
FRAMEBUFFER=/dev/fb1 startx
4) Execute the xinput_calibrator command
from the terminal after the LXDE GUI has
started.
5) Follow the directions on the screen. Once
complete you should get an output which
contains information such as this:
Section "InputClass"
Identifier "calibration"
MatchProduct "ads7846"
Option "Calibration" "119
3736 3850 174"
# Option "SwapAxes" "1"
EndSection
6) If the /etc/X11/xorg.conf.d directory does not
exist, it needs to be created manually.
mkdir /etc/X11/xorg.conf.d