
Data Sheet
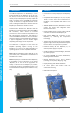

4D SYSTEMS 4DPi-32-II Primary Display – Raspberry Pi Compatible
© 2018 4D SYSTEMS Page 7 of 18 www.4dsystems.com.au
4DPi
-32
-II Primary Display
– Raspberry
Pi
9) On newer Raspbian images, by default the
system boots to Desktop GUI. Booting to
command line can be selected using the raspi-
config tool, submenu Boot Options.
$ sudo raspi-config
10) Shutdown the Raspberry Pi safely, and remove
the power after it has completed its shutdown.
For shutting down use the following command
$ sudo poweroff
or
$ sudo halt
Shutdown can take a while, since many files
have to be written from cache to SD card.
11) Connect the 4DPi-32-II to the Raspberry Pi, and
reapply power. The terminal should begin to
show on the 4DPi-32-II, and will be ready to use
once the Raspberry Pi has booted.
4.3. Calibrating the Touch Screen
Each 4DPi-32-II which is shipped from the 4D
Systems factory is slightly different, in the sense
that each of the touch screens has a slightly
different calibration. In order to get the best from
your 4DPi-32-II, you will need to calibrate the
display so it is as accurate as possible.
To calibrate the touch screen for the LDXE GUI, the
xinput_calibrator is required and the following
steps should be carried out. Make sure LDXE is not
running before you start, quite LDXE if it is and
return to the terminal prompt.
1) Install xinput_calibrator (if not installed by
default) by running this from terminal:
$ sudo apt-get install xinput-calibrator
2) Install the event device input driver:
$ sudo apt-get install xserver-xorg-
input-evdev
3) Rename 10-evdev.conf file to 45-evdev.conf.
$ sudo mv /usr/share/X11/xorg.conf.d/10-
evdev.conf
/usr/share/X11/xorg.conf.d/45-
evdev.conf
4) Check if evdev.conf has a higher number than
libinput.conf.
$ ls /usr/share/X11/xorg.conf.d/
The user should get something like this
10-quirks.conf 40-libinput.conf 45-
evdev.conf 99-fbturbo.conf
5) Perform a reboot
$ sudo reboot now
6) Reconnect to SSH and run xinput calibrator.
$ DISPLAY=:0.0 xinput_calibrator
Perform the calibration and copy results. The
result should be something similar to this:
Section "InputClass"
Identifier "calibration"
MatchProduct "AR1020 Touchscreen"
Option "Calibration" "98 4001 175
3840"
Option "SwapAxes" "0"
EndSection
7) You may test the changes after xinput
calibrator ends. To make the changes
permanent, paste the results to
/usr/share/X11/xorg.conf.d/99-
calibration.conf
$ sudo nano
/usr/share/X11/xorg.conf.d/99-
calibration.conf
8) Save the file and perform a reboot
$ sudo reboot now
You should now have a Perfectly calibrated 4DPi
Display.
4.4. Change the Display Orientation
To change the display orientation, simply edit the
/boot/cmdline.txt file
Find the parameter:
4dpi.rotate = 0
And change this to have the value of 0, 90, 180 or
270.
Save the file and restart your Raspberry Pi.
The touch screen with automatically remap the
alignment thanks to the custom kernel.