VIGIL Copyright ©2014 3xLOGIC, Inc. All rights reserved. 3xLOGIC Inc. 6510 West 91st Avenue Westminster, CO 80031 USA Disclaimer Information in this document is subject to change without notice and does not represent a commitment on the part of 3xLOGIC Inc. The software and/or databases described in this document are furnished under a license agreement or nondisclosure agreement. They may be used or copied only in accordance with the terms of the agreement.
Table of Contents 1 Introduction 2 Features 3 System Requirements 4 Main Screen 1 2 3 4 4.1 Top Bar Menu 4 4.2 Icon Toolbar 5 4.3 Sidebar 7 4.3.1 Sites Tab 7 4.3.2 Camera Treeview 7 4.3.3 Quick Export 8 Quick Export Window: 8 4.3.4 Audio Treeview 10 4.3.5 Relay Treeview 10 4.3.6 V-POS Treeview 10 4.3.
5.2.1 VIGIL Server Recorder Tab 23 5.2.2 Picture Quality Tab 25 Simple Settings Tab 25 Advanced Settings Tab 25 5.2.3 Camera Names Tab 25 5.2.4 Camera Settings Tab 26 Camera Setup/Recording Mode 26 Camera Settings Sub-Tab 27 Recording Mode Sub-Tab 27 CODEC Settings Tab 28 AZTECH CODEC Settings 28 MPEG4 CODEC Settings 29 Hardware CODEC Settings 29 Recording Rate / Resolution 30 5.2.
7.3 V-POS Settings 54 7.3.1 General Tab 54 7.3.2 Database Settings Tab 54 7.3.3 Email Settings Tab 55 7.3.4 Event Settings Tab 55 7.3.5 VIGIL Server Site Information Tab 57 7.4 V-POS Reports 7.4.1 VPOS Search/Report Criteria 58 58 Manual Query 59 Predefined Exception Query 60 Search for Transaction by Receipt 61 7.4.2 Report Results 61 7.5 V-POS Quick Search 62 8 Digital Virtual Switch 8.1 Virtual Switch Keypad Virtual Switch Keypad Hotkeys 8.2 Virtual Switch Screen 9 Searching 9.
10 Exporting 10.1 Still Image Exporting 81 10.2 Video Exporting 82 10.3 Audio Exporting 83 10.4 Export File Browser 84 11 Site Map 12 Server Alarms 85 86 12.1 Preview Alarms 87 12.2 Suppress Alarms 87 12.3 Search Alarms 88 13 Settings 89 13.1 Startup Tab 89 13.1.1 Managed by VCM 90 13.1.2 Enable Client Login 91 13.2 Live Tab 92 13.3 Playback Tab 94 13.4 Search Tab 96 13.5 Alarms Tab 97 13.6 Hardware Tab 98 13.
1 Introduction VIGIL Client gives you unrivalled access to live and recorded video from any of your networked VIGIL Server’s. Advanced playback and intelligent SmartSearch functionality lets you identify and review events of interest quickly and easily. The result is more accurate and efficient investigation of incidents with easy export of evidence material. Our mapping function provides unlimited map layers and camera links for unrivalled access to your cameras.
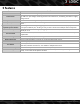
2 Features Feature Details Search Retrieve a list of stored footage for specified cameras from a start date/time to an end date/time. Quickly find the footage you need by marking an area within a camera's field-of-view and searchSmart Search ing. VIGIL will pull footage containing motion in the marked area, eliminating the need for lengthy footage review. Quick Search Retrieve a list of all footage for the past 1 – 8 hours.
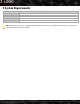
3 System Requirements Component Operating System CPU RAM Video Card Hard Drive Recommended System Requirements Windows 7 Professional or Ultimate (32 or 64 bit), Windows 8 Intel® Core™ i3 Processor Minimum 2 GB (4GB when running Virtual Switch) PCI Express 1GB (2GB when running Virtual Switch) SATA (Minimum 100MB required for install) Note: VIGIL Client will only run on Windows platforms that support DirectX 7.01 or higher. Run DxDiag.exe to view the version of DirectX that is currently installed.
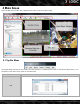
4 Main Screen This is the Main Screen window that is displayed when VIGIL Client has finished loading. 4.1 Top Bar Menu The Top Bar Menu located at the top of VIGIL Client user interface is a traditional feature seen in most software applications. For an explanation of the menu's items, please see the table below. Menu Item Auto Detect VIGIL Servers.... - Opens the Auto Detect VIGIL Servers Utility. File -4- ©2014 3xLOGIC Inc.
Auto Detect VIGIL Servers Start/Stop Looking Number of Servers Found/ New Servers Select All Add Close Start or Stop the Auto Detect Process. Number of Servers Found - Number of Server found via the Auto Detect Process New Servers - Number of Servers found by the Auto Detect process which are not currently in your VIGIL Client List. Select all Servers in the list. Add selected Servers to VIGIL Client Servers list. Close the Auto Detect VIGIL Server utility. Exit - Close/Exit the VIGIL Client application.
Shows or hides the camera sidebar. Opens the Search window. Clicking the button opens the context menu from which the Custom Search window or the Search Monitor Output History window can be opened. Opens the Exports, Site Map, Alarms, Virtual Switch or VCM Site ID Window, depending on the displayed icon. Clicking the button opens the context menu from which any one of these 5 options can be selected. All options are discussed in proceeding sections of this guide. VCM Site ID is described below.
4.3 Sidebar The Sidebar consists of two tabs: Sites and Views. The default view is the Sites tab. 4.3.1 Sites Tab The Sites tab(1, below) features a list of configured VIGIL Server Sites/Review Stations(2, below) Quick Search Click the bar to open the Sites Tab Quick Search feature(below). This feature is useful for long Sites lists that can be tedious to navigate. Sites Tab Quick Search Enter a letter or word found in the desired component's name to quickly locate the desired component.
Double Click Display All to open all Cameras on this site in Live View Windows. Display All Double Click Double Click on a Camera to open it in a Live View Window. Right Click Right Click on a Camera and choose Instant Replay to playback the last five minutes of footage. Five minutes is the default but can be changed in VIGIL Client Playback Settings. Click and Drag Click and drag a Camera onto a Live View Window to open it in the selected Live View Window. 4.3.
hour before the Quick Exports window was opened. hour before the To Set an end date for the footage export. Default parameters will set the To value to the time at which the Quick Exports window was opened. Export Destination Browse Select a destination for the export footage. By default, VIGIL will use the destination configured in the Destination Settings tab. Other Start Export Begin exporting the footage. Click Advanced to open the Advanced Quick Export window.
4.3.4 Audio Treeview The Audio Treeview shows all configured and currently enabled Audio channels on the connected Server. Double-click on an Audio Channel to begin recording. Double Click Audio Treeview Control volume with the Windows Volume controls. The currently selected Live Audio channel. This slider adjusts the audio sensitivity without affecting the sensitivity settings on the connected server. Click to stop recording.
4.3.7 User Audit Enabling and Configuring User Audit in VIGIL Server In VIGIL Server, proceed to Settings and click on the Server Settings tab. Enable User Audit at the bottom of the left-hand list and click the ... button to open the User Performance Criteria window. Performance Criteria can be configured on a per user or group basis. Utilizing the User Audit feature in VIGIL Client To access VIGIL Client's User Audit feature, select User Audit from the Client Treeview.
Red/Green Only- Select this feature to use only Red and Green as Usage Performance bar indication colours. Disabling this option adds Yellow as a third cautionary color. Show Monthly Performance Percentage in Performance Meter Replace the daily performance percentage in the User Performance Meter(located in the Icon Menu toolbar) with a monthly performance percentage.
Report Types The available report types are listed below. Time Logged In Details on login information for each session. Idle time is counted when there is no user input. Active time is counted while the user is actively manipulating the system. Footage Viewed Details on video playback including the camera number, footage start and end times, number of frames viewed and the total time watched. POS/ATM Query Details on the search criteria used for POS queries.
User Performance Report A User Performance Report can instantly grant management with a detailed report outlining the activity of a specific VIGIL user. View Performance For - Choose the user whose performance statistics will be reported. Users Timespan Performance Criteria Exclusion Dates - When clicked, this button will open an Exclusion Dates window where dates that need to be excluded from the performance reported can be chosen. Choose the time range of the user performance report.
4.3.8 Chat (located under Other) VIGIL Server and Client include a chat feature to speak or write back and forth between VIGIL Clients connected to VIGIL Servers. The Chat session is initiated by the VIGIL Client only and can be used to communicate via voice or text chat. Double click on in the Treeview to initiate a chat session with the selected Server.
4.3.9 Server Alarms (located under Other) Double Click on the be enabled for this option to work. Treeview item to open the Alarms window for the selected server. Server Alarm Polling must Search Alarms allows you to search through different triggered alarms based on simple criteria. Please see Section See "Search Alarms" on page 88 - See "Search Alarms" on page 88 for more information on Search Alarms options and functions. Acknowledges a selected alarm.
4.3.10 POS/ATM Live (located under Other) Double Click on the Treeview item to open the POS/ATM Data (Live) window for the selected Server. Site Name The Site Name is listed in the Title of the window in square brackets [ ]. Register Select a Register Number from the drop-down. Pop-Out Opens a separate POS/ATM Receipt using the currently selected Register. These receipts can be docked to the VIGIL Client Sidebar.
4.3.11 Audit Log (located under Other) The Audit Log provides a way to analyze, search and monitor various errors and general information concerning the VIGIL Client software that is automatically logged by VIGIL Client. Essentially, it allows you to search the VIGIL Client activity logs by using a variety of criteria such as date/time, error code, IP address, or module. This information can be sent to our engineers to help locate and fix bugs within VIGIL Client and ultimately improve its performance. 4.
Click this button after selecting an item of tagged footage to open that footage for playback. Click this button to delete the tag from the footage. Note: Deleting the tag does not delete the footage, it only removes the tag. 4.3.13 Server Exports(located under Other) The Server Export window gives you real-time progress updates on data currently being exported from the selected Server. Click the Server Export button in the Sites Treeview (under Other) to open the Server Export window. 4.
4.5 Information Bar The information bar found at the very bottom of the main Client window provides you with the last command sent to the Virtual Switch, CPU usage, date, time, and chat status. A green CPU bar indicates that the CPU usage is under 95 percent; red indicates that it is over 95 percent. Clicking on the CPU Usage portion of the info bar will bring up an information screen(pictured right) detailing information about the system, current streams and virtual switch. -20- ©2014 3xLOGIC Inc.
5 Servers Window A Server in this context is a Windows PC configured as a VIGIL Server. The purpose of setting up servers is to make connecting to local and remote servers more efficient than remembering IP addresses or DNS names. Server information is stored by a description that is created by the user. Note: If Managed by VCM is enabled in the Settings, the Servers list will be populated by the VCM Server that VIGIL Client connects to. The Servers window displays a list of saved servers.
5.1 Add / Edit a Server Click the Add or Edit (with a Server Selected) buttons from the Servers window to open the Server Settings window. These options are only available in Local mode. Enable this to use a VIGIL Connect alias or serial number instead of an IP address. VIGIL Use VIGIL ConConnect aliases are case sensitive so be sure nect it is an exact match of the alias configured on the desired server. IP/DNS Name The IP address or DNS name of the server.
5.2 VIGIL Server Settings To access a remote VIGIL Server's settings, VIGIL Client must be connected to the server with administrative privileges. Select a server from the list and click Connect. If the default user does not have administrative privileges, use Connect As to login as an administrator. 5.2.
Opens the Sequence window which turns on/off the camera sequencing on connected analog monitors. Note: The sequences must be configured on the Server. Uploads and applies an update file on the server. Select the .VGL update file and the update process will begin. Warning:This action will restart the server and take it temporarily offline. Opens the Hardware Information window which provides some basic information about the Capture Card installed in the VIGIL Server.
5.2.2 Picture Quality Tab The recording quality of each camera can be adjusted on this tab. Simple Settings Tab Adjust the camera recording quality to preset values: Low (20), Medium (40), High (60) and Super-High (80). Advanced Settings Tab Adjust the camera recording quality between 20 and 90. This is for fine-tuning the camera recording quality. 5.2.3 Camera Names Tab The Camera Names tab allows the ability to change the name of each camera.
5.2.4 Camera Settings Tab The Camera Settings tab provides advanced configuration of camera parameters, recording mode and rates, and recording CODECs. Camera Setup/Recording Mode Camera Default Camera Settings Default All Cameras -26- Select a camera to configure. Set the currently selected camera back to default settings. Set all cameras back to default settings. ©2014 3xLOGIC Inc.
Camera Settings Sub-Tab Brightness Adjusts the brightness of the video footage. Sharpness Adjusts the sharpness of the video footage Contrast Adjusts the contrast of the video footage. Hue Adjusts the hue of the video footage. Adjusts the U and V color difference signals used in YUV color format for the video footage.
Constant Always recording, 24 hours 7 days a week. Records only when motion is detected. Full configuration over motion area, amount of motion, size of motion and post motion recording time makes this a very versatile recording mode. Post Motion Record Motion Trigger Blocks The number of motion zones necessary to trigger the motion detector. The recommended value is 1. Motion Sensitivity Controls the sensitivity of the motion detection.
Note: Color detection is a CPU intensive setting. Uses bi-directional frames to decrease the file size of recorded footage. Use B Frame Note: This setting is extremely CPU and Memory intensive. MPEG4 CODEC Settings To switch the recording CODEC to MPEG4, select the MPEG4 option from the CODEC drop-down menu. Key-frame Rates Sets the number of key-frames recorded per second. The higher the value, the greater the data space needed for recording, but the higher the quality of the video.
Variable Bit Rate The default setting of Variable Bit Rate allows the encoder to change its recording bit rate automatically as required. This option offers the best combination of file size and visual quality. Constant Bit Rate A setting of Constant Bit Rate with a very high bit rate selected will provide the maximum video quality settings, although this is at the expense of storage space. Restrict Maximum Bit Sets a hard limit on the maximum quality that can be recorded.
5.2.5 Settings Tab The Settings tab provides control over some of the basic behaviour of the VIGIL Server. Site Name The name of the Site where VIGIL Server is located. The site name is included when saving still images. Auto Logon When this is checked, a message prompts for a username and password. The username and password entered will be used to log into VIGIL Server automatically when the program is launched. ©2014 3xLOGIC Inc.
Data Drive Settings The Data Drive Settings area displays the data drive information of the VIGIL Server. The path of the drive and the available/total space of the drive are displayed. The status of the data drive is indicated by its icon: Configured drive Currently recording on this drive Drive warning Drive error, contact your system administrator.
Sequence Sub Tab The Sequence tab configures the camera display sequences for the analog output monitors. Monitor Number Auto Start Sequence Select the analog output monitor number for the sequence. When enabled, the sequence for the selected analog output monitor is started automatically when VIGIL Server starts. Add Add a new camera to the sequence with a specified dwell time. Edit Modify the dwell time of the selected camera. Delete Up / Down Remove the selected camera from the sequence.
Users Click the Users tab to access the User configuration options. Add a User Edit a User Delete a User Click the Add User button to bring up the below window, select a Group and enter a Password in the Add New user window. Select a User from the Drop-Down Menu and click the Edit button. The user’s group or password can be changed, the user’s name cannot. Select a User from the Drop-Down Menu and click the delete button. Groups Click the Groups tab to access the Group configuration options.
5.3 Remote Register To Register a VIGIL Server remotely via VIGIL Client, select it from the Servers Window and click the Remote Register button(1, below). Clicking this opens the Registration window, where you can register software components for the remote server. To register modules, choose the desired module from the Unregistered Modules drop-down and enter the registration key provided to you by your sales representative. Click Register. The registration process is complete.
6 Live Viewer Live Viewer Windows each display a single camera feed from a connected VIGIL Server. When Separate Pages for Live and Playback is disabled in VIGIL Client Settings>Startup, playback pulled from a camera window on the Live Viewer will replace the selected window. When Separate Pages for Live and Playback is enabled, the Live Views are suspended and the user is taken to a separate playback page. Live Views are resumed after the playback window has been exited. -36- ©2014 3xLOGIC Inc.
6.1 Live Viewer Controls There is a tab at the bottom of the Cameras Sidebar that contains controls for the Live Viewer windows. Actively selected controls will be depressed(i.e the Camera Control button in the example to the right.) Increase all Live Viewer Windows to the maximum speed available for each Camera. Hides/displays the server timestamp in the top left corner of each Live Viewer Window. Opens the OSD Configuration window. See the OSD Configuration section for details.
6.2.1 Live Viewer Window Edge Controls Live viewer windows each have a set of controls available by hovering the mouse cursor over the appropriate window edge. Each edge’s controls are pictured and described in detail below. Note: The controls displayed and explained here are the controls for live feeds. For an explanation of the Edge Controls for a playback feed, see the Video Playback Section.
Click this button to open the Instant Playback feature. This option will replace the Live Viewer window of the camera you selected with a Playback window) or on a seperate playback page depending on your settings (the amount of playback time is dependent on your playback time settings for Instant Replay.) See "Search Tab" on page 96 A basic playback options bar and playback slider bar (pictured below)will appear on the selected camera window so that you can select the portion of footage that desire.
Bottom Hovering over the bottom of a Live Viewer Window reveals the framerate, link speed, stream type, and stream speed of the current Live View Window. The icon in the far right of the bottom Edge Control displays an icon for the mode of the current Live View Window: Live View Indicates the current footage is a Live feed. Playback - Paused Playback - Playing Indicates the current footage is Playback and is actively playing.
tings. This option is available for cameras using the 360 Dewarping control type. This must be configured on VIGIL Server to be available as an option in Client. This option is enabled by default. This feature allows users to zoom in and move Source Video Only cameras during playback. Click on an area of interest and then use the mouse scroll (Rotate Disabled) to zoom in. Click-and-drag to move the image after it is zoomed in.
6.3 Full Screen Mode In Full Screen Mode the UI is replaced with a toolbar at the bottom of the screen. The rest of the screen is available for displaying Live Viewer windows. See the Icon Toolbar section for an explanation of the buttons below the Live Viewer. -42- ©2014 3xLOGIC Inc.
6.4 On Screen Display (OSD) Configuration Open the On-Screen Display configuration window by the pressing the button(located at the bottom of the sidebar in the Live Viewer Controls.) Dwell Time Number of Lines Background Transparent/Color Font Color/Size/Bold Horizontal/Vertical Offset Column Selection OK ©2014 3xLOGIC Inc. | VIGIL Client - User Guide The number of seconds a data record will remain on-screen. The maximum number of records to display at a time.
6.5 PTZ Camera Controls Pan/Tilt/Zoom (PTZ) cameras allow navigation to an area of interest and are controlled by the user from the Live Viewer window. There are three major types of Pan/Tilt/Zoom (PTZ) cameras that exist: digital PTZ cameras, IP PTZ cameras and hard-wired PTZ cameras. Digital PTZ camera control allows users to zoom in on a fixed camera and move within the image without controlling the physical camera itself.
This window allows for customization of each of the joystick buttons. Use the drop-down menus to assign actions to each button. To determine which button is which, go into the Windows Control Panel and select Game Controllers, where the device will be listed. Select it and click Properties. Click any button on the joystick and the button number will be highlighted in the resulting window. Presets Presets are fixed locations that the camera can save and go to.
Enhancements Settings on the camera that can be toggled on/off. These include Color, Sensitivity, Backlight, White Balance and Auto Focus. Enhancements can be selected via the Drop Down Box and turned on or off via the buttons. Menu Some cameras have built-in menus that can be accessed and configured via this tool. Displays the camera’s menu; it may take a moment to appear. Exits the camera’s menu. You can also navigate to the Exitmenu option and click the Select button. Camera menu navigation buttons.
7 V-POS Treeview Configuration 7.1 V-POS Exceptions V-POS Exceptions are a powerful tool for automating the process of scanning through POS/ATM records looking for anomalies. Exceptions are automatically checked against the POS/ATM data and when triggered can set off a local or email based report. Add Opens an Exception Settings window to create a new exception. Edit Opens an Exception Settings window to edit the selected exception. Delete Run Delete the selected exception.
Enter a full or partial item name to search for. To exclude an item, insert the text [NOT] before the item name. If the Load Distinct Items on Startup setting is enabled, a list of valid items will be available from the drop down menu. Item Case Sensitive Enable this option to make the item field Case Sensitive. When enabled, only items matching the case used in the item field will be reported by the exception. Example: Item will only report back Item, not item or ITEM.
OR / AND which will only produce results that match all of the used Data criteria fields. Alternatively, the OR operator will match results from any of the used Data criteria fields. Enabled Camera Rule Name Enable this option to enable the use of Video Analytics Rules configured on the VIGIL Server. Combining Video Analytics with POS Data in Exception Reports allows for powerful Exception reporting such as Customer Not Present during a Refund transaction.
Enable Scheduled Report Emails Enable this option to enable Scheduled Report emails. By default this option is disabled. Plain Text / HTML Email Choose Plain Text or HTML format emails. Plain Text is the default. The HTML report contains the Exception details, a screenshot of the priority camera, and the entire receipt containing the transaction that triggered the exception report. A still image is not included in Plain Text emails.
7.2 V-POS Events All Exceptions that have the Enable Real Time Exception Events enabled (the default setting) will create an Exception Event for each POS/ATM record that matches the criteria specified in the Exception. For ease-of-use purposes, the POS/ATM Exception Events window can be dragged into the sidebar, and docked for quick access.
Acknowledge Acknowledge the currently selected Event or Events. If Allow User to Acknowledge all Events is not enabled in the Settings, only one Event can be selected at a time. Acknowledge All Acknowledge all Events. If Allow User to Acknowledge all Events is not enabled in the Settings, this button will not be available. Clear Clear the currently selected Acknowledged Event from the list. If Allow User to Clear Acknowledged Events is not enabled in the Settings, this option will not be available.
Below is a description of the different features accessible through the VPOS pop-up (2, above.) Camera V-POS Exception Events can require views from multiple cameras. Select a camera from the drop down list to open another playback window queued up to the same time frame as the Exception Event. Email Still A Still Image of the selected camera can be Emailed as a POS/ATM Report.
7.3 V-POS Settings The Settings window is where V-POS is configured. Some options are not available for configuration from VIGIL Client. 7.3.1 General Tab Enter the maximum number of records to load into a report. Limit HTML Reports to X Records Note: Although possible, exceeding 10,000 records will seriously affect system response times when trying to load a report. Check this option to enable Exception Enable Auto-Synchronization.
Limit by Number of records Local Database Size Limit by number of days Match server days of storage Limit the size of the V-POS replicated Database by number of records. Limit the size of the V-POS replicated Database by number of days. Limit the size of the V-POS replicated Database by matching the days of footage on the VIGIL Server. This is the recommended setting. 7.3.3 Email Settings Tab SMTP Server Location The IP address or DNS name of the Mail Server. Port The port number on the Mail Server.
Allow User to Acknowledge all Events Enable this option to allow access to the Acknowledge All button on the Events window, as well as be able to select multiple Events and Acknowledge them with the Acknowledge button. Popup Event Screen This option is not available in Client as the Exception Event screen is only updated when it is opened.
7.3.5 VIGIL Server Site Information Tab The VIGIL Server Site Information tab is where Contact Information for the VIGIL Server site can be specified. This information will be included with HTML based reports, enable the check box to also include this information with Text based reports. ©2014 3xLOGIC Inc.
7.4 V-POS Reports Manual Reporting can be configured using the same criteria as are available for Pre-Defined Exception Events. Manual Reports are presented in easy to read HTML reports that can be Printed, Emailed or Exported. 7.4.1 VPOS Search/Report Criteria Manual Reports can be created using 3 different methods; a Manual Query, Running a Pre-Defined Exception Event as a Manual Query or Searching for a Specific Transaction.
Manual Query Note: Any search criteria left blank will not be used for the Manual Query Report. Search for Line Items Filter Method OR / AND Item Case Sensitive Logical operators that will assist in searching with multiple criteria. By default, this is the OR operator, which will match results in any of the used POS/ATM data criteria fields. Alternatively, the AND operator will match results in all of the used POS/ATM data criteria fields. Enter a full or partial item name to search for.
Code Matches results in the Code column. You can manually type in a code to search for, or select NS (No Sale) or VX (Void) from the drop down menu. Cashier Matches results in the Cashier column. Enter a Cashier Name or Number to search for. Register Matches results in the Register column. Click on the Lookup Register button to display a list of Register to Priority Camera mappings configured on the VIGIL Server, double click a Register in the list to auto fill the Register field.
Search for Transaction by Receipt Receipt Type in text that will match results in Receipt # column. This Report will only contain the specified Receipt. # IDX Type in text that will match results in the IDX column. An IDX# is assigned to each line item in the POS/ATM Database. If the IDX refers to a line item with a receipt number, the Report will contain the receipt. 7.4.2 Report Results The report is presented in an HTML table with each column corresponding to the data fields from the POS/ATM data.
Note: This can take a while to display depending on Camera Resolutions and Internet / Network speeds. Email Page Click this button to Email the current report page to a list of recipients. An SMTP Server must be configured in settings. Advanced Export Click this button to export the entire report, organized by receipt, as either a .txt or .html file. Export Report Print Page Click this button to export the entire report as either a .txt or .html file. Click this button to print the current report page.
8 Digital Virtual Switch The Digital Virtual Switch feature allows users to configure additional PC monitors to display up to 16 simultaneous live camera feeds per PC monitor. Users are able to access and control all cameras from VIGIL Server sites, whether they are analog, network, or PTZ cameras, all without the need for a KBD300 keyboard. To set up a virtual switch, see the section on the Virtual Switch Tab under Settings. 8.
button. Relay CAM Warning: This Relay button is not associated with traditional VIGIL Server relay functions. Contact 3xLOGIC Support for more info. To add a camera to the virtual switch, select the virtual switch monitor number and then press the virtual switch input number followed by the CAM button. Virtual Switch Keypad Hotkeys The Virtual Switch can also be controlled via standard keyboard hotkeys. Each keypad function, along with the correpsonding hotkeys are listed in the table below.
Under each camera is a control bar containing the virtual switch monitor number, the virtual switch input number, the camera name and the VIGIL Server site. The control bar can be clicked on to set focus on that monitor (highlighted in red), or double clicked on to set that monitor to Full Screen Mode / Open in Live Viewer Window on Main Screen (configurable in Settings).
9 Searching VIGIL Client offers a robust set of tools for searching and playing video footage and data. To open the Search window, either click Search on the main VIGIL Client icon toolbar, or select Search | Search Footage and Data from the main menu. Each of the Search window sections can be minimized by clicking the double arrows in the title bar. When a section is already minimized, it can be restored using the double arrows.
9.1 Searching Video Search Reset Performs a search based on the current criteria. Resets all search criteria and POS/ATM data filters to their default values. The From/To time defaults to the past hour from when Reset is clicked. If POS/ATM Data is configured on the VIGIL Server, this button will open the POS/ATM Data Filter and POS/ATM Data Display Exception Results Data Search Results sections. Click the POS/ATM Data Filter section title bar POS/ATM Data search criteria.
9.1.2 Video Search Results After completing a search, the results are displayed in the Video Search Results pane as seen below. This pane is expandable and collapsible if the POS/ATM Data Search is enabled. Visual Display Tabular Display Click this button or use the drop-down menu to switch between Visual and Tabular display options. Visual display is a graphical representation of the search results.
9.2 Searching POS/ATM Data In addition to searching Video Footage, if the server has also been configured to record POS/ATM Data, you can search that data in VIGIL Client. Click the title bar POS/ATM Data button to open the POS/ATM Data Filter section, then click the POS/ATM Data Filter to open the POS/ATM Data search criteria section. Note: If the currently connected Server has a VPOS module registered, the above window will be replaced with the VPOS Search window.
Type in text that will match results in IDX column. If the IDX contains a receipt number, the POS/ATM data returned will be that receipt number and all IDX values corresponding to it within one hour. If there is no receipt number for the searched IDX value, the returned results will be based on the timestamp of that IDX. The search results will be +/- 10 seconds from the timestamp of the IDX. IDX After completing a POS/ATM data search, a POS/ATM Data Search window will be opened.
9.3 Custom Search A Custom Search that includes specified search criteria can be created and saved. The Custom Search window can be accessed from the Presets | Custom Search drop-down menu. It can also be opened from the toolbar menu (Search | Custom Search). When selected, the Custom Search window will appear. Description Add Opens the Add Custom Search window. Once a Custom Search has been added, click Apply to save the search. Edit Opens the Edit Custom Search window for the selected search.
9.4 Search Monitor Output History The Search Monitor Output Historyfeature can be accessed from the Search top bar menu. Mouse-over Search in the top bar menu and select the Search Monitor Out History item from the drop-down. The Search Monitor Output History feature can be utilized to search for all footage viewed on a specific virtual switch monitor within the defined timeframe.
9.5 Video Playback To play recorded video footage, double-click a camera from the Video Search Results pane. A Playback Window will open in the viewing area with the video footage queued up. Multiple Playback and Live Windows can be open at the same time if Allow Client to Stream Live and Playback Streams Simultaneously option is enabled (See the Search Tab section under Settings).
9.5.1 Playback Window Edge Controls Note: When Auto-Hide Controls from the right-click menu, indicator tabs ( ) will be used to indicate the location of the hidden controls. The controls will be visible upon mouse-over of the indicator tab. Top Use the resizing buttons to adjust playback window frame size (same as the Live Viewer Window Edge Controls). Yellow coloration indicates the selected window is currently synchronized with other playback streams.
Main stream enabled. Clicking this will switch the camera to sub-stream or RapidStream dependent on camera ability. Rapid stream enabled. Clicking this will switch the camera back to mainstream. Save Still Image/Export Motion Video This button opens a drop-down from which a user may save a still of the current footage frame or export the selected footage. See the Exporting section for more information.
Playback Synchronization Controls The Synchronize and Unsynchronize button respond differently to left or right click. While left-clicking will simply sync or unsync the selected playback stream with the current synchronization pool, right-clicking presents the user with an advanced set of Playback Synchronization Options. Unsynchronized Camera Options: Unsync All Playbacks - Unsync all streams currently in the synchronization pool.
Zoom – Use this button to enable the Zoom Tool. When the Zoom Tool is active, your cursor will change to the zoom icon and a black rectangle will display around the cursor. Left Click on the video feed to digitally zoom in on the area highlighted by the black rectangle. Right Click to Zoom out. Alternately, you may use the Zoom In or Zoom Out buttons in the Zoom Toolbox. To exit Zoom Mode, close the Zoom Toolbox. The Zoom Toolbox Adjust Image – Use this button to display the Adjust Image Toolbox.
Bottom / Playback Controls Hovering over the bottom section displays the bottom playback edge controls for the current video feed. At the top of this control, a red or green buffering status bar indicates the amount of footage that has been buffered. Red indicates a partially buffered video while green indicates the video has been buffered in its entirety.
Visual Timeline When video feeds are pulled for playback, footage timelines are compiled at the bottom of the screen in a unified visual timeline for both Unsynchronized and Synchronized video streams. The camera names are listed to the left of the timeline. Time-stamps for the footage are displayed above the timeline to the left and right edges. Note: All Synchronized playback stream's share a set of Playback Controls which are located in the Synchronized Visual Timeline bar.
When it is disabled, edge controls will always be visible. Synchronized Playback Opens a sub-menu featuring available synchronization controls. See "Playback Synchronization Controls" on page 76 For cameras using the 360 Dewarping PTZ Camera Control type, the video can be manipulated in the playback window using the following right-click menu options: Source Video Only (Rotate Disabled) This option is enabled by default. This feature allows users to zoom in and move cameras during playback.
10 Exporting Video footage can be saved either as a single frame still shot or as a video file. Audio and POS/ATM data can be saved either embedded within video footage or in a separate document. This process is referred to as “exporting”. Note: To export footage there must be at least one export destination configured. Note: If Export Auditing is enabled on the VIGIL Server, required information must be entered before selecting the destination folder for both images and video exports. 10.
10.2 Video Exporting Video footage can be exported in Microsoft AVI Video format or in Authentic Video format which uses 3xLOGIC’s Motion JPEG AZTECH format. Video clips exported in Authentic Video format can be played using the 3xLOGIC DV Player program. AVI format video clips can be played using any media player that supports standard AVI format(i.e. Windows Media Player).
10.3 Audio Exporting Click the export button and select Audio as WAV File. You may choose a Local Destination(A destination on your current system) or a Remote Destination( a destination on the connected VIGIL Server.) This will allow you to export audio in .wav format with no accompanying video footage, Use the From and To date and time boxes to select the range of the audio footage to export, and select the audio channel to export from the Channel drop-down menu.
10.4 Export File Browser The Export File Browser provides a thumbnail file browser for exported video footage and still shots. File navigation is similar to Windows Explorer. To open the Export File Browser window, select theExports option from the Icon Menu toolbar in the main VIGIL Client window. To search for a file or folder, go to Edit | Find, enter a file or folder name, and click OK. Go to Edit | Find Next to select the next file or folder with the given name.
11 Site Map The Site Map utility provides a graphical interface to a site’s cameras by displaying their location on a map. For more information on creating and using site maps, please refer to the Site Map Designer Section. Monitor Live Select an analog output monitor on the VIGIL Server that will display the camera. Displays cameras in the Live Viewer window. Toggles the playback controls: l Reset – Resets the search criteria to default (previous hour).
12 Server Alarms VIGIL Servers can be configured to send alarms to VIGIL Client. When VIGIL Client receives an alarm, the Server Alarms window is displayed. The Server Alarms window displays a list of alarms received by VIGIL Client from connected VIGIL Servers.It also allows quick playback of alarm footage by selecting an entry and clicking the Playback button. To open the Server Alarms window, select Alarms from Client's icon menu toolbar.
12.1 Preview Alarms Click on the thumbnail icon in the Preview column to show a thumbnail snapshot image of the alarm event. Click on the expanded thumbnail to minimize it. To view an alarm thumbnail, the server from which the alarm was received must be connected. Click on the disconnected icon to automatically connect to the server. The grayscale thumbnail icon represents a thumbnail that has not yet been viewed. Click on the icon to view the thumbnail.
12.3 Search Alarms Click to open the Search Alarms window where a variety of criteria can be used to search for an alarm event. Click Search to search for all alarm events on the system. The results can be narrowed down with the following options. From/To Site Alarm Type Select the Site to search alarms from. Check this box and select an alarm type to search for from the drop-down menu. Alarm Check this box and enter an alarm number to search for.
13 Settings 13.1 Startup Tab The Startup tab controls the behaviour of VIGIL Client when it first opens. Managed by VCM Enable Client Log On Auto Logon to All Servers on Startup When enabled, VIGIL Client will retrieve its Site list from a VIGIL VCM Server. For more information, see the Managed by VCM section below. When enabled, a username and password will be required to log on to VIGIL Client. For more information, see the Enable Client Log On section below.
Auto Hide Toolbar in Full Enable this option to make the toolbar controls hide until hovered over while VIGIL Client is in Full Screen Mode Screen Mode. For more information, See "Live Viewer" on page 36 for more info. Show Splash Screen on Startup When enabled, the VIGIL Client splash screen is automatically displayed when the program is launched. 13.1.1 Managed by VCM VIGIL Client can be configured to pull its list of Servers from a VCM Server.
13.1.2 Enable Client Login VIGIL Client by default uses no authentication which allows any system user to have full access to the Client Software. When the Enable Client Log On option is checked, VIGIL Client supports two levels of User Authentication; Administrative Users who have full access and Users who have no access to the Settings window or to VIGIL Server settings. Click the Manage Log Ons button to open the Manage Log Ons window. ©2014 3xLOGIC Inc.
13.2 Live Tab The Live tab controls how the Live Viewer windows function. Enables faster decoding of streams from MPEG4 cameras. Frame by Frame Note: This setting may have an adverse effect on non-MPEG4 cameras. Enables the transfer of motion block information for use with the SDK. Transfer Motion Block Adjust Speed Automatically Note: Enabling this feature is not recommended.
Reset all Streaming Settings to their default values. Show Site and Camera Name Maximize When enabled, the VIGIL Server site and camera name will display in full screen live mode. This option is for the Classic Mode Live Viewer. When enabled, the Classic Mode Live Viewer window will automatically open maximized.
13.3 Playback Tab The Playback tab grants the users several options related to the retrieval and viewing of playback footage. Allow Client to Stream Live and Playback Streams Simultaneously Enables VIGIL Client to stream live footage and playback recorded video footage simultaneously. To conserve server resources, leave this option disabled. Alternatively, the Suspend/Resume All Live Feeds button(Live Tab, bottom of Camera Treeview) can be used.
If this option is enabled, a icon will appear in the Playback window(up-left) as well as the left-side Playback edge controls. This icon indicates that disk caching is incomplete.It may be clicked in the left-hand edge control to cancel disk caching for the active playback footage. It is replaced with the icon when caching is complete. Cache Location To configure this setting, clicking the Settings button. The location where the cached files will be stored.
13.4 Search Tab The Search tab controls how searching of Video Footage and POS/ATM data functions. Enable Visual Search by Default Show Visual Search results by default instead of Tabular Search Results. For more information, See "Video Search Results " on page 68 Short Intervals When enabled, the Quick Retrieve drop-down menu in the Search window displays short intervals of 15 and 30 minutes in addition to the selection of an hour, 2 hours, 4 hours, and 8 hours.
13.5 Alarms Tab The Alarms tab controls the notification settings for alarms received from connected servers. Automatically Display Inbound Alarms From Server When enabled, the Alarms window will automatically pop up when inbound alarms from VIGIL Server are received. Instructs the system to beep or play a Wave file when an incoming alarm is displayed. System Beep A system beep is played. Uses an audio WAV file instead of a system beep. Audio Notification Wave File ...
13.6 Hardware Tab The Hardware tab contains settings specific to the video rendering hardware installed on the client system. Use VGA Hardware AccelEnable or disable VGA Hardware Acceleration. eration Monitor CPU Usage COM Ports Keyboard Settings Enable or disable the CPU Usage bar at the bottom of the main window. Opens the COM Port Settings window, where COM Port settings can be configured.
13.7 Destinations Tab Video Still/Motion Export Destinations are used to store exported video footage. You must set up destinations here before you can save video footage or still images. Select this option to use the export destinations of connected VIGIL Servers. Use VIGIL Server Export Destinations Use Global Export Destinations Note: Deleting these destinations does not delete their Windows folder or the folder's contents. Select this option to use a Global Export Destination.
ting is normally used for CD-R or DVD-R media type destinations. Include AutoRun Files Due to some Anti Virus applications detecting all Auto Run files as a potential threat, disable this option to not include the AutoRun files with the export. If the AutoRun files are included, the DV Player install will run when the DVD is inserted to a system that does not already have DV Player installed. Quick Export Configure default setting for the VIGIL Client Quick Export feature.
13.11 Virtual Switch Tab The Virtual Switch tab allows configuration of up to eight digital (PC) or analog monitor outputs. Disabled Digital Disable the Virtual Switch feature. The digital virtual switch feature allows users to configure additional PC monitors to display up to 16 simultaneous live camera feeds per PC monitor. Users are able to access and control all cameras from VIGIL Server sites, whether they are analog, network, or PTZ cameras, all without the need for a KBD300 keyboard.
Double Click Display On Lice Viewer... When enabled, Double Click on a Monitor on the Virtual Switch and it will open in a Live Viewer window on the Main Monitor. When disabled, Double Click on a Monitor on the Virtual Switch and it will change to Single Monitor Layout, double-click again to return to previous layout. Monitor Settings Enabled Enables the corresponding monitor output. Use Hardware Acceleration When enabled, the monitor will use hardware acceleration, if applicable. 13.11.
13.12 Help Menu This sections allows you to configure customizable help icons for display on your icon bar. Enable Custom Help Enable the ability to create custom help menu items. Enable Replace About Button Enable this option to allow one of the custom help menu items to replace the About button in the Icon Menu Toolbar. Custom Help Menu Item Show on Help Menu Enable Replace About Button Enable this option to have the custom Help Menu item appear in the Help drop-down menu.
14 Site Map Designer The Site Map Designer is a utility that allows the user to configure graphical displays of the site with associated cameras. To open the Site Map Designer from the Start Menu: Programs | VIGIL | Site Map Designer. Creating a New Site Map 1. Before beginning a new site map, create an image (JPG or BMP) file. This file will be used as a background picture for the site map. 2. Click the Image button on the toolbar or select File | Load Background Image from the menu.
14.1 Site Map Designer Icons and Buttons Hot Spot With this icon selected, drag a box on the site map to define a new hot spot. To delete a hot spot, select the hot spot you wish to remove and click the Delete key. Fixed Camera Dome (PTZ) Camera Multi-Camera Grid Select an existing hot spot on the site map and click the icon or drag a box with the icon selected to place a fixed camera on the site map.
14.2 Site Map / Hot Spot Properties Note: Press the Tab key or select a different input box after each setting has been made to make sure the changes occur. Sitemap Properties Description Top Level Map A brief description of the site map. Top Level Maps are listed as a home map in Gatekeeper. Hotspot Properties Default Live Only Hot Spot Types Link Relay Caption Tag Select Default for a PTZ or a fixed camera hotspot.
15 DV Player VIGIL Client allows video exports to include the VIGIL DV Player to ensure playback software is available for Authentic Video (MJPG) exports. A number of controls have been provided to make navigation and advanced features more accessible: Click and hold down the Fast Backward or Fast Forward button to playback as quickly as possible without skipping any frames. Skips to the very beginning/end of the video footage. If clicked while playing the footage, skips one 10th of the footage.
Note: The authentication feature on the DV Player will only detect errors for video frames that have been tampered with since the export. If the video was altered before the export, authentication errors will not be found. If Video Analytics information has been embedded in the Video File, what information is displayed can be selected. Save a still image in BMP or JPG format, export video in AVI, Authentic Video (MJPG) or VIGIL Server File Stream format, or Audio only.
16 Language Switcher VIGIL Client can be run in English, French, Spanish, Chinese and Hebrew. The Language Switcher can be run from the Windows Start menu. Select Programs | VIGIL | Language Switcher. Select the desired language from the drop-down menu and click Switch. A prompt will show informing that a system reboot is required to complete the language change. Click Yes to reboot immediately, Click No to have the update applied the next time the system is restarted.
17 Contact Information 3xLOGIC has offices in Victoria BC, Canada and in Westminster, Colorado, USA. Please visit our 3xLOGIC web site at www.3xlogic.com. Please contact us by e-mail at support@3xlogic.com (technical support), or using the following contact information: 3xLOGIC Technical Support: Toll Free:(877) 3XLOGIC (877) 395-6442 Email:support@3xlogic.com Website:www.3xlogic.