
Operation Manual

UP Plus
3D Printer User Manual
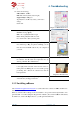
4. Load the spool
of filament
filament coming out from the back of the roll / printer.
5.
Feed the end of the filament
Feed the filament
through the feeder
about 10cm out the other end of the tube.
6.
Push the end of the filament into the print head feed
hole.
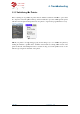
7. Place
the Perfboard
attach the binder clips
Perfboard in place.
(as per picture)
Perfboard
after printing
the printer.
When printing starts, melted plastic will be
pushed into the holes of the Perfboard.
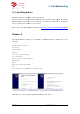
8.
Plug the USB cable into the
9.
Plug in the power adapter
printer.
10.
Switch on at the wall socket
of the printer.
11. Visit
www.3dprintingsystems.com/support
and install the 3D Print Soft
12.
Installing the drivers (Windows)
4.
Troubleshooting
3D Printer User Manual
v 2013.6.10
of filament
onto the roll holder, with the
filament coming out from the back of the roll / printer.
Feed the end of the filament
through the filament guide.
through the feeder
tube and feed
about 10cm out the other end of the tube.
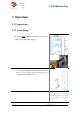
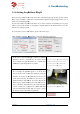
Top View
Push the end of the filament into the print head feed
the Perfboard
on top of the black platform and
attach the binder clips
on the front in order to hold the
(as per picture)
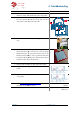
Always remove the
after printing
to remove printed models from
When printing starts, melted plastic will be
pushed into the holes of the Perfboard.
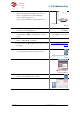
Plug the USB cable into the
back right of the printer.
Plug in the power adapter
and USB into the back of the
Switch on at the wall socket
and switch on at the back
www.3dprintingsystems.com/support
to download
and install the 3D Print Soft
ware.
Chapter
3.1.2 Installing the
Installing the drivers (Windows)
Chapter
3.1.3 Installing drivers
Troubleshooting
Top View
3.1.2 Installing the
software
3.1.3 Installing drivers
(Windows)