
User Guide
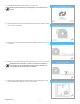
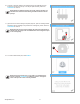
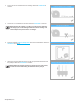
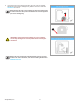
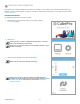
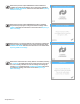
Table Of Contents
-  Introduction
-  Important Safety Information
-  CubePro 3d Printer Features and Benefits
-  At a Glance
-  Specifications and Requirements
-  Unpacking and Setting up Your CubePro
-  Printing Your Creation
-  Finishing Your Creation
-  CubePro Software
-  Operation Procedures
-  CubePro Maintenance
- Restoring Roughness to the Print Pad
- Cleaning the Jet Wiper
- General Cleaning
- Adjusting the Jet Wiper Assembly
- Calibrating the Print Pad
- Calibrating the Z-Gap And Print Pad Level
- Calibrating the Offset Jets
- Calibrating the Wipe Function
- Testing the Print Jets and Extruders
- Moving the Print Jets
- Updating the CubePro Firmware
- Replacing Fuses
- Lubricating The Bearing Rods
- Error Codes
- Contacting Support
-  Cubify Sustainability Program

193D Systems, Inc.
19. Apply two thin layers of Cube Glue to the print pad. Select the checkmark to
continue.
NOTE: For more information, refer to the section titled “Applying
Cube Glue.”
NOTE: Apply enough glue to cover a square area of 5”/15 cm in the
center of the print pad.
NOTE: For best results, ensure the glue is dry prior to printing.
NOTE: Print jet 1 will begin to heat.
NOTE: The printer will begin printing the welcome message test
print.
20. Select the checkmark to continue to go to the main menu.
NOTE: Please wait while the print jet cools.