
User guide

60 CHAPTER 3: DEVICE WINDOW
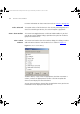
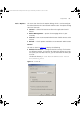
To add this device to the current inventory file, use the Add Device dialog
as follows:
1 Launch the Add Device dialog using the Edit > Add Device menu option.
2 Enter the name of the device into the Name field as
b1r2-192.168.1.1.
3 Enter the IP address of the device into IP Address field as
192.168.1.1
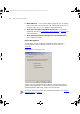
4 Enter the read community string into the Read text field as netman2003r.
5 Enter the write community string into the Write text field as
netman2003w.
6 Click OK.
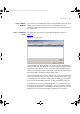
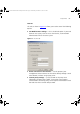
If all information has been entered correctly an information dialog
appears, stating that the new device has been added successfully.
7 Click OK to close the dialog.
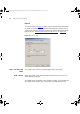
The new device is now listed in the inventory, and is added to all
appropriate device groups.
Key Considerations The following section provides useful information and advice on the
Device Window.
Deleting Devices A device deleted from one device group removes it from all device
groups. The only way to re-add the device is to either re-import it or use
the Add Device dialog.
Active Selection The active selection within 3Com Network Administrator is always
highlighted in blue (this color may differ according to the windows
scheme currently being used). A non-active selection is always shown in
gray. The active selection may be contained within the device groups tree
or the device list, but never both at the same time.
Scheduled Tasks When 3Com Network Administrator is closed all currently scheduled
tasks are cancelled. When the application runs again the tasks will have
to be re-scheduled.
3Com Network Administrator for HP OpenView.book Page 60 Wednesday, November 12, 2003 2:33 PM