
User guide

126 CHAPTER 6: BACKUP, RESTORE AND SETUP
To do this:
1 If possible, keep the replacement device isolated from your network in a
‘staging area’. Configure the replacement device with an IP address on
the same subnet as your management PC. For further information on
configuring a device with an IP address, refer to the user documentation
that is supplied with your device.
2 Connect the management station to the replacement device using either
a direct Ethernet connection or a connection through a simple hub or
switch.
3 Create a new inventory and select Add Device to add the replacement
device to the empty inventory file.
Add Device can be launched from Edit > Add Device.
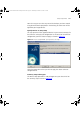
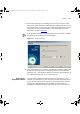
4 Launch the Device Restore Wizard using the toolbar button on the main
screen. Click Next from the Introduction step to display the No Backups
Found step as shown in Figure 51
.
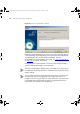
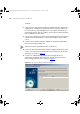
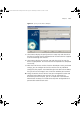
5 Click the Yes radio button to indicate that the target device is a
replacement for another device and click Next to display the Specify
Devices Being Replaced step as shown in Figure 61
:
Figure 61 Specify Device Being Replaced Example
3Com Network Administrator for HP OpenView.book Page 126 Wednesday, November 12, 2003 2:33 PM