
User Guide Hub/Switch SuperStack II Switch 1000

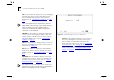

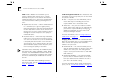

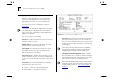
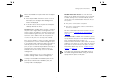
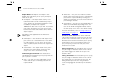
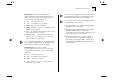
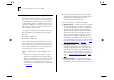
Table Of Contents
- About This Guide
- Getting Started
- Installation and Setup
- Setting Up for Management
- Managing The Switch 1000
- Setting Up Users
- Creating a New User
- Deleting a User
- Editing User Details
- Assigning Local Security
- Choosing a Switch Management Level
- Setting Up the Switch Unit
- Setting Up the Switch Ports
- Setting Up the Switch Database (SDB)
- Setting Up Resilient Links
- Setting Up Traps
- Setting Up the Console Port
- Resetting the Switch
- Initializing the Switch
- Upgrading Software
- Advanced Management
- Status Monitoring and Statistics
- Safety Information
- Screen Access Rights
- Trouble-shooting
- Pin-outs
- Switch 1000 Technical Specifications
- Technical Support
- Glossary
- Index
- 3Com Corporation Limited Warranty
- Electro-Magnetic Compatibility

Choosing a Switch Management Level 4-7
Choosing a Switch Management Level
The Switch Management screen allows you to:
■
Choose between managing a port, the unit, or a
VLAN
■
Display screens for setting up the Switch
■
Display a screen for managing the Switch Data-
base
■
Display screens for managing resilient links
■
Display screens for managing STP
■
Display screens showing statistics
From the Main Menu, select SWITCH MANAGE-
MENT. The Switch Management screen is displayed,
as shown in Figure 4-7
.
Management Level
Port / Unit / VLAN
If you
choose
Port
, the screen is displayed similar to
Figure 4-7
, and all options at the foot of the screen
relate to an individual port. If you choose
Unit
, the
screen appears similar to Figure 4-8
, and all options
relate to the Switch unit. If you choose
VLAN
, the
screen appears similar to Figure 4-9
, and all options
relate to VLANs.
Port ID
1 / 2 / 3 / ... 24 / 25 / 26
(3C16900A)
1 / 2 / 3 / ... 12 / 13 / 14
(3C16901A)
If you choose
to manage the Switch at port level, enter the partic-
ular port number into this field before selecting the
next screen. For 3C16900A, ports 1–24 are the
10BASE-T ports, port 25 is the Plug-in Module port
at the rear of the unit, and port 26 is the
100BASE-TX port.
Figure 4-7
Switch Management screen for Port level (3C16900A)
Figure 4-8
Switch Management screen for Unit level
For 3C16901A, ports 1–12 are the 10BASE-T ports,
port 13 is the Plug-in Module port at the rear of the
unit, and port 14 is the 100BASE-TX port.