
User Guide Hub/Switch SuperStack II Switch 1000
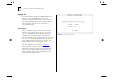
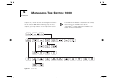

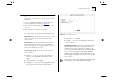
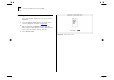
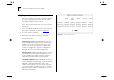
Table Of Contents
- About This Guide
- Getting Started
- Installation and Setup
- Setting Up for Management
- Managing The Switch 1000
- Setting Up Users
- Creating a New User
- Deleting a User
- Editing User Details
- Assigning Local Security
- Choosing a Switch Management Level
- Setting Up the Switch Unit
- Setting Up the Switch Ports
- Setting Up the Switch Database (SDB)
- Setting Up Resilient Links
- Setting Up Traps
- Setting Up the Console Port
- Resetting the Switch
- Initializing the Switch
- Upgrading Software
- Advanced Management
- Status Monitoring and Statistics
- Safety Information
- Screen Access Rights
- Trouble-shooting
- Pin-outs
- Switch 1000 Technical Specifications
- Technical Support
- Glossary
- Index
- 3Com Corporation Limited Warranty
- Electro-Magnetic Compatibility

4-2 C
HAPTER
4: M
ANAGING
T
HE
S
WITCH
1000
Setting Up Users
From the Main Menu, select USER ACCESS LEVELS.
The User Access Levels screen appears as shown in
Figure 4-2
.
From this screen you can access:
■
LOCAL SECURITY screen
— This allows you to
set up access levels for users on the Switch.
■
CREATE USER screen
— This allows you to
create up to 10 users in addition to the default
users set up on the Switch.
■
DELETE USERS screen
— This allows you to
delete users from the Switch. The default users
cannot be deleted.
■
EDIT USER screen
— This allows you to change
your own password and community string. You
cannot change details for other users.
Figure 4-2
User Access Levels screen